Why you should stick to the wall
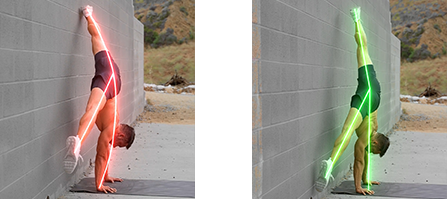
Being sent back to the wall is seen as a punishment by many but really it’s a challenge, a commitment to doing the hard and right thing. There are wall drills for literally all levels and the better you are at handstands the more you can take away from the wall.
There are 3 main reasons for why you should stick to the wall many months after you first tell yourself it is time to ditch the wall.
- Time under tension. Stop trying and falling and start training.
- Instant feedback. The wall is unforgiving like the meanest coach
- Take balance out of the equation and focus on alignment. At any level
So basically. If you are training handstands and care at all about improving your technique, form, alignment and ultimately control then read on. This is for you!
The problem lies in the mount
You know what’s easy? Holding a handstand.
You know what’s difficult? Getting into a handstand!
It’s not fair but it’s the way it is. When you first start out you might be able to hold a handstand but chances are high you do not have a lot of control. In order to tuck or swing up your mount needs to be refectory on point executed with the precision of an Olympic gymnast. Additionally, you are lacking specific strength at the beginning of your journey meaning you can not save your handstand very well either yet.
If you are not good at handstands without the wall you should not train them.
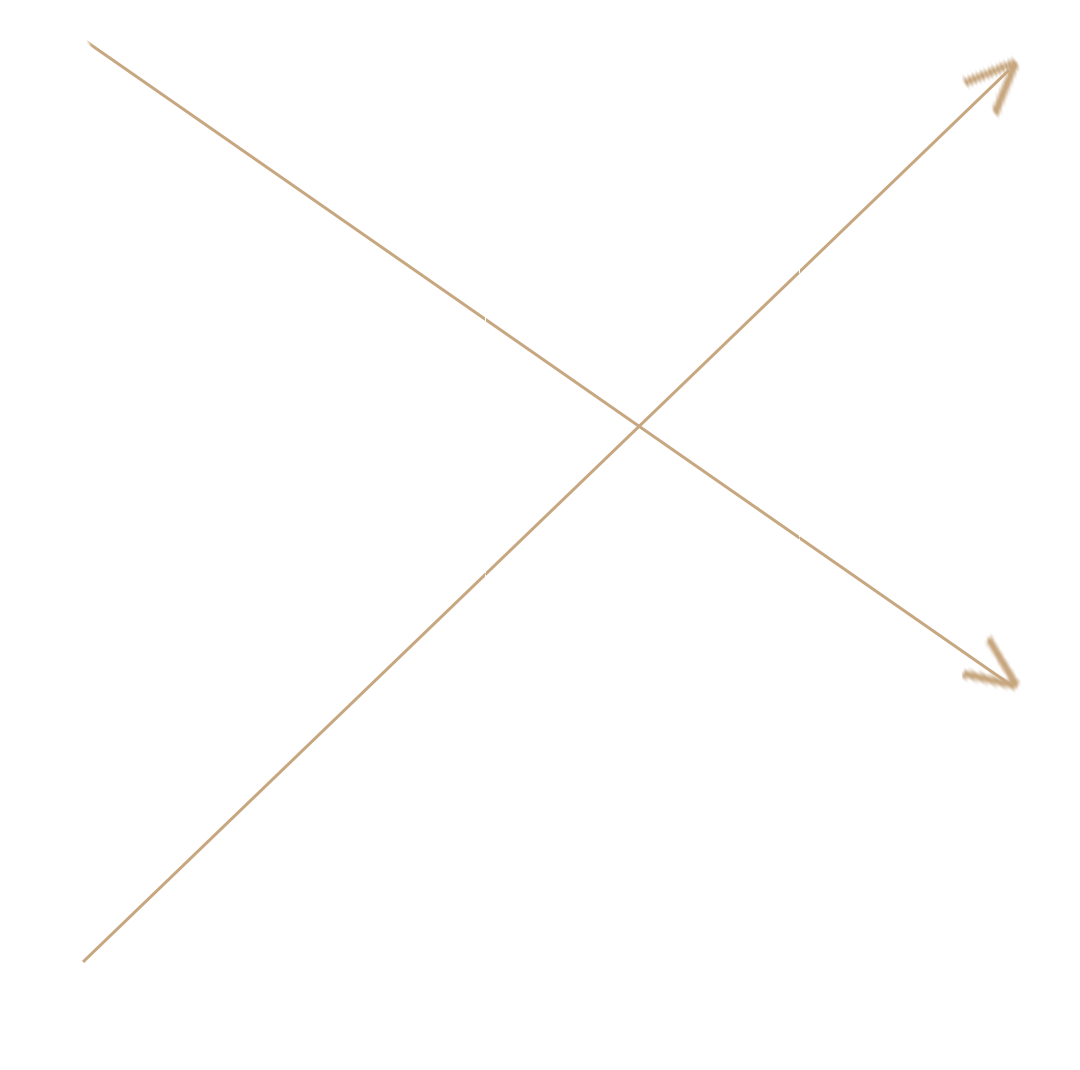
Instead, come back to the wall and train there. Let’s work on improving your handstand close to the wall where you can build strength, control and improve alignment. The better you get at those wall drills the more confidence you will build and the less precise your mount will need to be. Eventually these 2 graphs will meet. At this point you can start training without the wall yet we will push on slightly longer until your handstands are so comfortable that your mount literally doesn’t matter.
It is only at this point that training without the wall really makes sense as before you’re not really training your handstands or improving specific strength and awareness, you’re only practicing jumping and bailing.
At the wall you can be sure to get a consistent amount of time upside down no matter if you have a good or bad balance day. Like this you can slowly over time using the principle of systematic overload build your practice and training volume. You can monitor your progress and make sure you don’t overload your joint and muscles too much too quickly. All in all you get a successful training effect no matter what.
Yes, your way off the wall might take a bit longer but your handstand will be significantly more stable, controlled and better aligned than anybody else who ditched the wall a while ago.
Cold as ice
While the wall is your best friend when it comes to training efficiency she is also a cruel mistress when it comes to your emotions. The wall won’t lie to make you feel good. The wall won’t forgive you the tiniest mistake. You can make lots of things work without the wall by bending your elbows and just kind of winging the drills but not at the wall. The wall will always be there to tell you off and to show you exactly what you are doing wrong.
Exactly that is the beautiful thing about training at the wall especially for athletes who are already able to balance freestanding or might even be working towards a one arm handstand. Let’s take a deeper dive by looking at 3 different wall exercises in detail to see how the wall can force you to do things the right way.
L handstand Leg Isolation
An exercise that is great for intermediate beginners working away from the wall. This exercise is fairly easy to just do but extremely technical if you want to do it right.
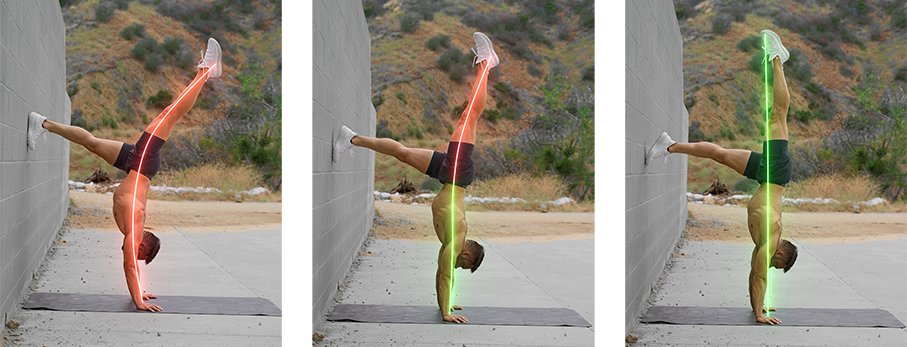
The easy way is to use the first leg, arch it over until the second leg comes off. This technique forces you to arch your back a lot to be able to get the weight off the wall leaving you to deal with a whole lot of mess.
The other way would be to bring the first leg perfectly on top in a straight line above the hands, shoulders and hips and bring the second leg up to join it. Harder to get off the wall at first as your alignment needs to be significantly better but ultimately the better choice.
You can only take this better option if your shoulders are right on top of the center of your hands and your scapula is fully elevated.
In this drill the wall teaches you where to put your shoulders and how to align yourself properly.
Tuck Take off to Straight to Straddle
This is also a great drill to practice basic alignment for anyone who is able to get into a deep and clean tuck without much effort. Alternatively one can also do a 45 Handstand Leg Isolation Take Off in case the tuck does not come easy.
The idea is that you are doing a freestanding handstand very close to the wall. In this handstand with legs together you can not pike your hips at all. Whilst you might be able to stand and feel comfortable with closed hips your alignment is not efficient and this shape won’t work for more advanced drills or one arm handstands. Here close to the wall your feet will touch the wall even before you would fall freestanding. You are again forced to align yourself properly with good technique. It gets even better when you open into the straddle. We often tend to pike quite a bit going into a pancake like position instead of an actual middle split. Again, this is something that can work when doing a regular handstand as you are able to make it work by arching your back a bit or bending the elbows. Close to the wall this won’t fly! Your feet will touch the wall and you will get instant feedback about your poor form. Learn to open your legs only as wide as your middle split allows it. A slight pike is fine but not a full pancake as it won’t work for later progressions.
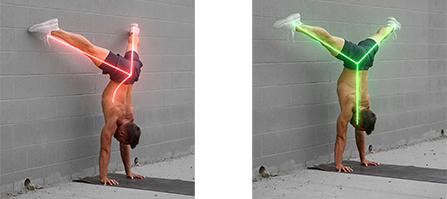
Deep Side Bends Close to the Wall
A great example for how training close to the wall can also be extremely useful for anybody who is way beyond learning how to align a regular freestanding handstand and is now working on One Arm Handstands. Side Bends are one of the biggest hurdle to overcome on one’s way to one arm domination. There are lots of moving parts and often people training for the one arm handstand are pretty strong and comfortable on their hands. While generally this is awesome it comes with a disadvantage as well. Prep exercises that need to be clean in order to do later progressions can be done wrong without actually realizing it. Remember when you first started learning to handstand and you would simply fall when you did not do your handstands right? You got instant feedback. We don’t have this anymore now because you are strong. You are able to make a lot work that really shouldn’t.
By practicing the side bends close to the wall you will tap the wall as soon as you make the slightest mistake knowing you have to start over and focus more.
Focus on 1 thing at the time
The wall is not only strict and brutal, showing you every single mistake at all times. The wall is also gentle, your friend and supporter really.
The wall gives you the ability to focus on 1 thing at the time. The difficult part about handstands is that you need to combine technique, strength and balance. It is difficult to improve exercise specific strength without being able to balance and it is difficult to improve alignment and technique without the strength to hold the position. Now the beauty about the wall is that we can take balance out of the equation and simply focus on form and strength. We can especially work on focusing on alignment and forcing correct form when we start to feel fatigue. This is easier said than done. When we get tired our form naturally worsens. If we sink into our shoulders the back starts to arch and our handstand gets extra heavy. You are already tired and on top of that your alignment is completely off now making your handstand x times heavier than it should be.
At the wall we can practice strength of character to push harder and force our body to stay in the correct and efficient position even when we get tired.
Training at the wall really is the real deal. At any level the wall is a great tool to not only train hard but also train smart. So next time when I am training with you and I am sending you back to the wall don’t give me that long face. Understand the challenge and commitment that comes with training at the wall and take from it everything that you can!
