Home | Knowledgebase | ADVANCED HANDSTAND SKILLS

How to One Arm Handstand - First Steps

If you have been thinking about the one arm handstand for a while and want to finally start training for it, yet you have no idea where to start and what the appropriate progressions and drills are then look no further. You have come exactly to the right place! 


One arm handstands are complex and intimidating at first. I can not argue that but if broken down into smaller bits and pieces you will quickly realize that there is nothing magical about them. By analyzing the movement and working on the right progressions with correct focus you will understand what to do and ultimately how to train for the OAHS!

How to handstand

How to One Arm Handstand - First Steps

If you have been thinking about the one arm handstand for a while and want to finally start training for it, yet you have no idea where to start and what the appropriate progressions and drills are then look no further. You have come exactly to the right place! 

One arm handstands are complex and intimidating at first. I can not argue that but if broken down into smaller bits and pieces you will quickly realize that there is nothing magical about them. By analyzing the movement and working on the right progressions with correct focus you will understand what to do and ultimately how to train for the OAHS!


Before you can run you have to walk

Make sure your basics are there and that you are actually ready to start working towards your one arms. While some one arm drills are extremely beneficial already when working towards your very first freestanding two arm handstand you can only truly benefit from the one arm training when you are actually ready. A question that I get quite often is for how long someone should be able to hold a handstand before training for one arm handstands. Unfortunately you can not measure it quite that simply. Instead of taking endurance as a criteria one should look at control, alignment and awareness. 

A good sign that you truly are ready to start focusing all the way on one arm handstands is that you can do single leg isolations without bending the elbows to catch your balance. This shows that you are able to coordinate your legs and body upside down while staying strong and stable in the shoulders which really one arm handstands are all about.


Learn to side bend

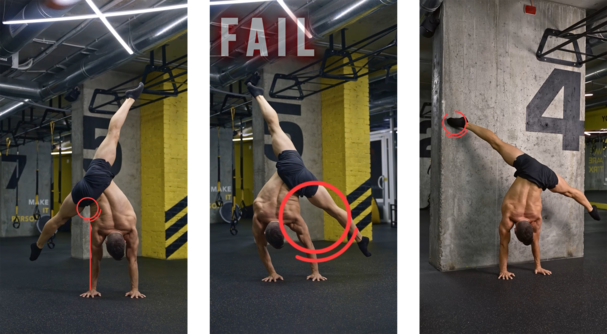
For most, including me this is the most difficult part of the one arm handstand. Developing adequate coordination, flexibility and control takes time. Allow your body to take the time it needs and stay patient. Key here is to isolate the side bend between your last rib and the hip bones! If you are bending towards the side and your face is not touching your supporting shoulder anymore you can be sure that you are not isolating the side bend. You are making your handstand unstable and your shoulders fragile for injuries. Bend a bit less to begin but focus on form first!

Additionally it is essential that you lock your legs inside of your hips. No matter how flexible you are you have to push your legs into your own, personal end range of motion. Externally rotate the legs and push them in the middle split. Keep them there. Do not allow them to move throughout the entire exercise.

Start by practicing deep side bends facing and touching the wall. Focus on your shoulders mainly. Do not allow them to move at all.
Next up are deep side bends close to the wall. If you make small mistakes such as sinking into one of your shoulders or rotating the hips you will touch the wall with your foot for instant feedback.
It’s a whole new shoulder

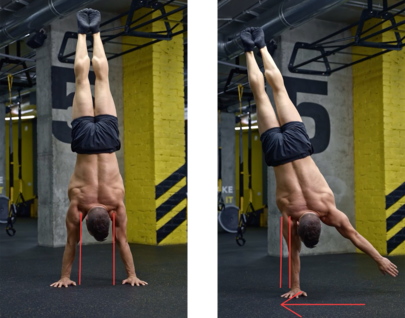
The obvious part is that when we are standing on 2 hands each of our shoulders carries half of our body weight. The not so obvious part is that as long as we are standing on 2 hands  the weight mainly goes on the inside of the shoulder. As soon as we transfer over to one hand not only does this shoulder now have to carry twice as much weight but also does the weight travel towards the outside of the shoulder.

We have to prepare for that! 

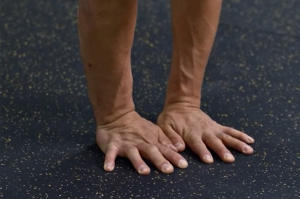
The 2on2 handstand or handstand with narrow hands is a great starting point. Start at the wall with slide aways before training them freestanding. Besides preparing your shoulders on a strength level your body awareness and coordination will improve. You are feeding multiple birds with 1 single scone 😉

You can use wooden handstand blocks. Simply place them next to each other and close the gap. If you do not have them train on the floor with your hands as close towards each other as possible.

Going to Miami

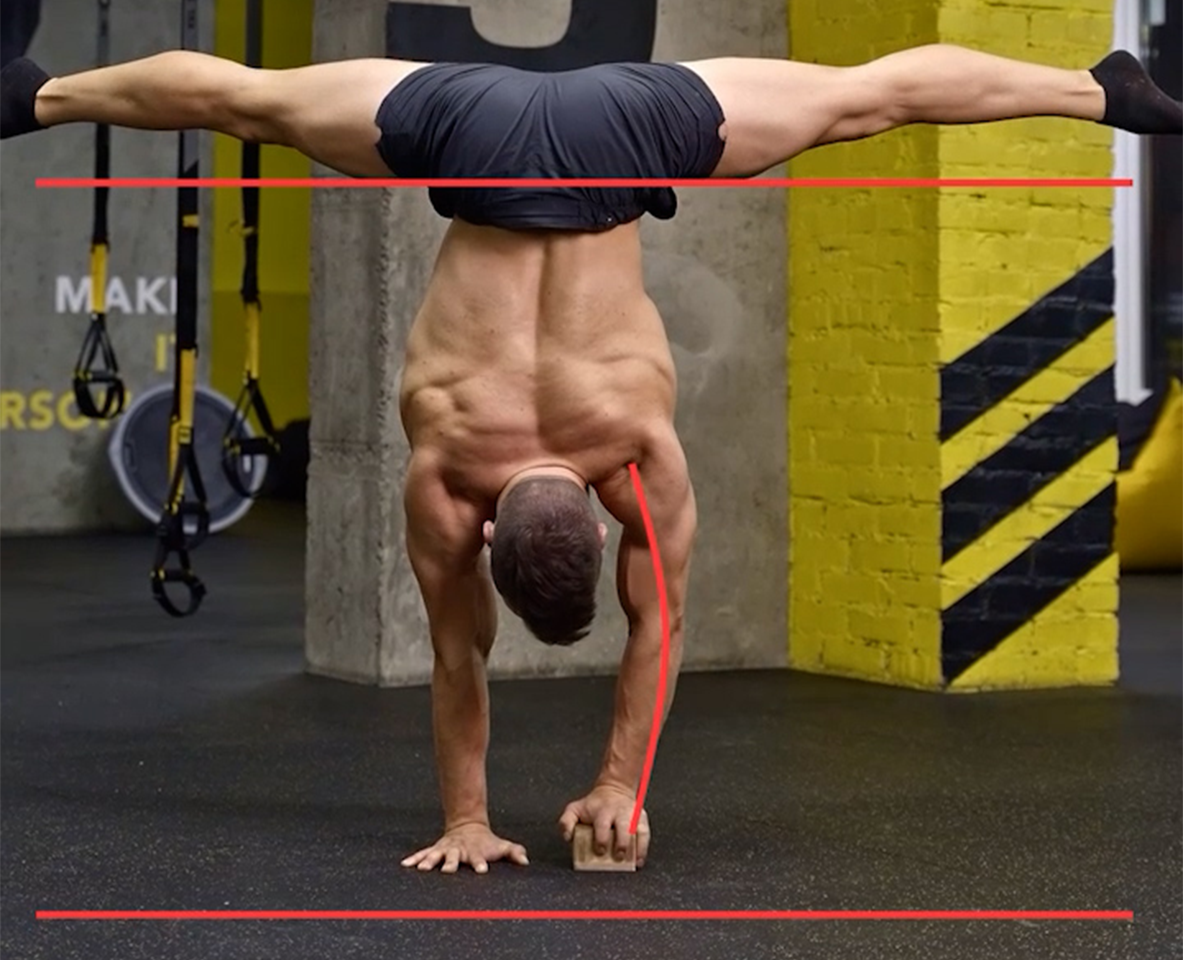
Last but not least, take one block away and start working on the Miami Handstand. I call all handstands when you have 1 hand elevated on blocks and the other on the floor Miami handstands because I love Miami, I love those drills and I came up with most of them at South Beach.
For now the idea is to keep the block elbow bent so that both shoulders and hips are parallel to the floor. You should have equal weight between both hands and your hands should be shoulder width apart or less.

You can either use your wooden handstand blocks or really anything similar to elevate the hand. Yoga blocks, tupperware or a pile of books will do here.
If you have difficulties getting up at first head over to the wall and practice slide aways and simple take offs from the wall. Work on getting used to this new hand and shoulder position, You will quickly realize that the only truly tricky part here is jumping into the position. Once up and aligned the basic Miami Handstand is almost just like a regular handstand.

Film yourself during training to check on your form. The first key exercises honestly can not be clean enough. The better you get at those the smoother the rest of your journey towards the one arm handstand will be.
Happy training.
Leave a Reply

WordPress Video Lightbox

Leave your email and I will send your Free First Steps towards the One Arm Handstand Workout right away!


Leave your email and I will send your Free First Steps towards the One Arm Handstand Workout right away!