How to PRESS TO HANDSTAND
The Press to Handstand is without a doubt one of the most desired moves when it comes to handstands, yoga, calisthenics or any movement category related ro gymnastics. Not only is it a beautiful and elegant way to get up into the handstand whilst staying in full control but also can the press to handstand be great for conditioning training and to improve overall coordination and body awareness.
First up, before really discussing anything here we need to set 1 thing clear: The Press to Handstand comes in many different forms. Bent arm, straight arm, with legs together, from a stalder, etc, etc, etc… While the technical details and training approaches can be applied to the bent arm press to handstand and the stalder press I will be focusing on the regular straight arm straddle Press to Handstand from a Standing position here.
Strength VS Flexibility
Another good way of proving my point is to look at two different groups of people.
Group number 1 is training at a crossfit gym. The stereotype of a crossfit athlete is strong and rather stiff.
Group number 2 is training at a yoga studio. Yogis are usually very flexible yet do not bring as much raw strength to the debate as a crossfit athlete.
Chances are high there is not one person inside group 1 that can press to handstand whilst often most advanced yogis can somewhat press to handstand without even training for it, truly proving the point that the press to handstand primarily relies on flexibility.
There are 2 types of people when learning to press
This basically leaves us with 2 groups of people who want to learn to press to handstand. One is stronger while the other is more flexible. Both groups have a lot to offer yet lack in the opposite department. Every single person from each group will learn a press to handstand if they work hard on themselves. Who will learn it quickest simply depends on who is lacking the least in the opposite department. Meaning the strongest yogi and the most flexible crossfit athlete will get their press first.
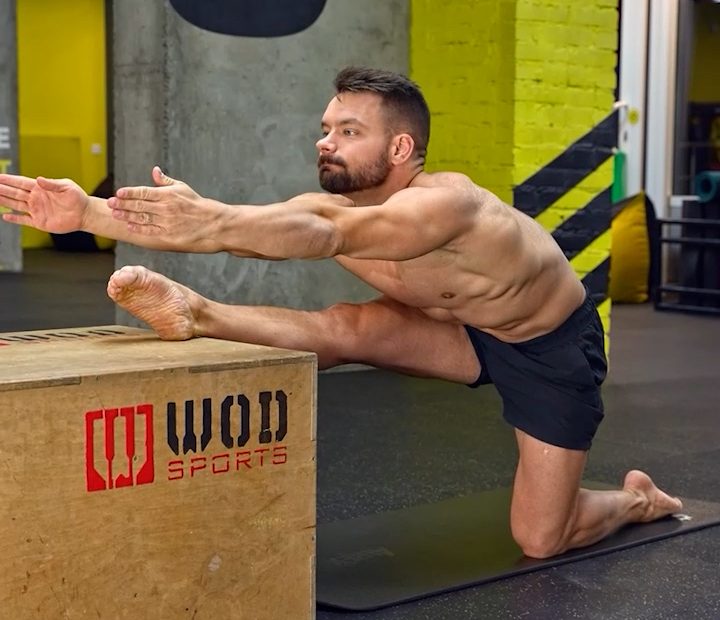
If you are very flexible meaning you can do the splits, your belly button touches the floor in the pancake or you can bring your chin to your ankles when forward folding with locked knees your road to the press to handstand will be all about building strength in your shoulders, in your core and in your back. Being flexible is a big blessing but also comes with a big curse. You have to learn to control your body and to keep it together!
If you are strong but you can barely tie your shoes you will have to invest heavily into building hamstring, hip, shoulder and even lower back flexibility. This road will be long but it will be a highly rewarding one as with increased flexibility your quality of life will improve. You will feel better and healthier growing older and every day tasks like for example tying your shoes will become easier. Besides increasing your overall mobility you will also have to work on your coordination. During the press it is extremely helpful if you can switch your hips into a slight anterior pelvic tilt. Most who are rather still are not familiar with this kind of movement and it will take some time to figure out how to do it.
So as you can see. No matter which group you fall in you have work ahead of you. This road won’t always be easy and will be long but it will be a highly rewarding one. All the little gains that you will make towards the press will help you tremendously in all other disciplines that you might be training and with all over body control. So bare with me. You are in for a wild ride. Let’s figure this Press To Handstand thing out together!
Straight Arm Press to Handstand - Technique
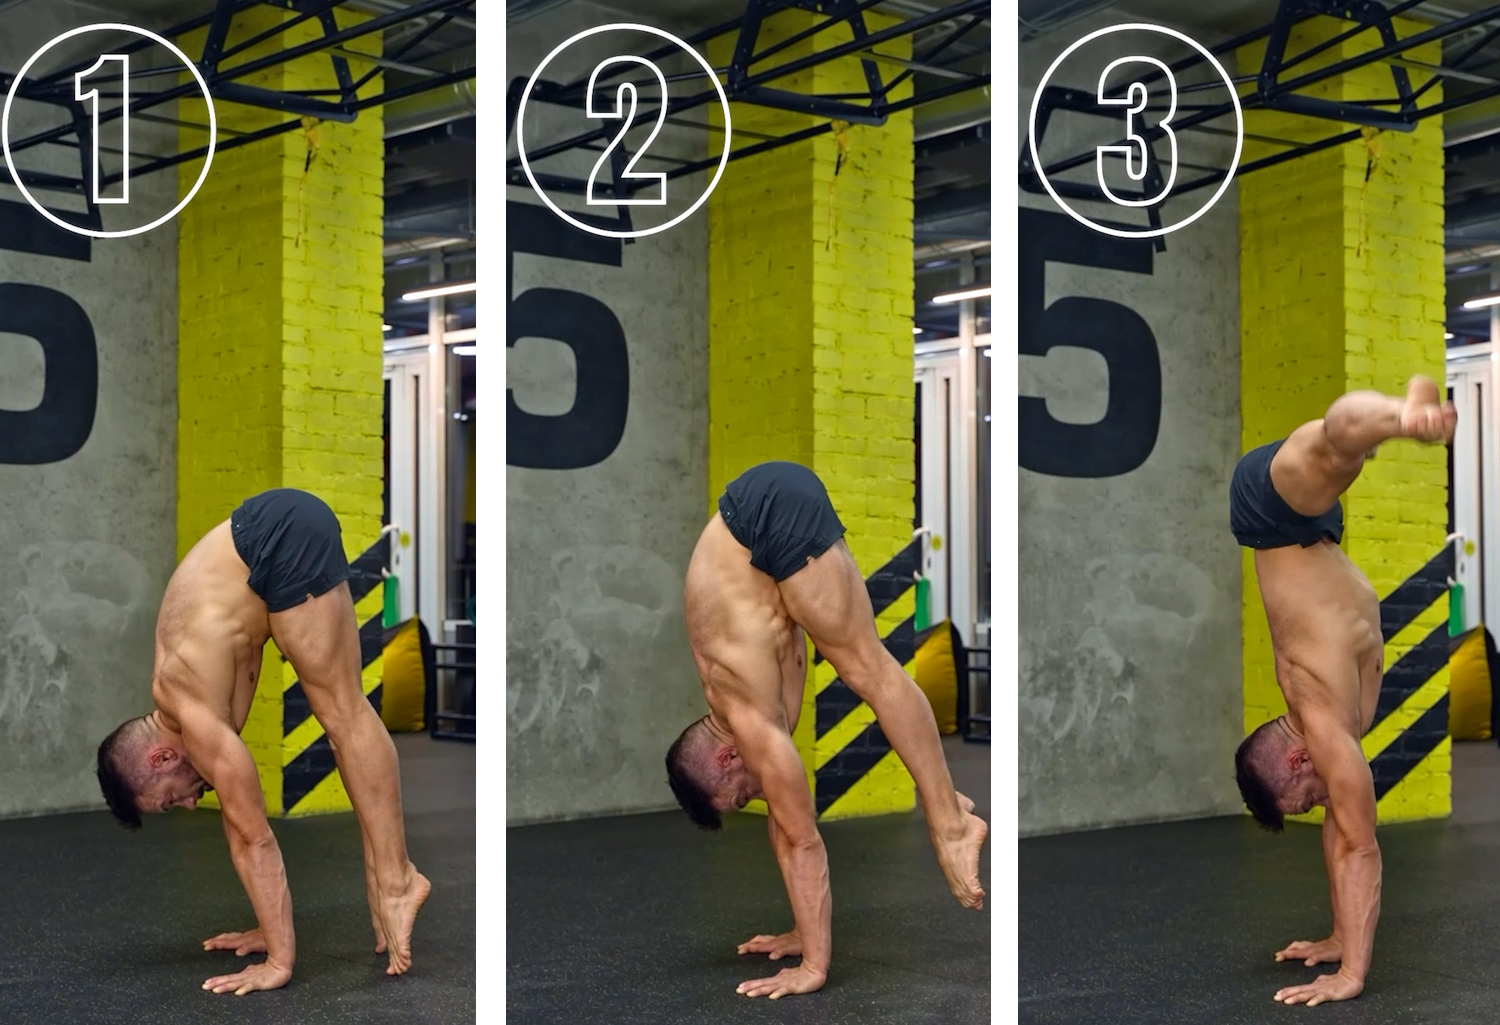
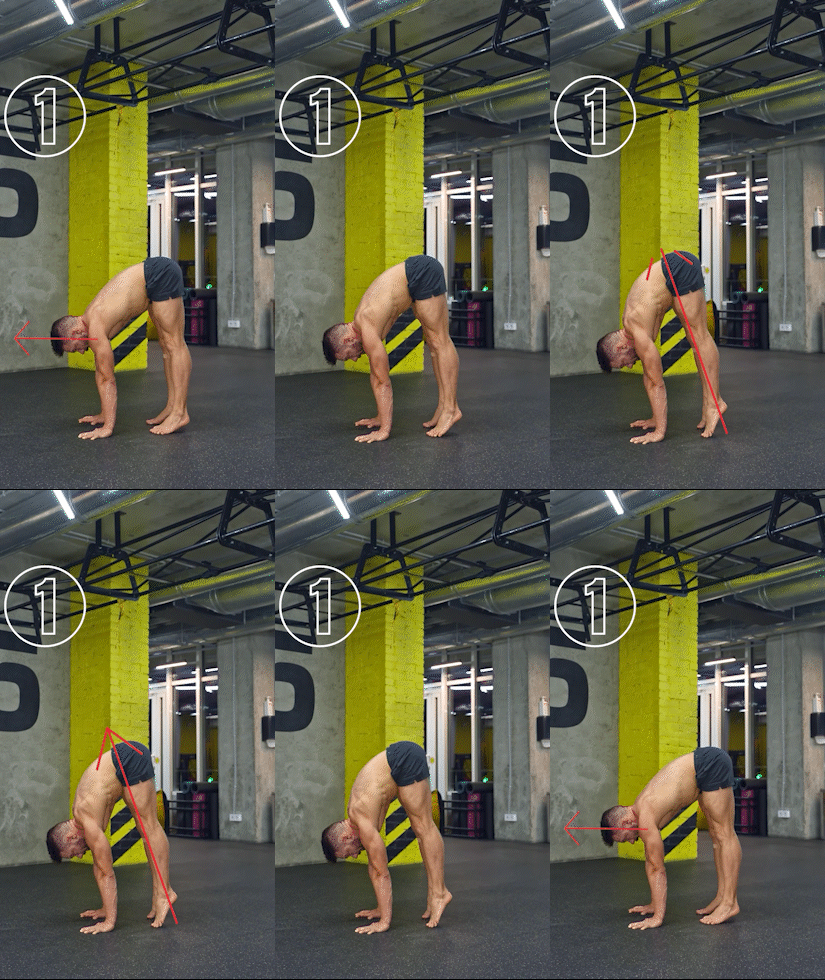
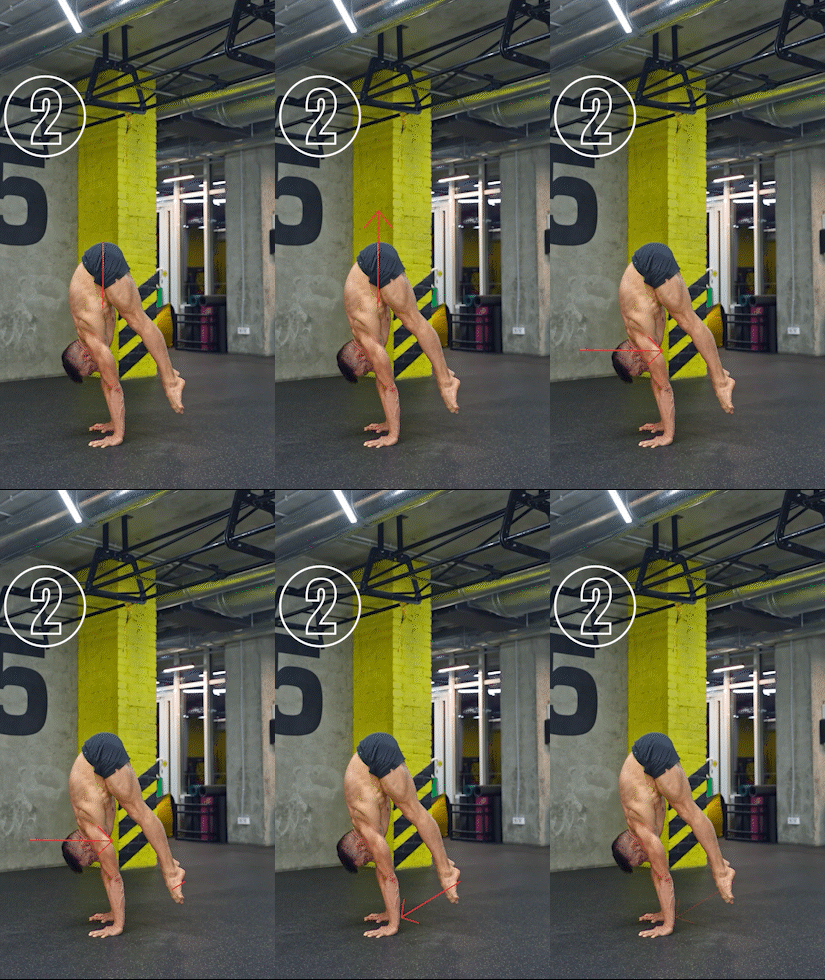
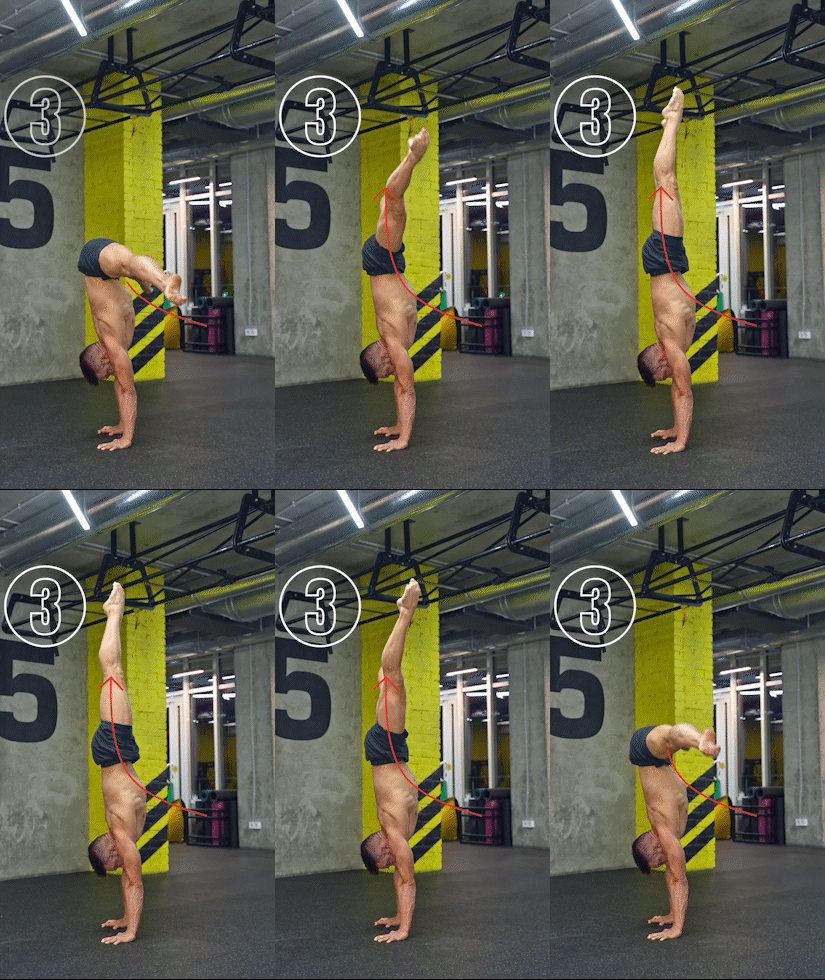
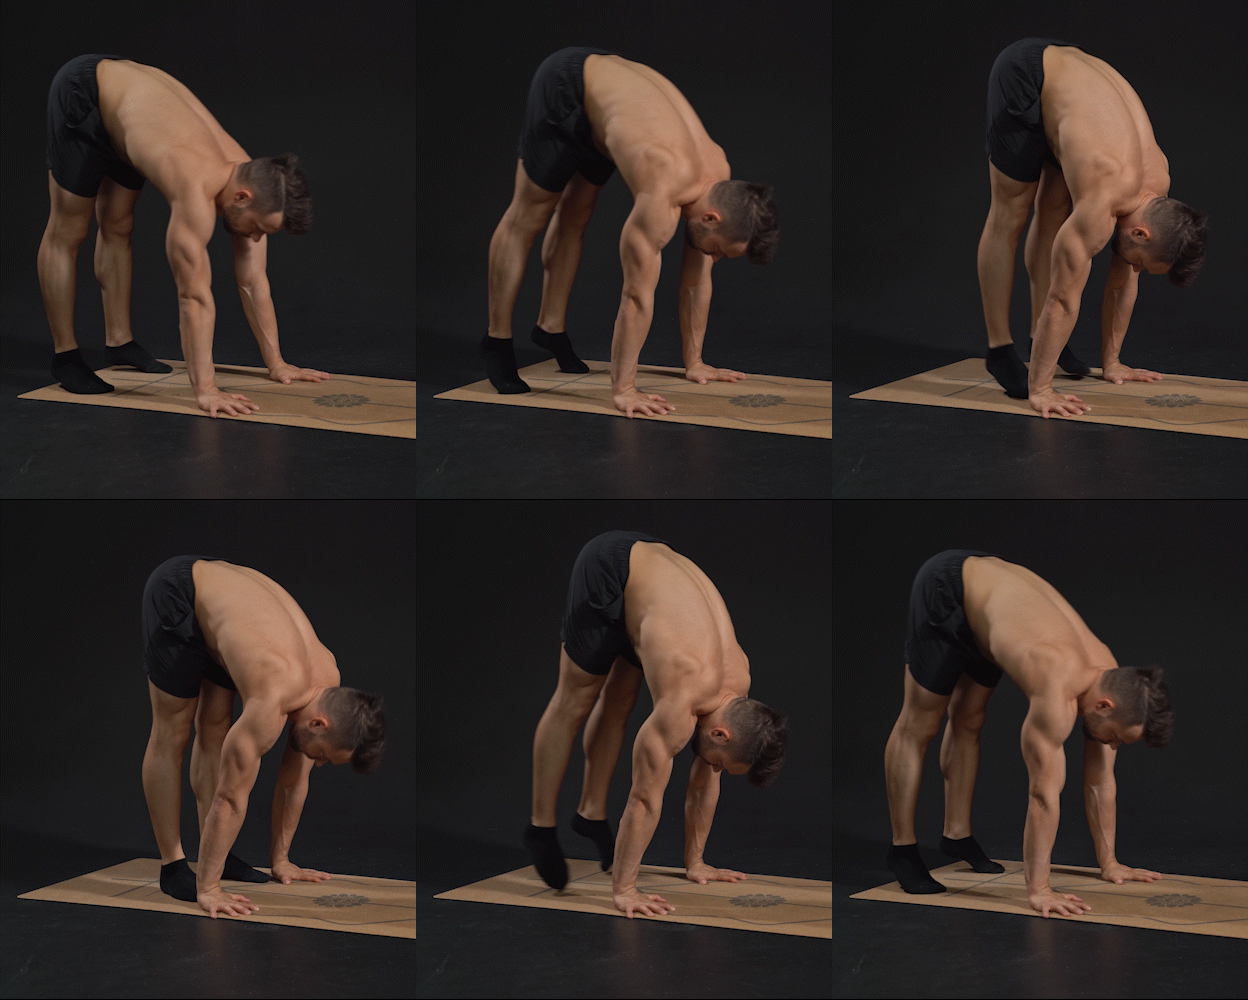
The press to handstand consists of 3 parts. We have the take off, the compression period and the unrolling into the handstand. The better you get at separating these parts from another the easier and the more efficient your press will get.
As the name suggests the idea is to keep the arms locked the entire time and the hips parallel to the floor. While bending the arms and bringing one leg up first to get up into the handstand is of course also considered a press in today’s strict straight arm press this would be considered as cheating.
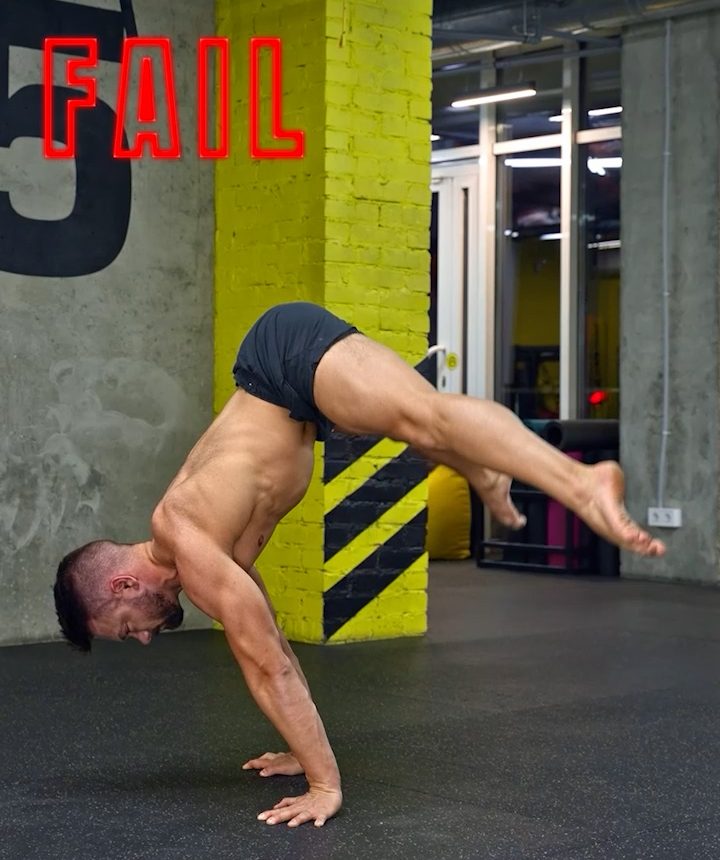
A good press should be gentle on the wrists and does not need a lot of space. If you have to lean your shoulders far towards the front in order to get the hips up you are not compressing enough. You are forced to planche your way up into the handstand. This is a cool skill if you are super strong but again not the goal of today’s exercise.
The Take Off
The Compression Period
The unrolling into the handstand
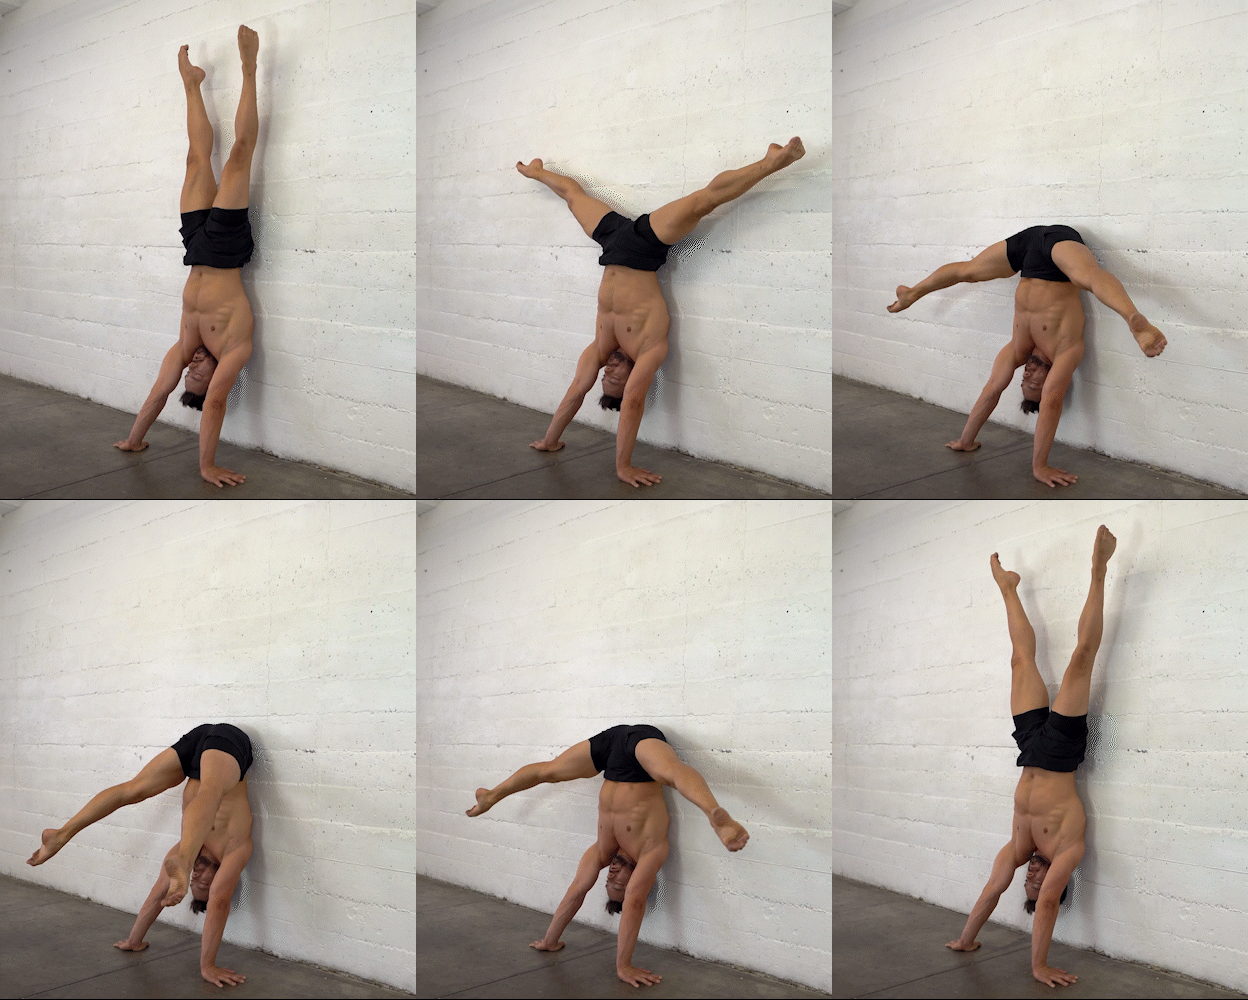
Last but not least we have to make it up into the handstand. If you executed part 1&2 well part 3 should be a real piece of cake for you. With your hands, shoulders and hips already aligned on top of each other you now just have to bring the legs around through your fullest straddle. You can even abort this movement halfway through and simply stop in a straddle handstand.
Again, your flexibility is mainly what will make things easy for you here. The better your pancake and middle split the easier it will be to get your legs around. Back to wall presses can be beneficial here as well to understand the movement pattern. Make sure you do not press the back of your head against the wall as that works the wrong muscles. Work on keeping your lower back connected to the wall when you pull the legs down. Lock your knees!
Make it up by making it down
When you first start training for the press it feels absolutely impossible to get off the floor or up into the handstand. If you practice handstands a bit and someone asks you to do a press to handstand this usually feels like an absolute joke to the world. Breaking the movement up into separate parts and drills as described above usually helps quite a lot.
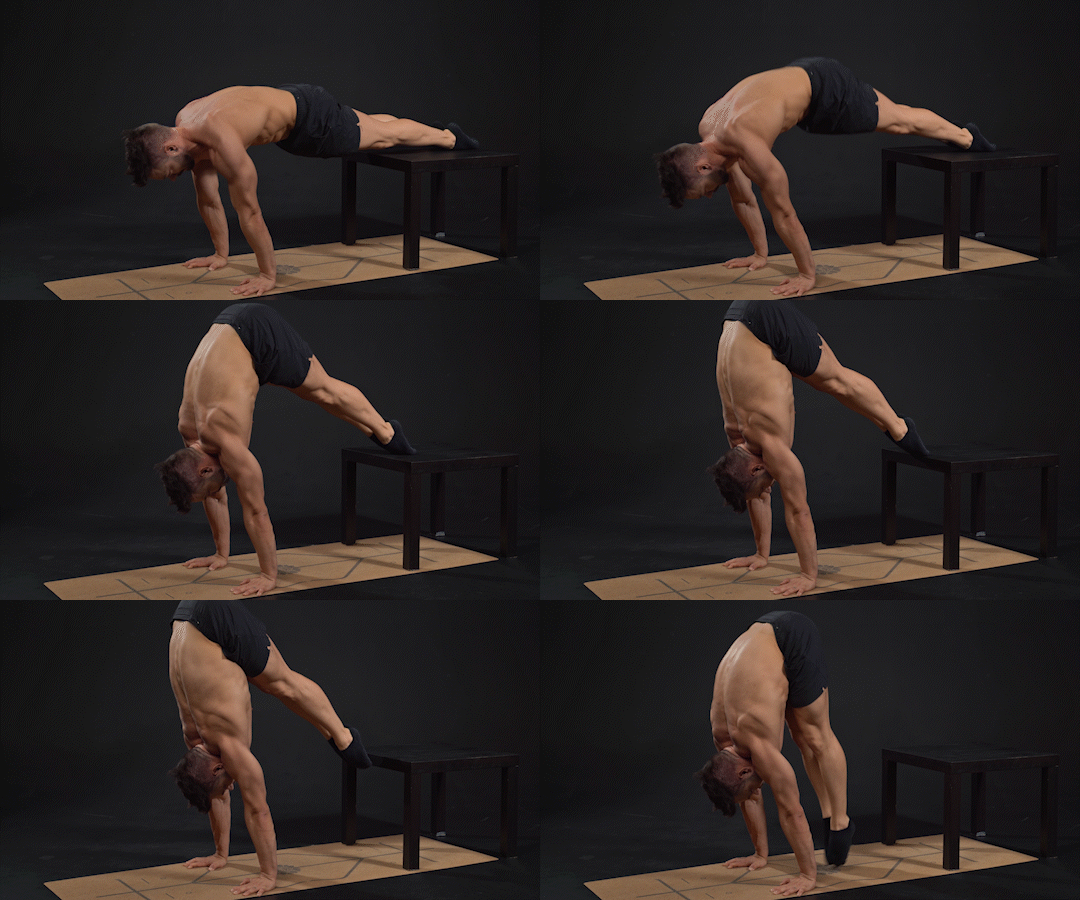
One of the best things that you can do for your press to handstand is to do slow negatives. From a handstand lower down. Start by lowering your feet to a table. You will basically do part 3 only. Keep your hands, shoulders and hips perfectly aligned and just bring the feet down to the table. Once this is stable and coordinated properly add part 2 in the reverse mix. Pull the feet down as much as possible without moving the shoulders towards the front. Then when you think you can not go any lower pull a tiny bit harder before finally leaning the shoulders in front and dipping the hips and feet towards the floor.
The goal is to make it down whilst staying in full control. In an ideal world you will touch the floor with the nail of your bog foot only and stay there for a moment. This of course will not be possible at first. At some point throughout the movement you will feel as if you are losing control. Here you have to resist! At the moment do not think of lowering anymore. Simply focus on freezing at this sticking point. Gravity will take care of the rest. Don’t worry 😉
Fitting Press Training into your Weekly Routine
Now. you are here reading my blog and you have made it all the way through until the end so at this point I am pretty safe to assume that you and I have quite a lot in common!
We are eager to learn more, to constantly improve and never to take no as an answer. This also makes us rather busy. Organization and focus is key when it comes to training and chances are high your schedule is already slam packen. Yet, there are different ways of how you can fit training for your press to handstand into your weekly routine.
Dedicated Press Sessions
2-3 times per week you can do a dedicated press to handstand sessions. Warm up well, practice some handstands for upside down awareness and balance, stretch your hips and hamstrings for about 30 min and then dive into your press to handstand work. These sessions tend to get long, yet they are highly efficient
Split
Just like we divided the press into different parts you can also divide these parts into different training sessions. This could be for example because you do not have time to do long lasting workouts multiple times per week or maybe you do not have the energy to train quite that long in one go. We would for example have a workout for handstand technique and line work. You will definitely include part 3 of the press during the end of this session. If you have time and juice left you will also do some shoulder conditioning here. This could for example be done with walking deads, planche leans or bench zombies. If you do not want to do your press conditioning at the end of this workout you can also do these kinds of drills for example at the gym or after a yoga/pilates class. This now only leaves us with the flexibility training. You have to stretch. You could for example do 3 sessions of 45min at night while watching TV or doing your homework. For the first few months I would recommend to be 100% focused while stretching as form, technique and brain muscle connection is key. Yet eventually, you will be able to go more into auto pilot while stretching and allow your mind to wander.
Rule of thumb
Make sure to always stretch at least a bit before working on your presses. The more, the better. Warm up well. Especially your shoulders and wrists. Pressure through your body is high during the press so please, in order to protect yourself from injuries you have to do prehab work! If you are only working on part 1&2 you can skip the hand balance specific warm up. As soon as you include part 3 in your practice you have to warm up a couple handstands for overall upside down feeling and body awareness.
The press to handstand is one of the most desirable handstand skills for a good reason. It provides an incredibly beautiful, stable and elegant way to enter the handstand whilst training for it will help you improve so many different aspects of your practice. If there was any move I would be happy to train for the rest of my life without ever getting it it would be this one!



Muchas Gracias! Excelente información!