What is the
Narrow Handstand?
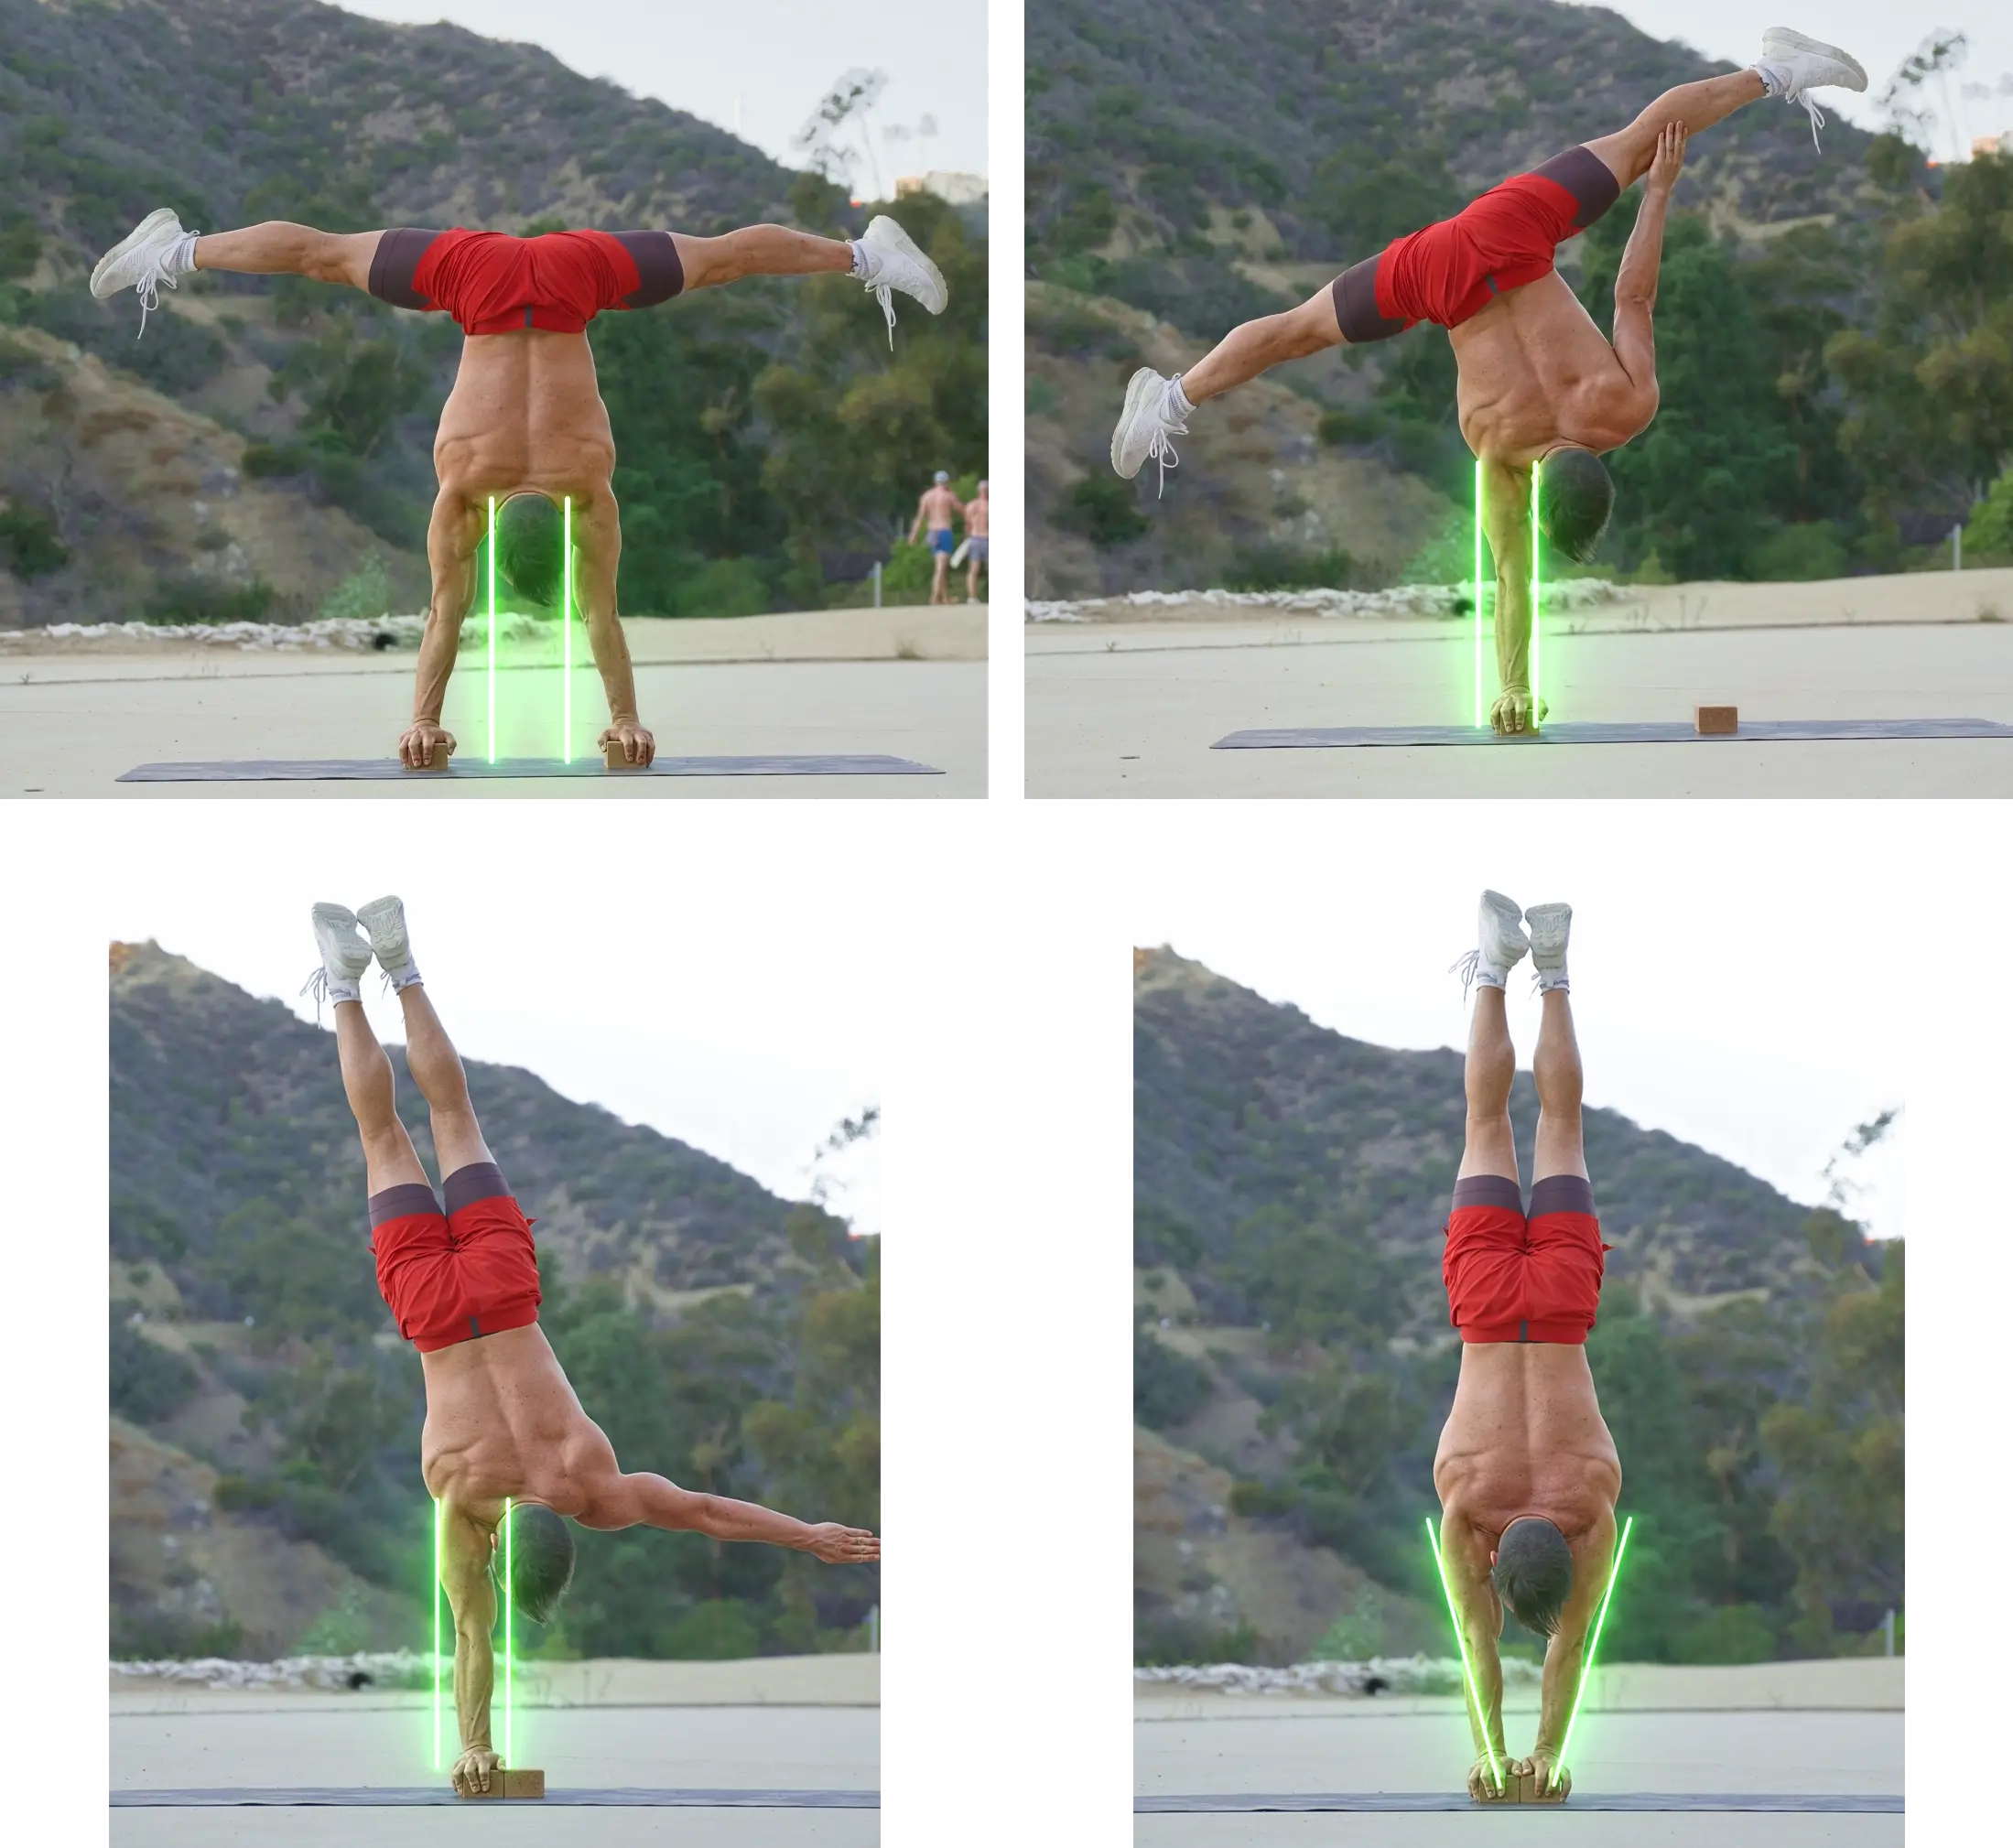
As the name suggests a narrow handstand is nothing more than a regular handstand with your hands not right underneath the shoulders but instead significantly more narrow. For us the goal is to place the hands on the floor so they touch each other.
How exactly to Place the Hands in the Narrow Handstand
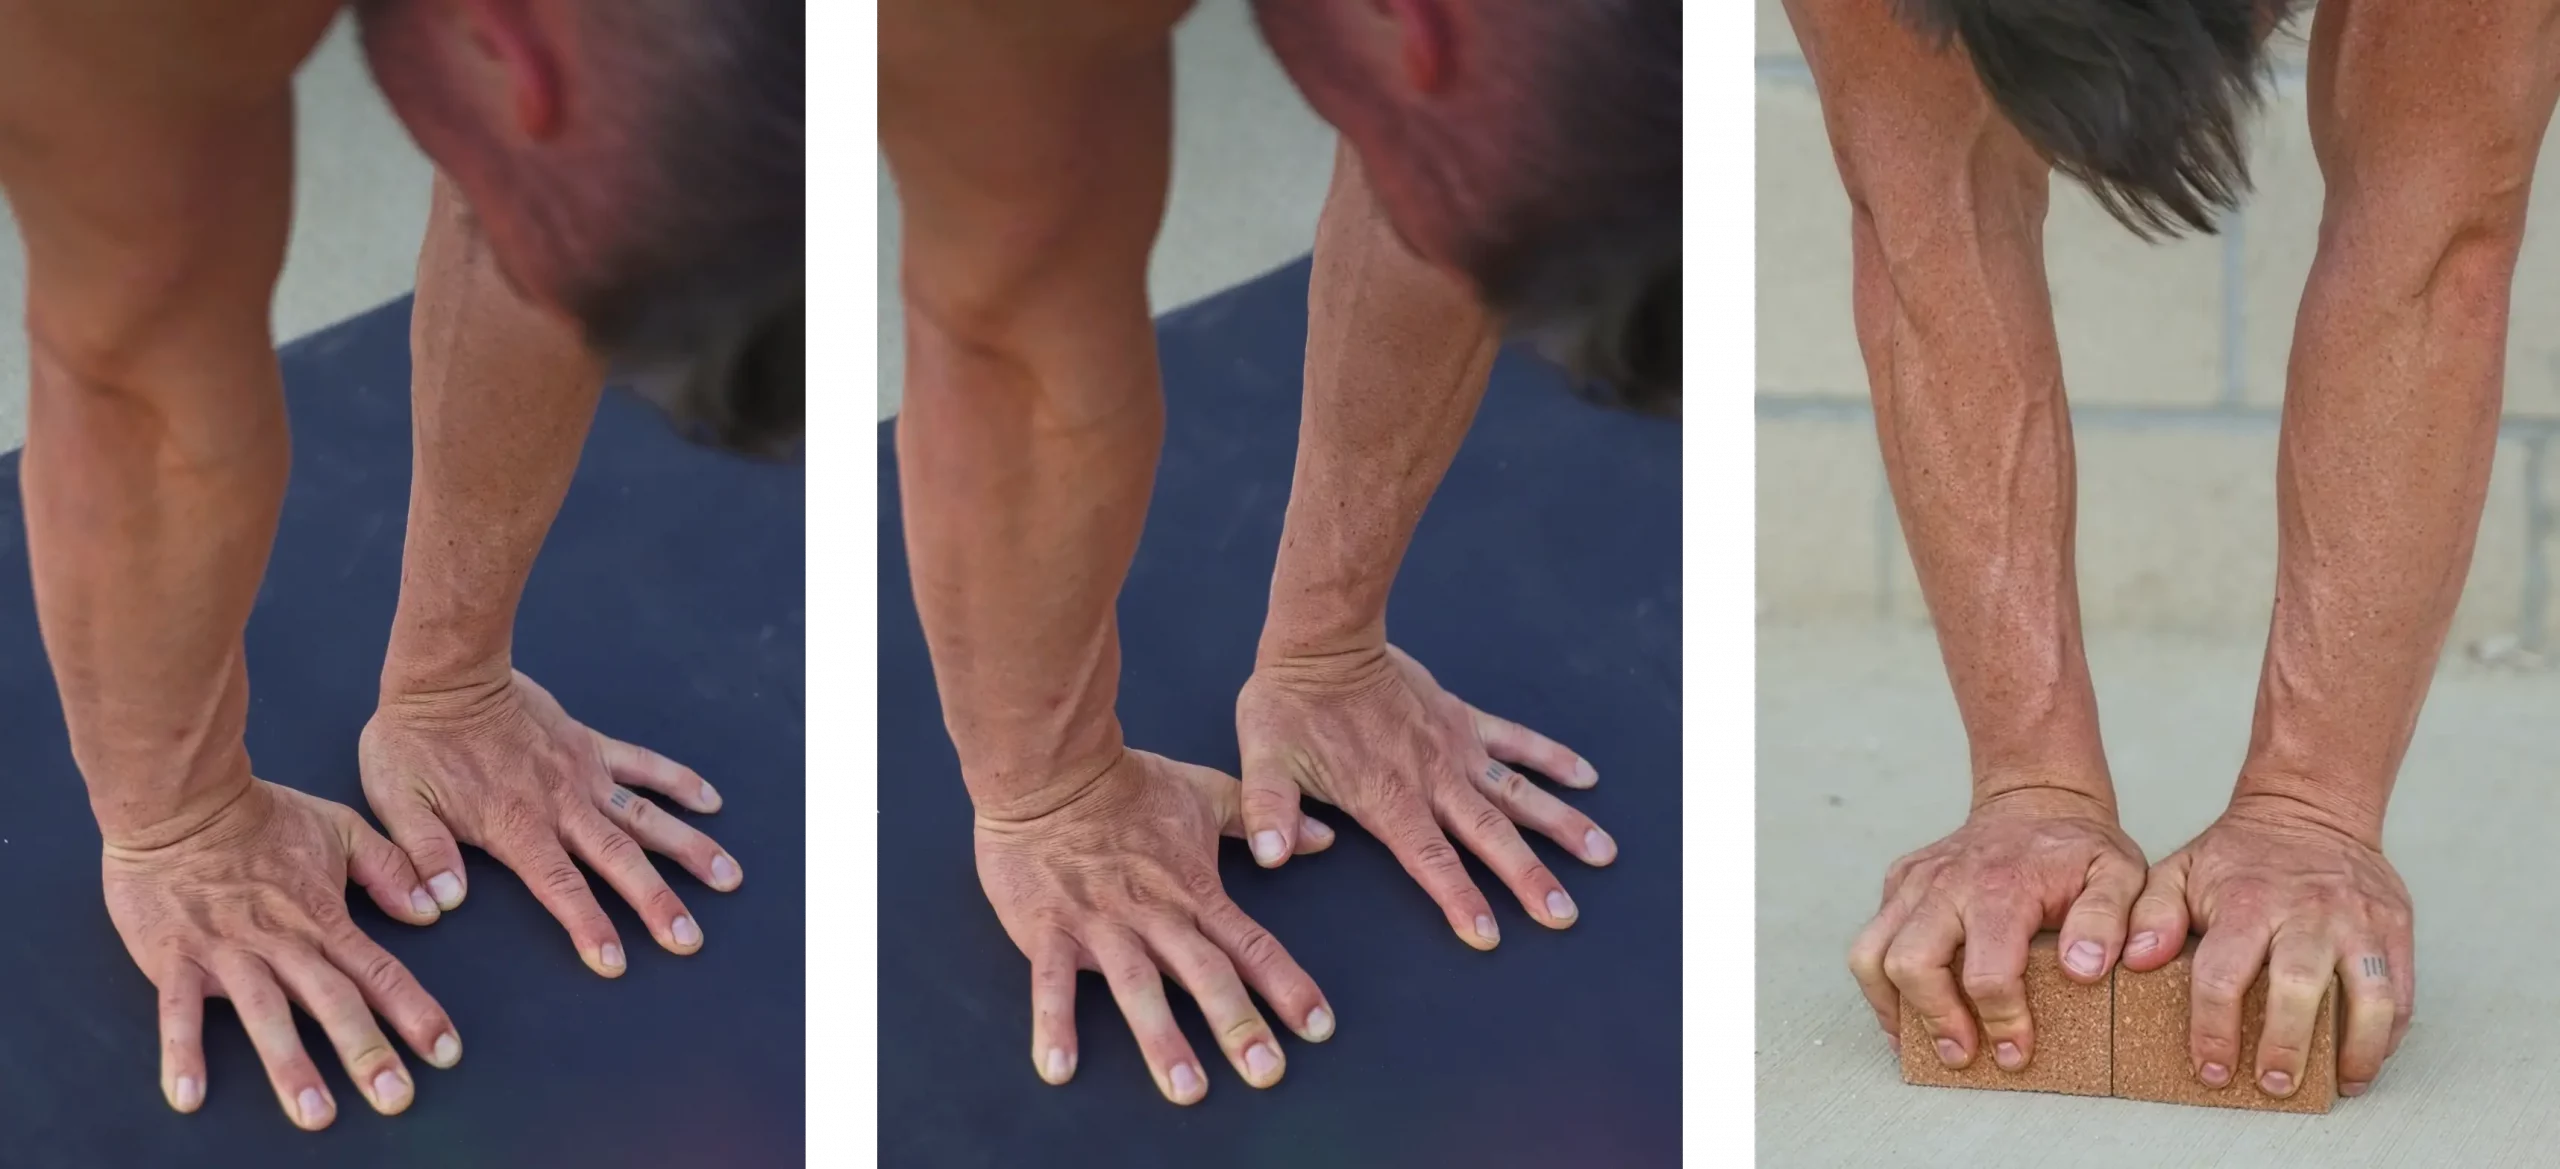
First off, understand that the direction in which the hands are pointing should not change due to the narrow position. On your knees ready to jump up into a handstand move your hands towards each other until your thumbs touch. Most people will fold their thumbs in so they touch the hand on the inside and the other thumb on the outside. If you train acro yoga or any kind of hand to hand and you are considering doing narrow handstands on someone’s head I strongly recommend crossing your thumbs as this will prevent you from sliding off the head in case your porter is sweaty.
Narrow Handstands on Blocks
If available try using blocks when training narrow handstands. Being able to grip the blocks with your fingers will give you more control over your handstand. Additionally, the main reason why we are training 2on2 handstands is because we want to work towards the One Arm Handstand. Most one arm drills are done with blocks and your first oahs will be on blocks and as all beginnings are hard it is a good idea to get used to them as early as possible.
Place the blocks side by side so they touch each other. Your thumbs should point towards the front and touch each other on their outsides. On their insides they should be touching the side of your hand/index finger. Most people place 2 fingers in front of the blocks and 2 coming out on the side. If you have very small hands or if you are used to having your hands slightly rotated outwards in your handstand on the floor you might place 3 fingers in front.
Why you need to train
Narrow Handstands for the OAHS
Many people when working towards the one arm handstand go from regular handstands to fingertip holds to attempted oahs. This is not efficient, you will hit constant plateaus and instead of improving your technique you will only get good at this very particular position that you are training.
I’ve made it a big part of my life’s work to look for plenty of progressions on the way to the oahs to actually learn the principles and to avoid plateaus. The 2on2 handstand is an essential step on this journey.
Narrow Handstands to Prepare your Shoulders for the oahs
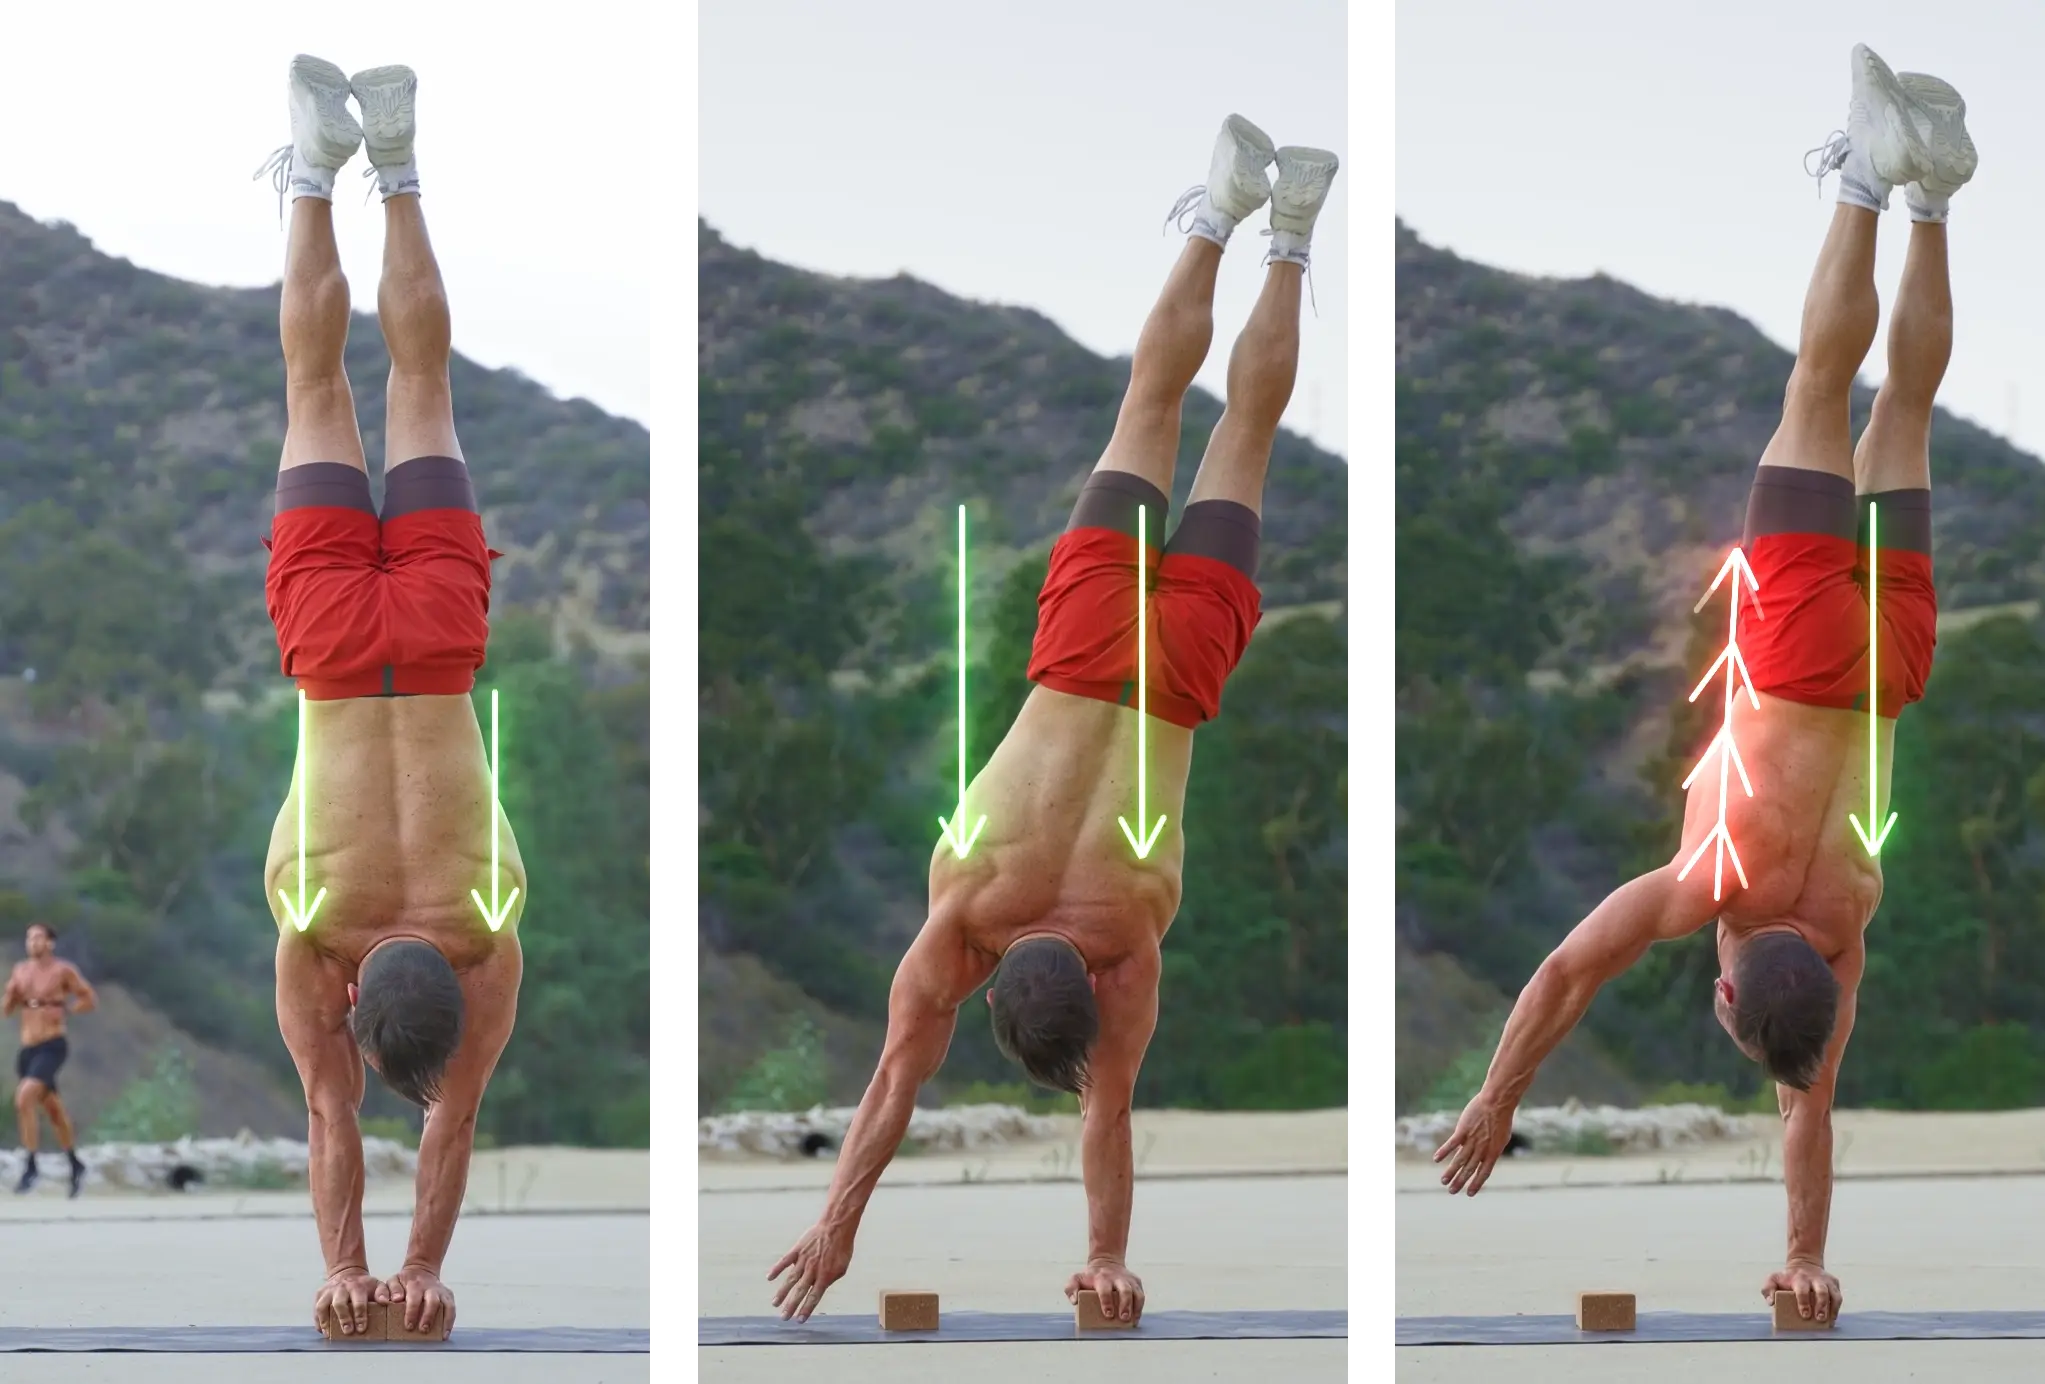
In a regular handstand the pressure of your body weight lies between your hands. Most stability work is done with the anterior deltoids and upper chest muscles. When you transfer out towards one hand your shoulder might only move slightly towards the outside yet your weight travels a whole lot in that direction. This means a significant amount of work is now done by your outside shoulder. Your posterior deltoid is now doing a lot of the stabilization work yet you have never really used this muscle in this direction.
If we would be able to just jump up into the one arm handstand and hold the shape chances are high the muscle wouldn’t be able to take the pressure and be completely overloaded leading to possible injuries.
By simply training one arm handstand drills your posterior deltoid will grow in this direction and eventually get strong enough to protect itself. A better way of course is to be pre active about this pressure.
Due to the angle of the arms in the narrow handstand position we are able to prepare the outside of your shoulders before ever even needing them setting you up perfectly for the drills to come.
Narrow Handstands to avoid twisting out of your oahs
One of the main issues that athletes trying to learn the oahs are facing is rotation. Everything is great at first but as soon as the hand comes off the floor the hips rotate and we fall out. This hip rotation happens due to the free shoulder. It is very typical to subconsciously pull the shoulder away from the floor. When the shoulder comes up it also goes towards the back side of your body and the hips follow. Getting rid of this “habit” is for many one of the hardest parts of the oahs.
Here again the 2on2 handstand comes in handy. In the narrow handstand you are forced to push both shoulders down as much as possible so they both basically touch your chin. This sensation is very similar to what you are supposed to feel standing on 1 hand.
Narrow Handstands to learn to balance on 1 hand
The reason that the one arm handstand is so significantly harder than the two arm handstand is that we go from a rather big surface of balance created by two hands to a very small surface of balance. This is of course significantly harder to balance. Picture you standing upright on 2 feet compared to a ballerina on 1 point shoe.
The more narrow you go in your 2on2 handstand the more you are able to simulate and ultimately get used to this feeling of balancing on a small surface area. Whilst the specific technique and feeling is still a bit different in the oahs the narrow handstand will drastically help you move towards control on 1 hand.
2on2 handstands and
different body types
In a very general sense when it comes to handstand athletes there are 2 body types. Usually one is either mobile and not quite as strong just yet or rather strong and bulky but not so flexible. Picture someone with a yoga background VS someone with a crossfit background. Both people have their strength yet both also have things to work on.
The flexible and not so strong type
For you the narrow handstand position is physically rather easy. Chances are high your shoulders are not very wide meaning the angle in your arms won’t change too much. Yet, especially when done on blocks this handstand variation can be scary as you don’t have the shoulder strength and volume to give you the needed confidence.
The 2on2 or even 2on1 handstand is very popular for performers with this body type as your forearms and elbows are possibly touching.
Another advantage that practicing this position gives you is that the 2on1 handstand might represent a great way to get up on canes for your first handstands. Place your hands on 1 block with the feet on the other and “simply” swing up. Proceed with caution though. Since you can not walk when you lose balance you want to make sure to place some crash mats around for the first couple attempts and spend a significant amount of time training on the floor with only blocks.
The not so flexible and strong type
For you this drill will be rather difficult as scapular elevation and shoulder flexion is most likely already a problem. Additionally, your shoulders are wider meaning the angle that your arms will stand in is more extreme. Go slow and give yourself time. Whilst this position is hard the benefits reaped will be enormous as they will directly carry over towards your shoulder coordination and strength.
Narrow Handstand
Progressions
Training for the narrow handstand is pretty straightforward. Keep in mind that we are including these drills to prep the outside of your shoulders. This is a new muscle that is not used to this kind of pressure so make sure to build volume slowly over time! My recommendation is to include 2-4 sets of narrow handstands consistently in each session either before your one arm drills or if you are not working on your one arms yet at the end before the conditioning part of your workout.
First Build Strength
Before we can try to balance and eventually control the position we need to build sufficient amounts of strength to stabilize this new handstand variation.
Either with 2 blocks or your hands on the floor come to the wall. There are 3 exercises here that are key.
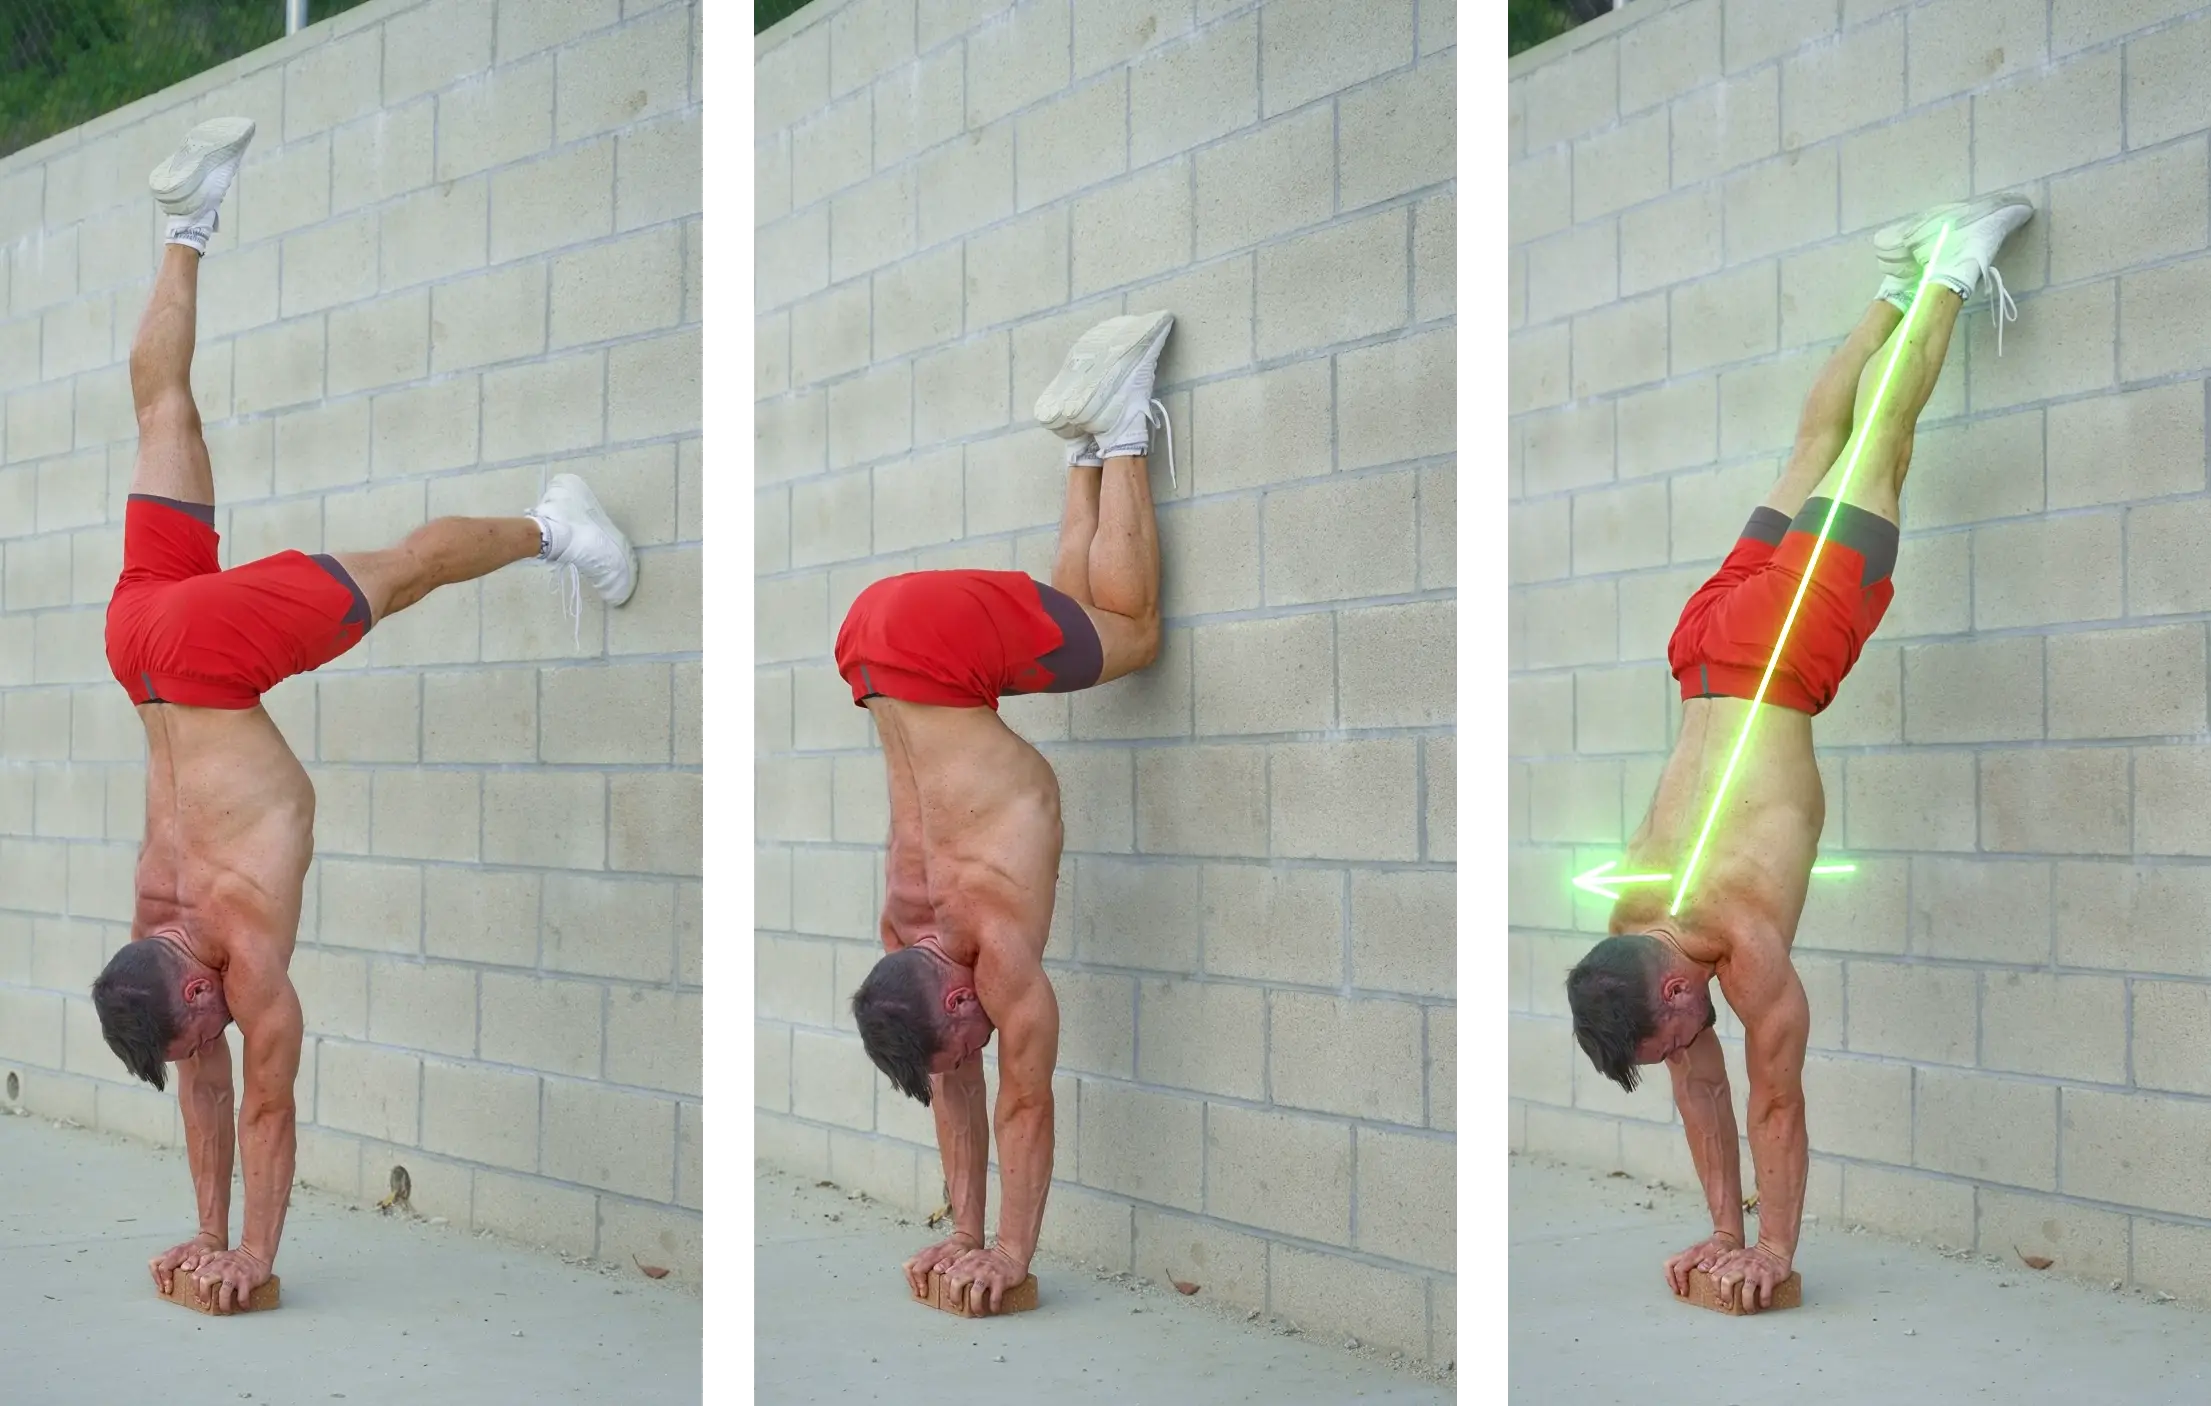
Start with single leg L handstand shrugs. Make sure you are only going up and down and not with your shoulders towards the wall when you push up.
Next up add tuck slides into the rotation. These will be hard to do clean. Focus on keeping the shoulders right on top of the center of your hands, keep your elbows locked and do not allow your hips to flip into a posterior pelvic tilt.
Then Build Control
Once you get the basic strength we need to start to move the narrow handstand away from the wall. The best first step is the slide away. Practice with your legs together but also in a full straddle. Whilst focus here is to get away from the wall we need to continue to focus heavily on the lean of the shoulders before taking the feet off to mimic the jump up moment.
You guessed it right. From here we logically move into the straddle jump to handstand. We are prepared well so theoretically this should not be too hard now. Once your straddle jumps get consistent incorporate closed legs and if possible even tucks into your freestanding 2on2 practice.
Commitment is key
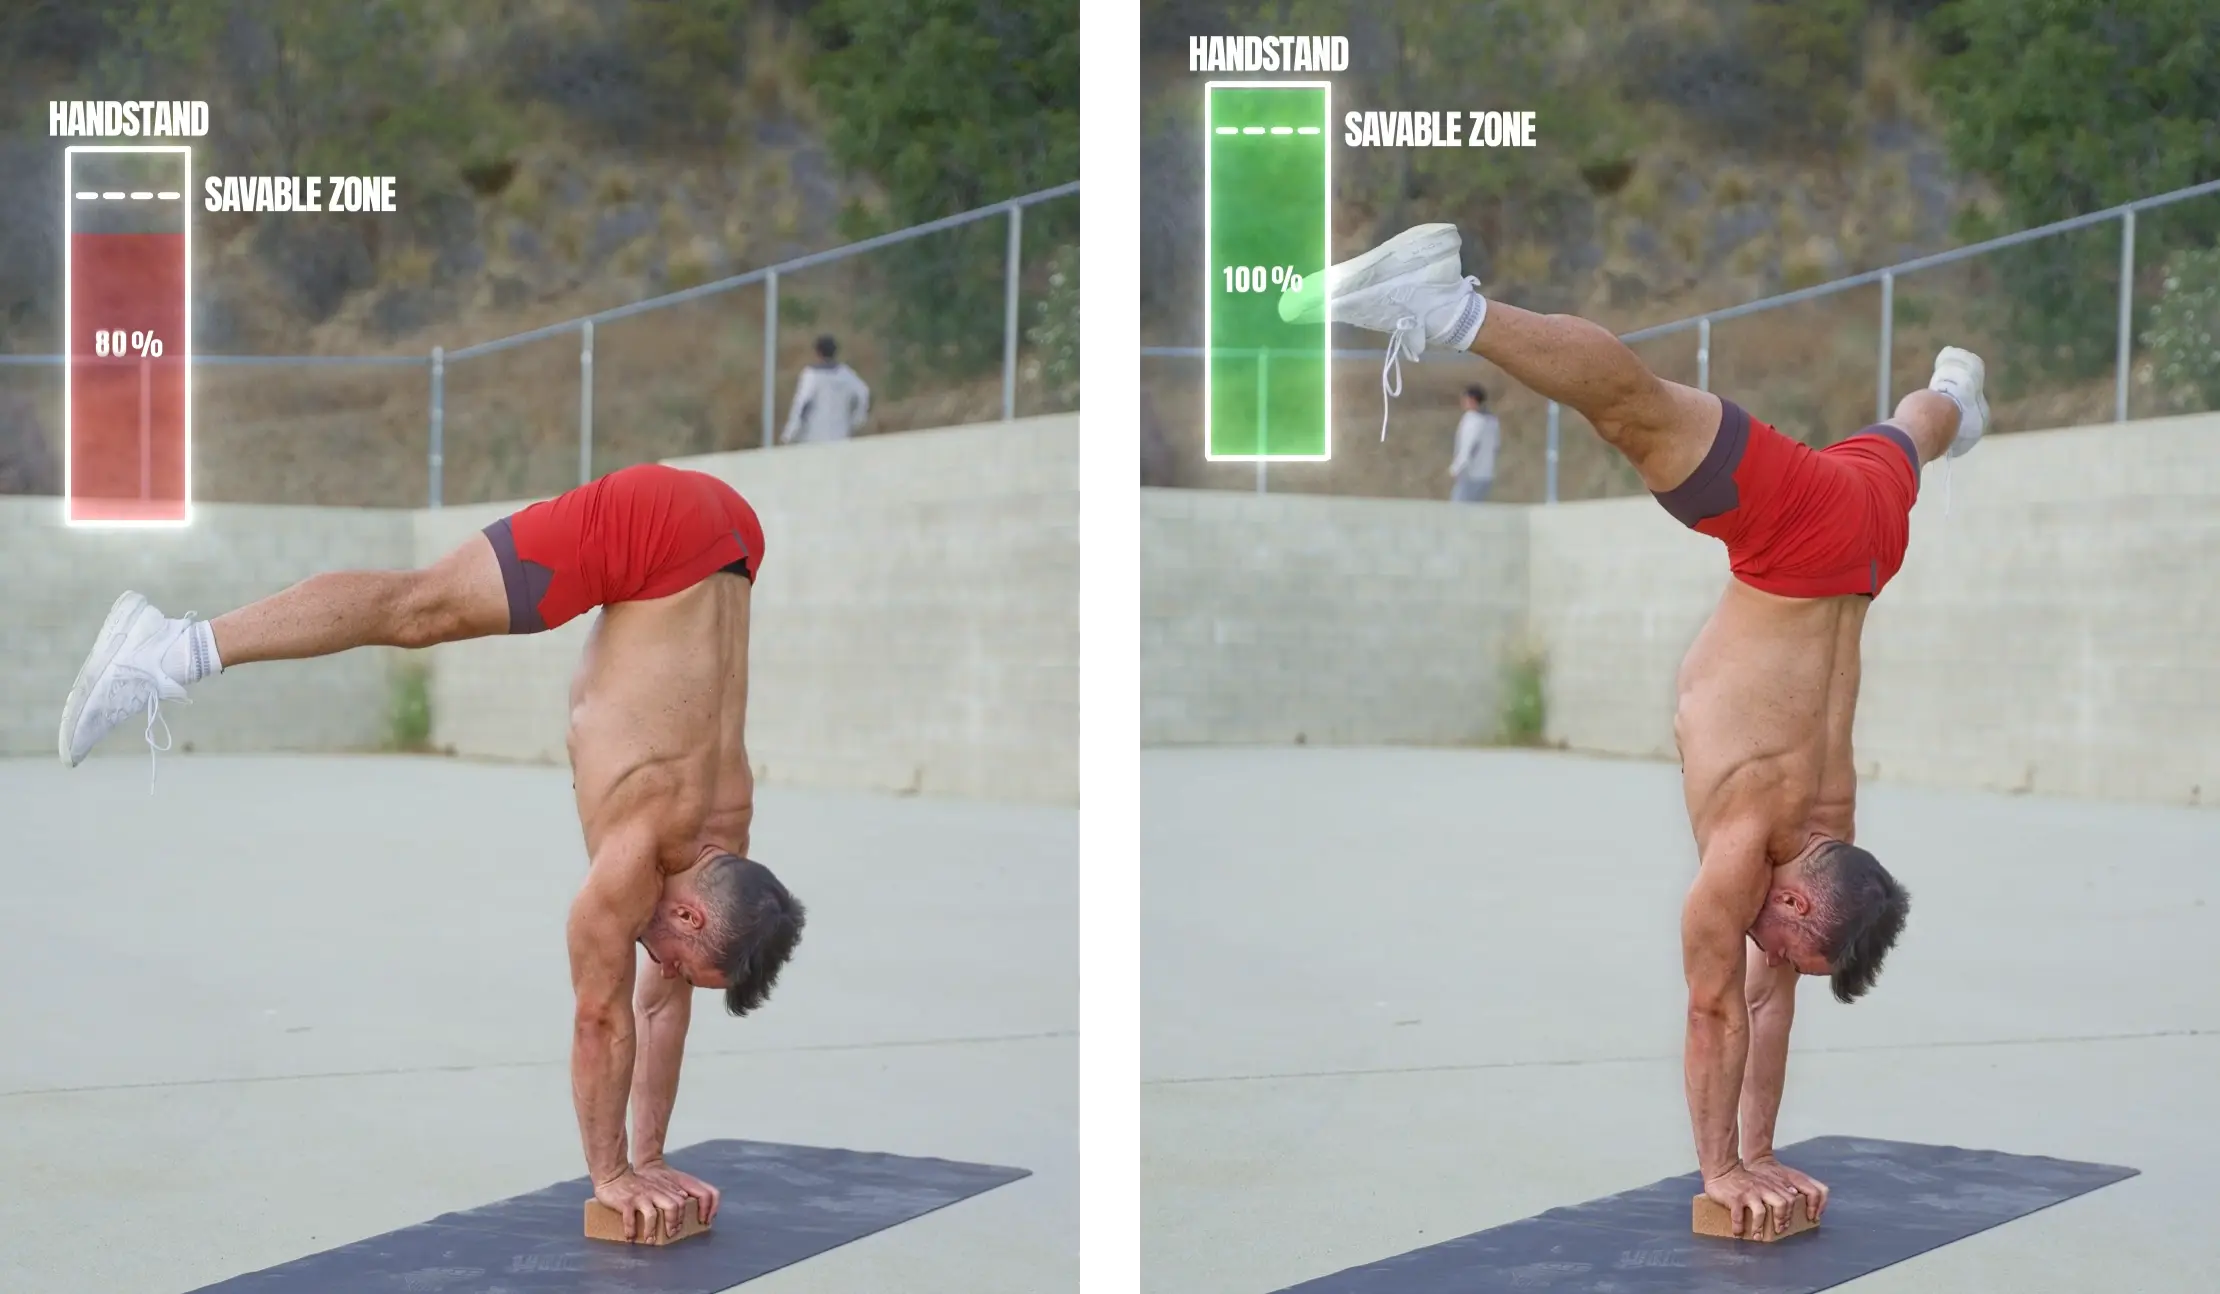
The thing with all of these “special hand position“ handstands is that holding the actual handstand is actually not that hard. Getting up is the tricky part. You might be used to jumping up to approximately 80% and then bending the elbows to catch your weight. This can work with the narrow handstand but is significantly harder. I do not recommend trying to fight for your entries here. Instead force yourself to get all the way up. If you realize you are not making up, abandon the attempt and go again. Once you start practicing and you’ve made it up you’ll feel what I mean right away!
Start not so narrow
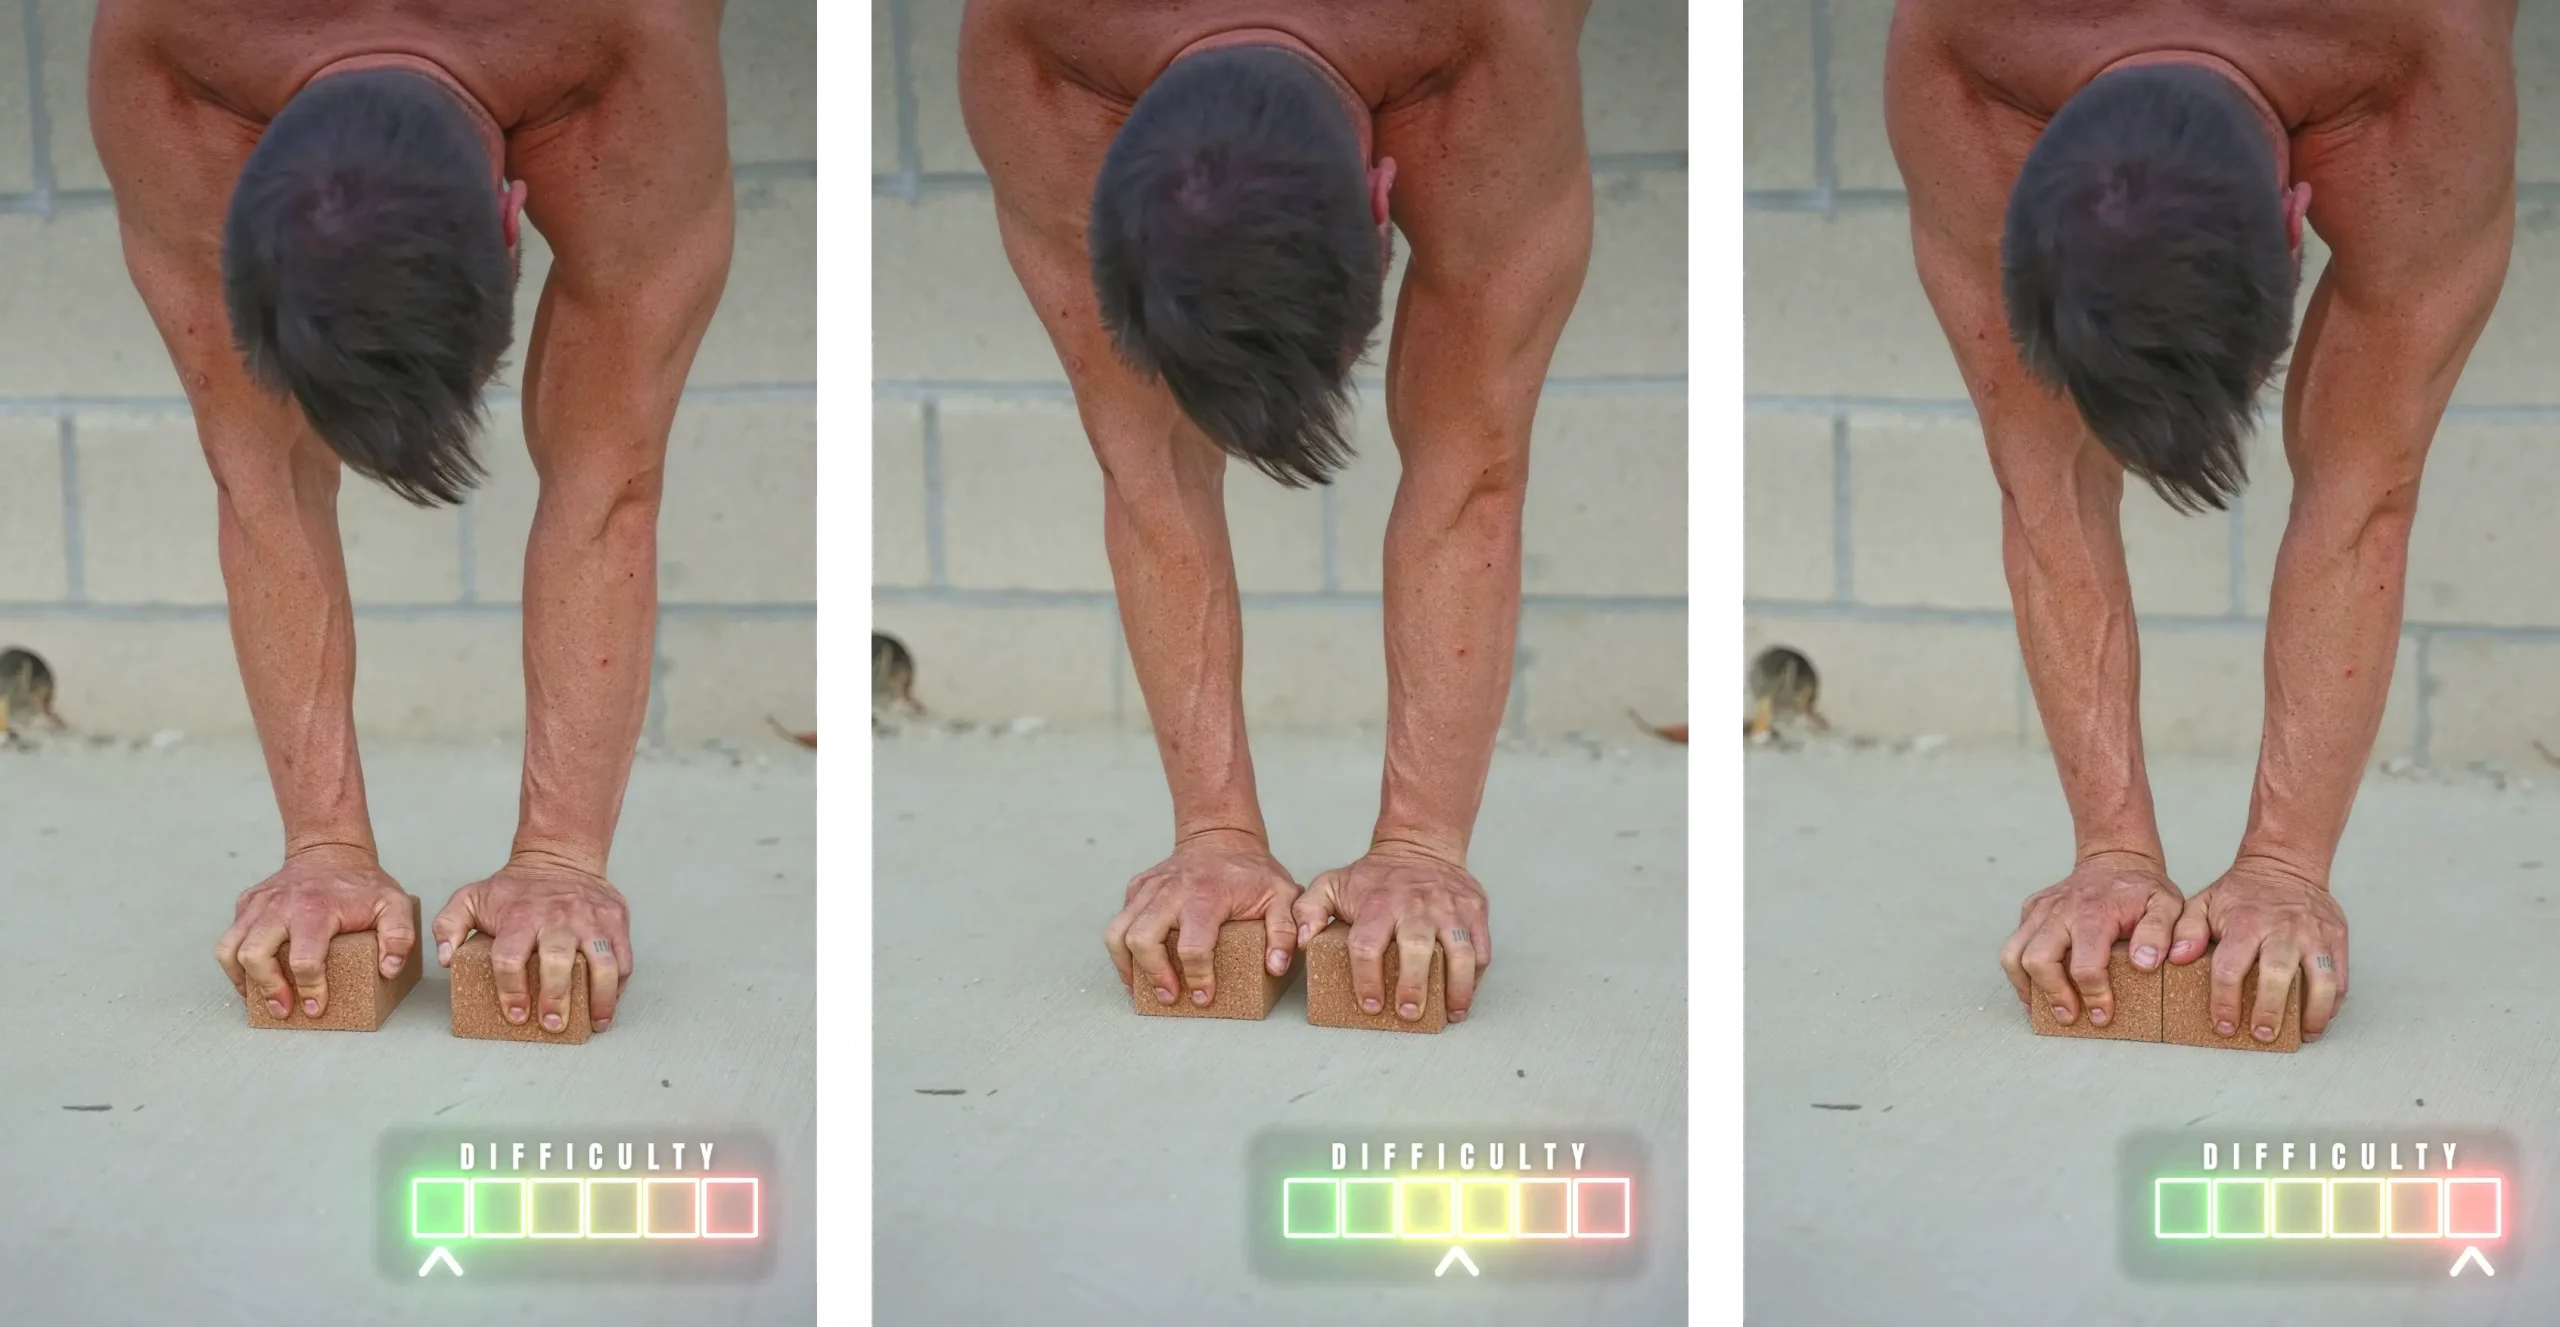
Another great way of progressing towards the narrow handstand is to simply not start just that narrow. Leave a bit of space between the blocks or your hands on the floor and over time move them closer towards each other. This will allow you to naturally build strength and awareness over time without too much stress.
The 2on2 handstand is the closest that you can get to a one arm handstand on 2 hands and with that a necessity on the way towards your first one arm handstand. Narrow handstands will challenge your strength, coordination and balance awareness. I would highly recommend to build them permanently into your training routine if you have not yet!

