
Home | Knowledgebase | HOW TO HANDSTAND
Best Wall Handstand Drills
The chest to wall handstand. No matter your current level we all had to learn this one first. The wall handstand represents the foundation of all handstand practice. No matter if you are trying to take your handstand off the wall for the first time or hoping to master your one arm handstand soon the wall with its wide variety of drills and progressions will for ever your best friend. This wide variety can almost be a curse though. In my exercise library alone I have over 215 handstand technique specific wall drills not taking in account any kind of conditioning work. Deciding for a best one is impossible but choosing the right wall handstand drill for you is essential.
Is doing a handstand against the wall good for you?
Training the handstand against the wall is absolutely essential for anyone who wants to improve their upper body strength and coordination.
Spending time upside down at the wall will benefit you the most to help you improve your handstand position no matter your current level. Especially if you are already able to do a free handstand of the wall.
No matter if you are practicing yoga, gymnastics or bodyweight fitness training handstands with your feet up the wall is a must.
Are handstands against the wall hard?
Whilst handstands against the wall require a bit of practice they are not hard. Since we are able to take balance out of the equation you will be able to wall handstand with just a bit of focused practice. Your body and muscles will adapt quickly to being upside down with your hands on the floor and the blood in your head.
How to do a Handstand on the wall?
Start easy. A plank is basically a wall handstand just that your toes are not very high up. Walk your feet closer towards your hands and keep your shoulders on top of the hands. Now elevate your toes on a yoga block and later a chair. You are almost there. You can add a couple more progressions here or straight away go for the wall handstand.
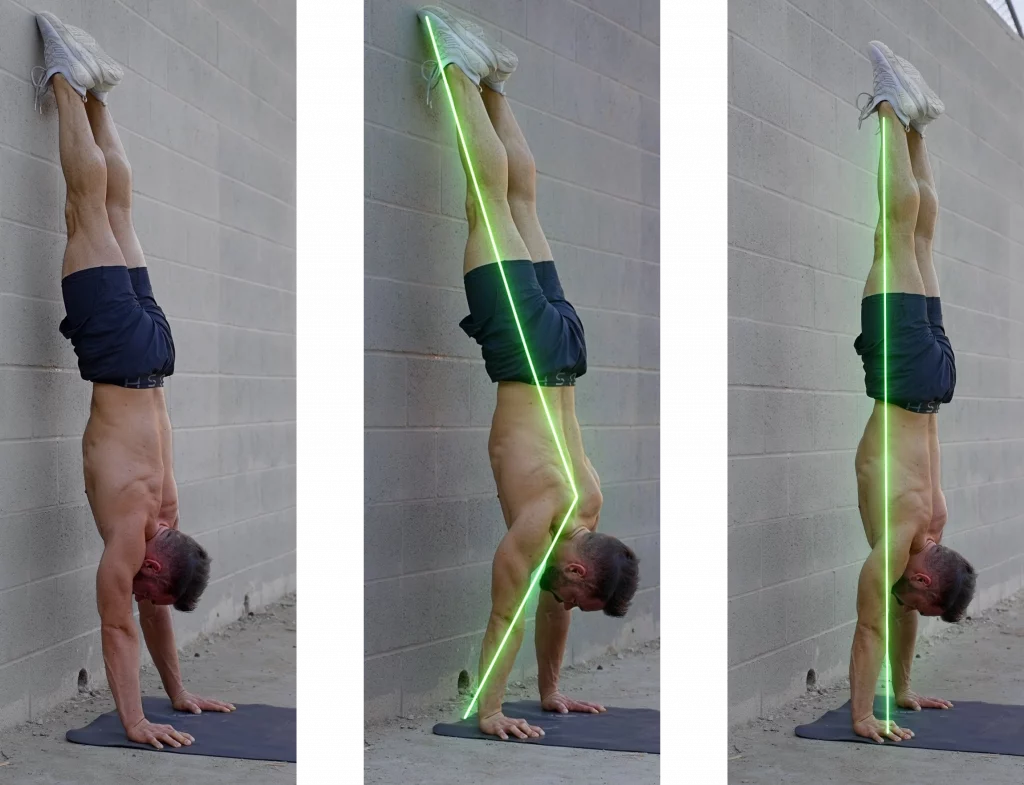
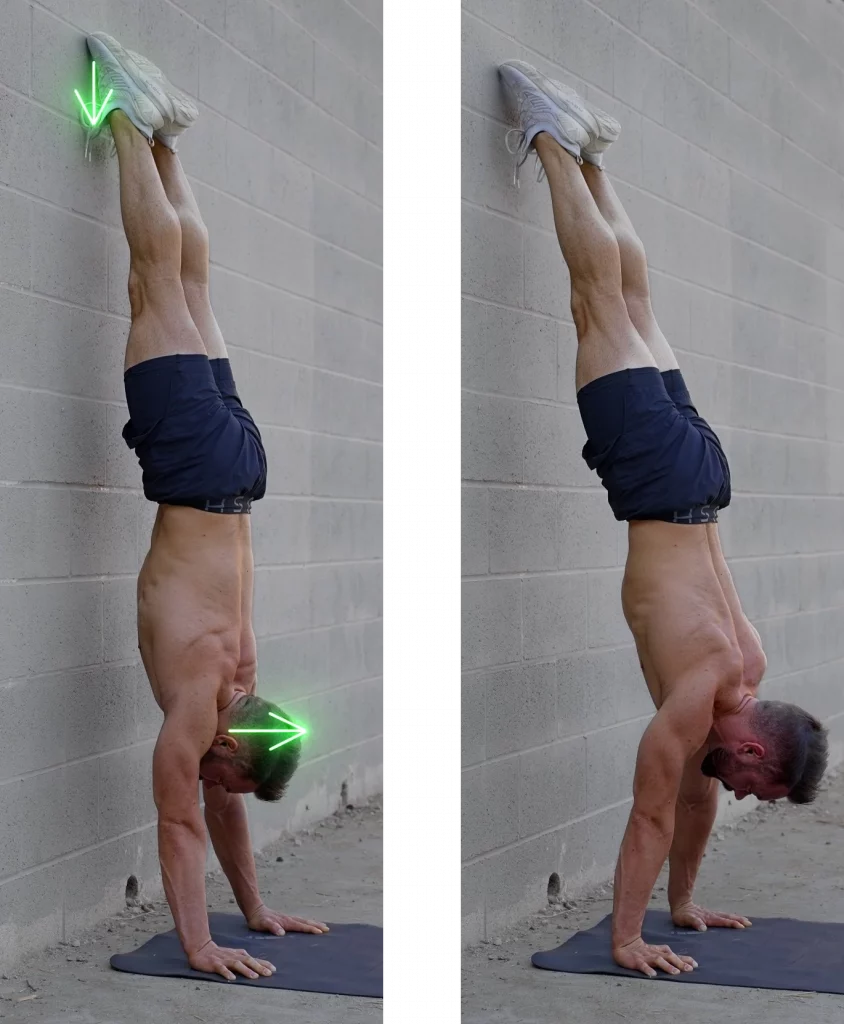
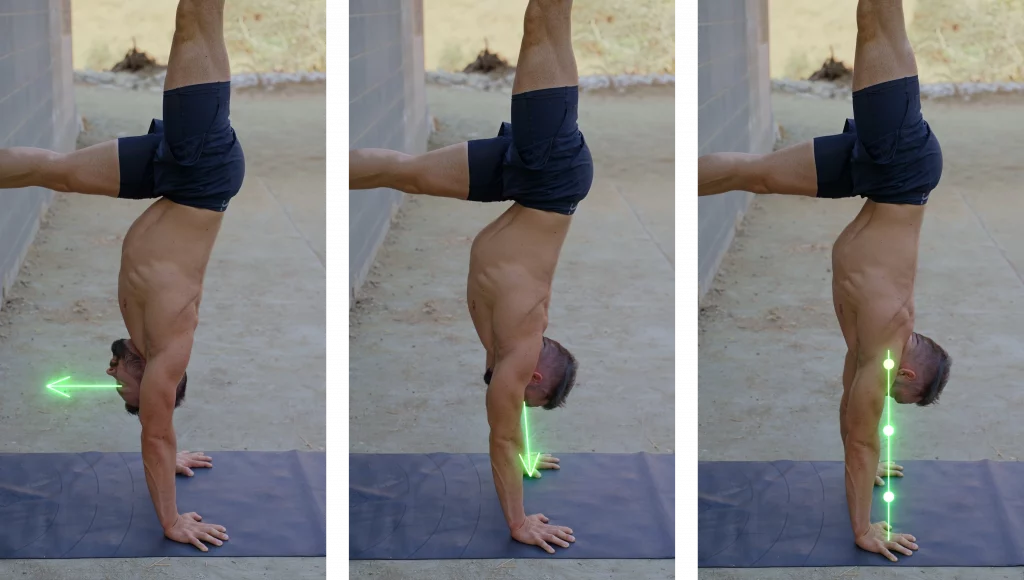
Walk your feet up the wall, engage your upper body, core and legs fully and walk as close as you can. In a regular chest to wall handstand you have to make sure to keep your hands shoulder width apart and to look them. Keep your elbows locked, your scapular elevated and to only be touching the wall with your feet.
How to determine what the best exercise is?
As mentioned above the list of wall handstand exercises that you can practice is endless yet your time is valuable and you deserve to be picky! We want to find the drill that benefits you the most on your journey towards upside down and body weight mastery.
Understand the main components of handstands
Few things have to come together for your handstand to work well. You need upper body and core strength, legs stability and of course a great feeling for balance. There are drills that allow you to be practicing all of these things at the same time and there is always at least one exercise that will allow you to focus on 1 weak spot at the time.
Get to know your own weak spots
Most of the time when you are training handstands you are alone in the room. This means you have to become your own coach. Get to know your body and your handstand. You first have to understand the exercise and see what it can do for you and then you have to learn to combine this knowledge with your own practice.
A great way of staying self critical and to monitor your progress is by making a video of your attempt and to compare them to my videos from the exercise library. Check if your scapulas are performing the right amount of elevation, if your hips are placed on top of the hands and if you are able to maintain control throughout the entire workout.
Decide for a level appropriate for you
Once you understand which aspect of your handstand you have to improve and which exercise will do exactly that for you we have to then adjust the exercise towards your level. This is another thing that I absolutely love about training handstands: every exercise can be adjust towards any level. You can always make drills easier or harder!
![]()
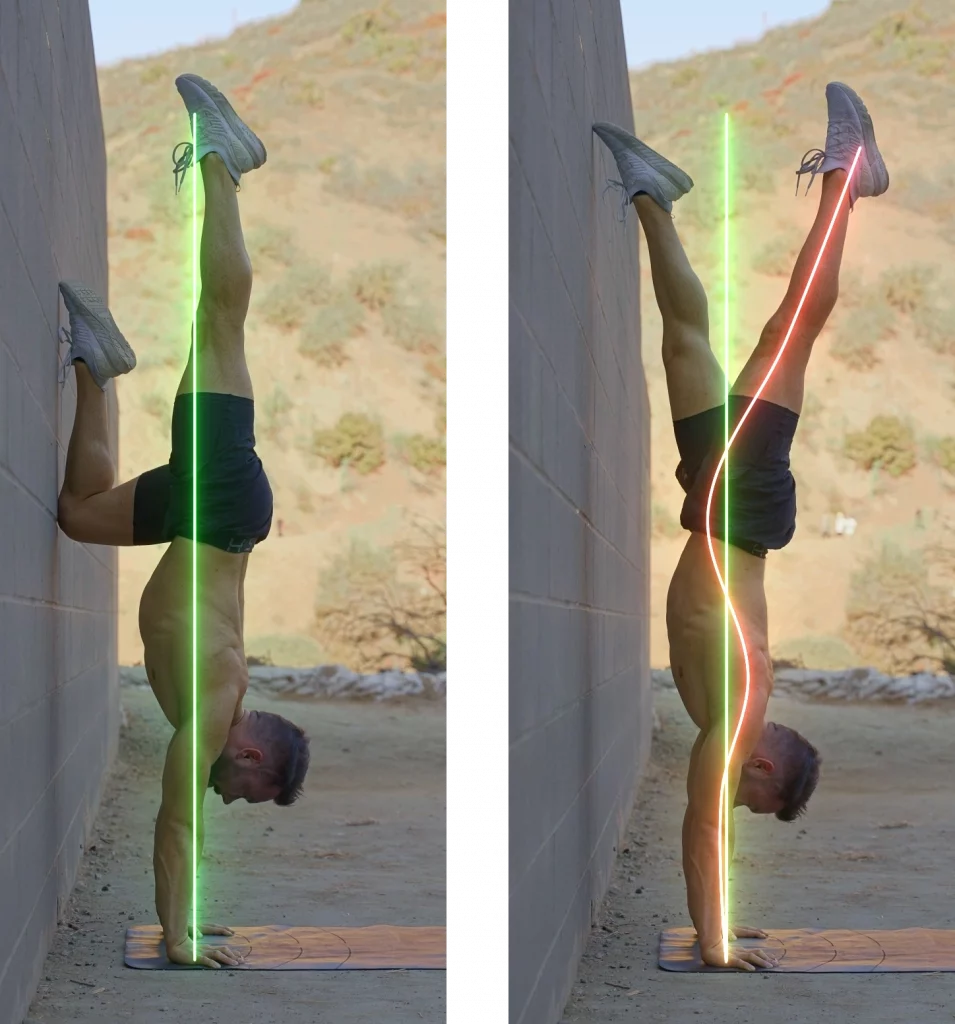
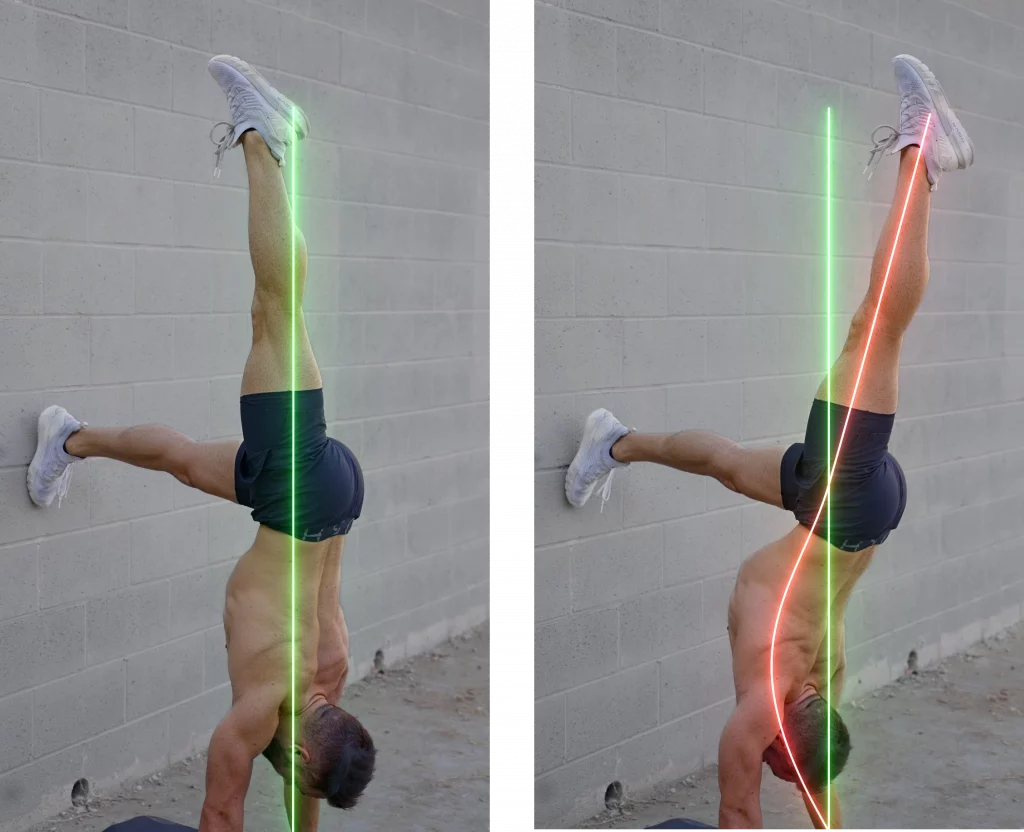
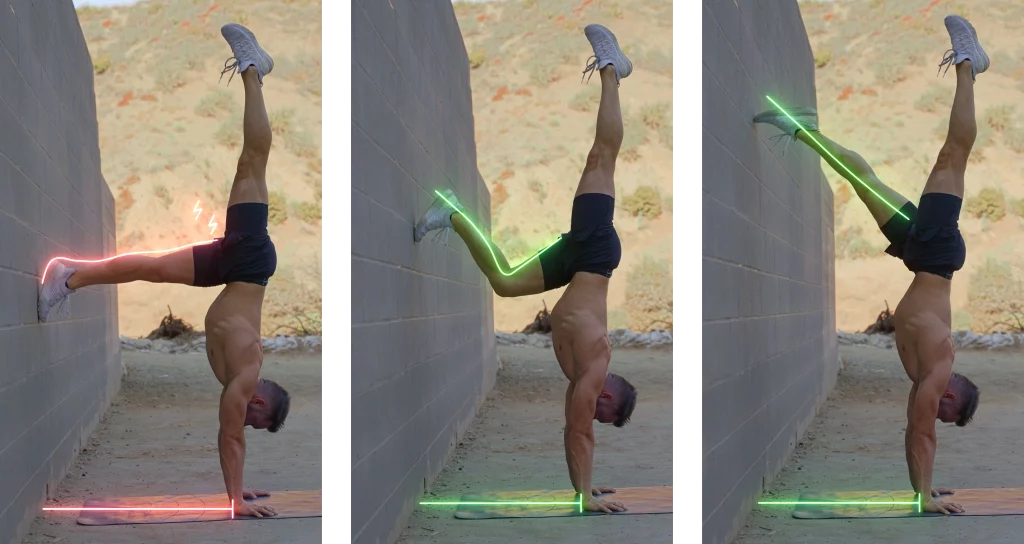
Single Leg Tuck Slide
This one can be perfect for absolute beginners but the version that I like the most is a bit more advanced. The advanced version is rather challenging on your full body coordination and you will be required to strengthen your upper body before performing this one to perfection.
How to do single leg tuck slides
Place your hands on the floor and align your shoulders and hips not on top of your wrists but on top of the center of your hands. Do not place to soles of your toes against the wall. Instead point them so you can slide the top of your foot.
From here bring 1 foot away from the wall and align it on top of your already aligned hands, shoulders and hips. Pull the knee of the foot that stayed on the wall down in a straight line and bring it back up on that same straight line.
Keep your lower back straight or even in a slight anterior pelvic tilt. Nothing but the wall leg should move. Neither the shoulders nor the opposite leg should change the position that they are in even a bit.
Why are they so great?
This tuck slide variation is extremely challenging for your full body strength, balance and weight distribution. Perfecting these will greatly benefit you on your journey towards a handstand without the wall.
Common mistakes and regressions
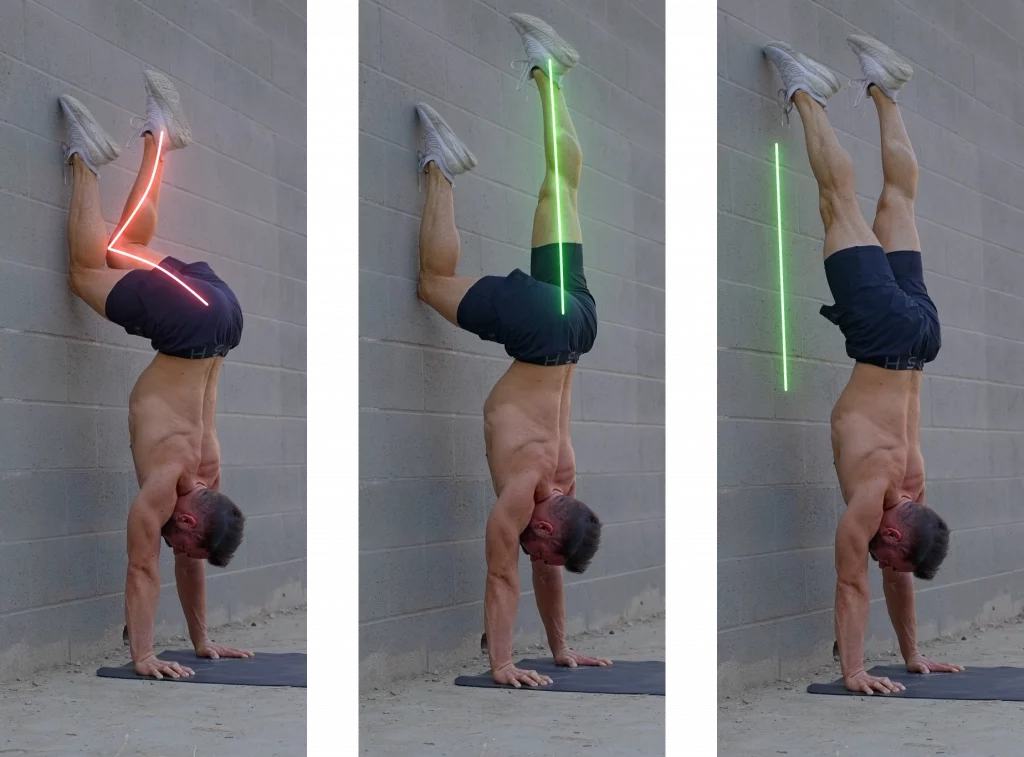
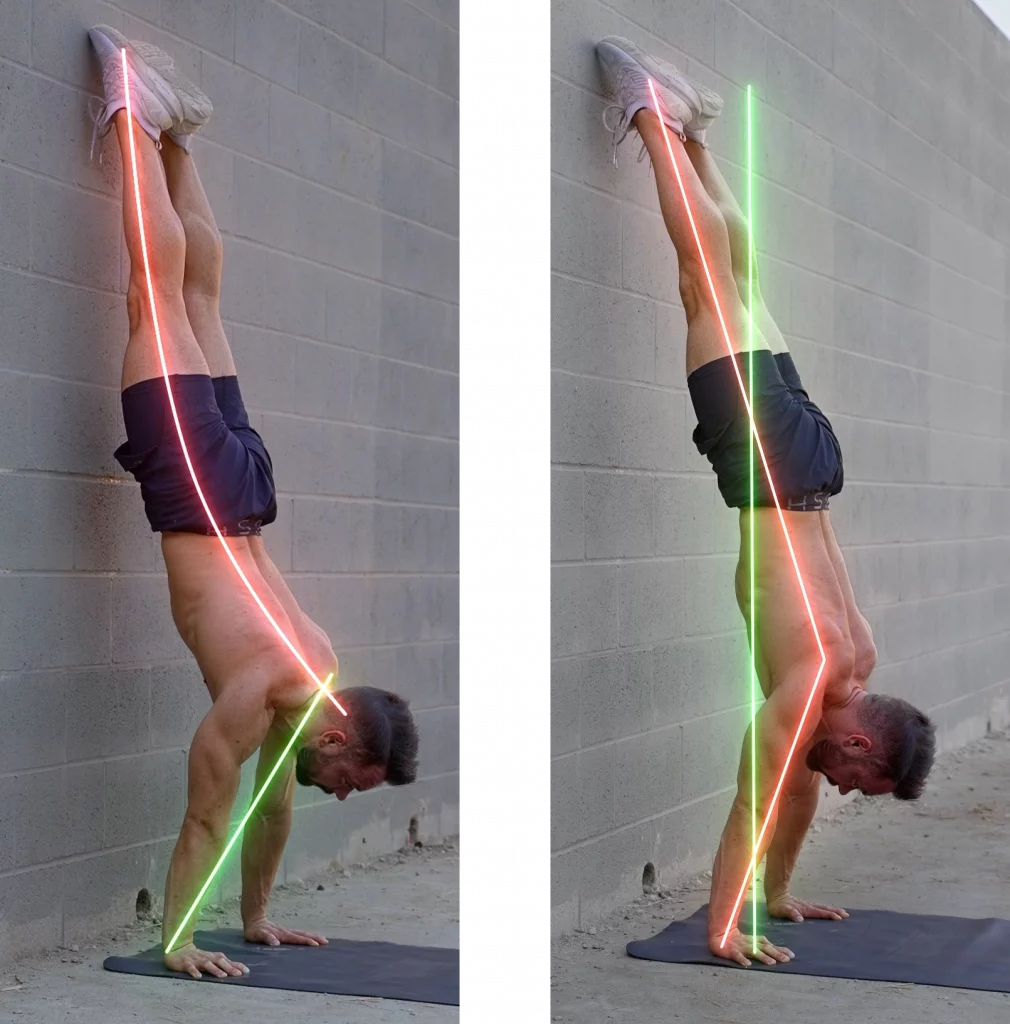
There are 2 main issues that happen during the single leg tuck slides. The first and biggest problem lies in the shoulders. They have to stay on top of the center of your hands. If you lean them towards the wall to your line will arch and you won’t be fingertip heavy anymore causing you to lose connection with the ground and also ultimately control.
Secondly, we often forget about the top leg. It is hard to keep it in immobile. It might feel like it is perfectly on top but really it is moving all over the place. Grab your phone and shoot a video to check on yourself.
If you are not ready for the more advanced version with the foot off the wall simply do not take it off just yet and join both ankles together. Keep weight on the wall with both feet. Like this you are able to focus on your shoulders and hips only.
How can I use them
You should place this exercise towards the beginning of your workout when you still have plenty of energy but you are warming up balance and awareness.
Slide Away
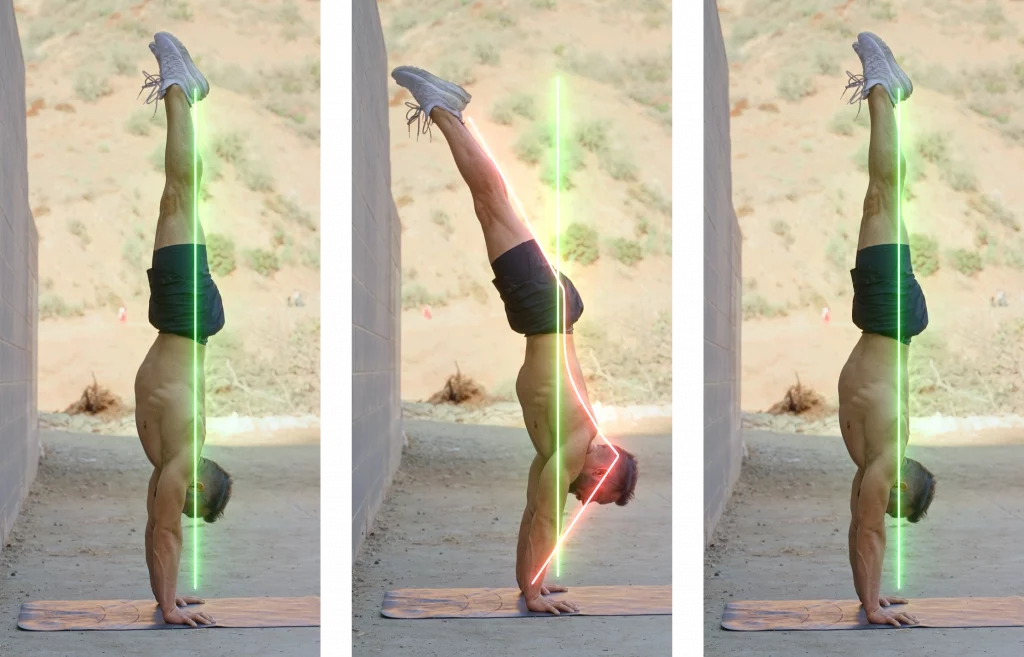
This is the one. My all time favorite drill. My grandfather was the head coach of the East German gymnastics team and he came up with this drill. The ultimate drill to improve straight arm handstand strength, to get away from the wall and to learn how to save ever single kick up to handstand.
How to do a slide away
From your regular wall handstand lean your shoulders forward. Keep your body perfectly straight. Lean forward until your toes lift off the wall, travel your hips on top of the hands and bring the shoulders back until they are aligned. Stay here and work on balancing your handstand.
If you are scared of falling forward onto the floor grab a mat. It can give you the confidence that you need to commit to the drill fully and to get off the wall. Place the mat right behind your hands so you can safely roll on it. If you do not have a mat at home you can always use the mattress from your bed to make sure you can bail safely. Use this drill to get your first feeling of freestanding handstand balance.
What do Slide Aways do for me?
Handstand Slide Aways are the ultimate Handstand exercise to strengthen your scapular muscles, arms, wrists, core & legs. No matter if you are a beginner or rather advanced you will benefit greatly from the slide away. You will finally be able to start practicing handstands without the wall.
Every time that you get up into a handstand no matter if it is a tuck or a kick up you have to open your shoulders the way you are forced to do in the slide away. Additionally, every time that you lose control over your body in your handstand you come through this exercise.
Common mistakes and regressions
The main issue that I see during the slide away with beginners is that the body does not stay straight. While this can be due to a lack of strength the main issue here is usually coordination. Do not pike at the hips and do not arch your back. You really have to focus on your shoulders pulling forwards whilst everything else stays perfectly in aligned.
When performing the slide away it can happen that you bring too much momentum and you will feel the urge of walking your hands on the ground. Walking needs to be avoided. Instead use your fingertips and wrists to search for proper alignment.
For beginners who do not feel ready to take the legs off the wall just yet cut that part of the movement out. Lean forward and push the shoulders back up. Prepare your muscles for this new pressure. Do not rush into attempting free handstands. There is no point. You have to spend quite a bit of time upside down before every muscle of your body is ready.
A great way to measure the progress of your slide away is to look at the distance between the wall and your hands. The further you come away whilst being able to maintain a straight body position the stronger you are.
How can I use them
The wall Slide Away drill should be placed during your handstands practice at the moment when you are the most warm but still have almost all of your energy. It takes the body a while to really get into it. Balance is something that needs to be warm just like your muscles.
Once ready start practicing the slide aways to ease into the idea of training your handstands without the support of the wall. Being comfortable at this drill is a decent sign that you are ready for free handstands without the wall.
L Handstand Shrugs
This last drill handstand is the perfect blend between coordination and scapular elevation strength. L Handstand shrugs will make your blood boil and help you engage your shoulder muscles like never before.
How to do L Handstand Shrugs?
Walk up the wall and place your hands on the ground in a distance about as far as your legs are long. Place the soles of your feet on the wall. Get well aligned with your shoulders on top of the center of your hands and engage your back. Slowly lift 1 leg on top. Do not kick it up with momentum as you will over. Instead move the leg slowly to be able to stay the boss of your handstand.
Once perfectly aligned slowly sink into your shoulders and push back out. Keep your legs immobile and your core fully engaged. Push the ground away and feel how you are getting taller in your shoulder in every single rep.
Absolutely make sure to train both sides equally here to make sure you do not develop any misbalances in your handstands.
Why are they a must in my routine?
Scapula elevation strength and coordination is absolutely key when it comes to handstands. Your position and how well you will be performing in your handstand is entirely determined by your shoulders elevation.
The L handstand shrugs do not only require you to push up vertically whilst balancing with the shoulders 3 dimensionally but also are you forced to lift the entire weight of your body through its range.
Common mistakes and regressions
Go slow. One of the main issues here is that people are trying to rush. Only by going slow will you be able to be sure that the position in your handstands stays consistent and that you can harvest the full benefits of this drill.
Also make sure to focus on keeping your shoulders in a vertically aligned only. Your arms have to be right on top of the center of the hands from the ground up. Do not push them towards the wall. A big problem is that we like to push the shoulders open into flexion instead of elevation.
If you are not able to do the shrugs with 1 leg on top you can either just work on bringing the leg up and then back to the wall or your can also move the soles of your feet away from the wall and onto a box or table to so the shrugs there with less forward pressure.
Bonus tips: bend your knees and place them on the table to make this even more beginners friendly.
How can I use them
Place 1 or 2 sets of scapular elevation drills at the beginning of your workout to wake up and warm up the involved muscles but the main place for elevation conditioning is at the end of your workout to squeeze out what ever is left and to create necessary muscle to support your weight upside down when doing handstands.
No matter your age, current fitness level, time on hand or goal. These exercises and especially their progressions will greatly help you improve your handstands.
Combine these tips to create your own workout routine. Start by warming up, sprinkle in some stretches and adapt where you need to. You can do this after or during your yoga session, before a regular calisthenics strength session or as its own separate workout.


