
The concept
For someone who is just starting out with handstands all this can be someone strange and confusing but bare with me as I will aim to explain things as simple and easily understandable as possible
The Problem
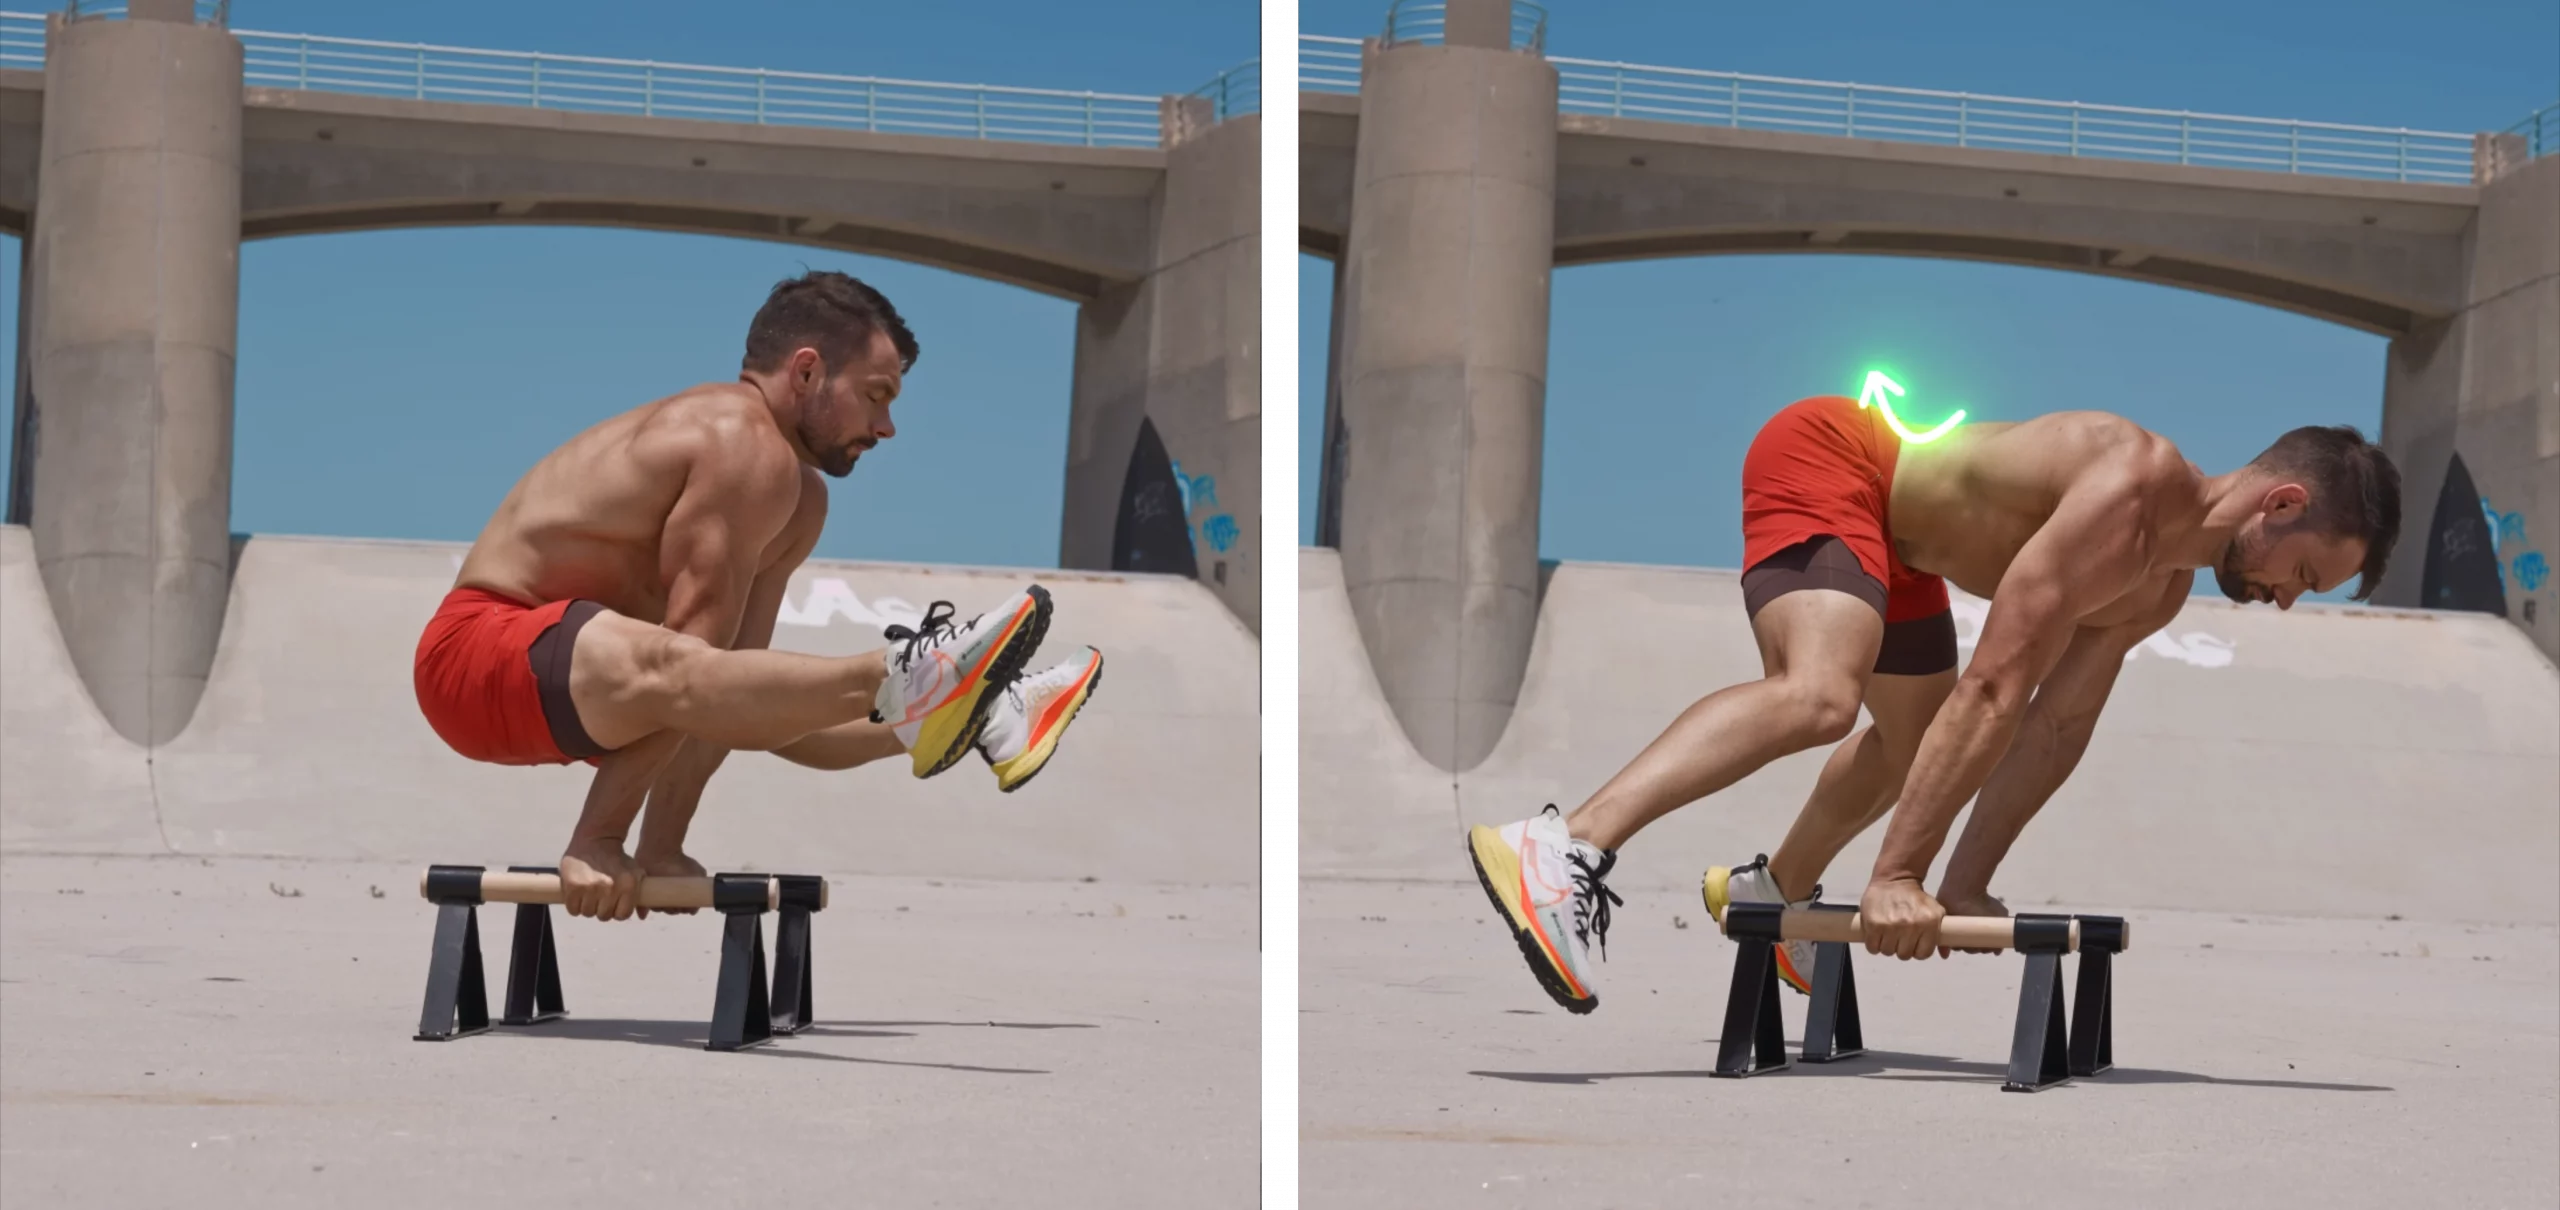
In the Tuck, L and press to handstand you have your legs on one side of the body. This creates an uneven balance of weight with significantly more weight on the side of the wrists where you don’t have fingers to push against. This means that you collapse and fall if you don’t do anything against it.
Most of us will naturally first think of shoulder strength when resisting gravity but your shoulders alone will not support the weight of the legs. you have to connect the shoulders with the legs and hip through the back

The Solution
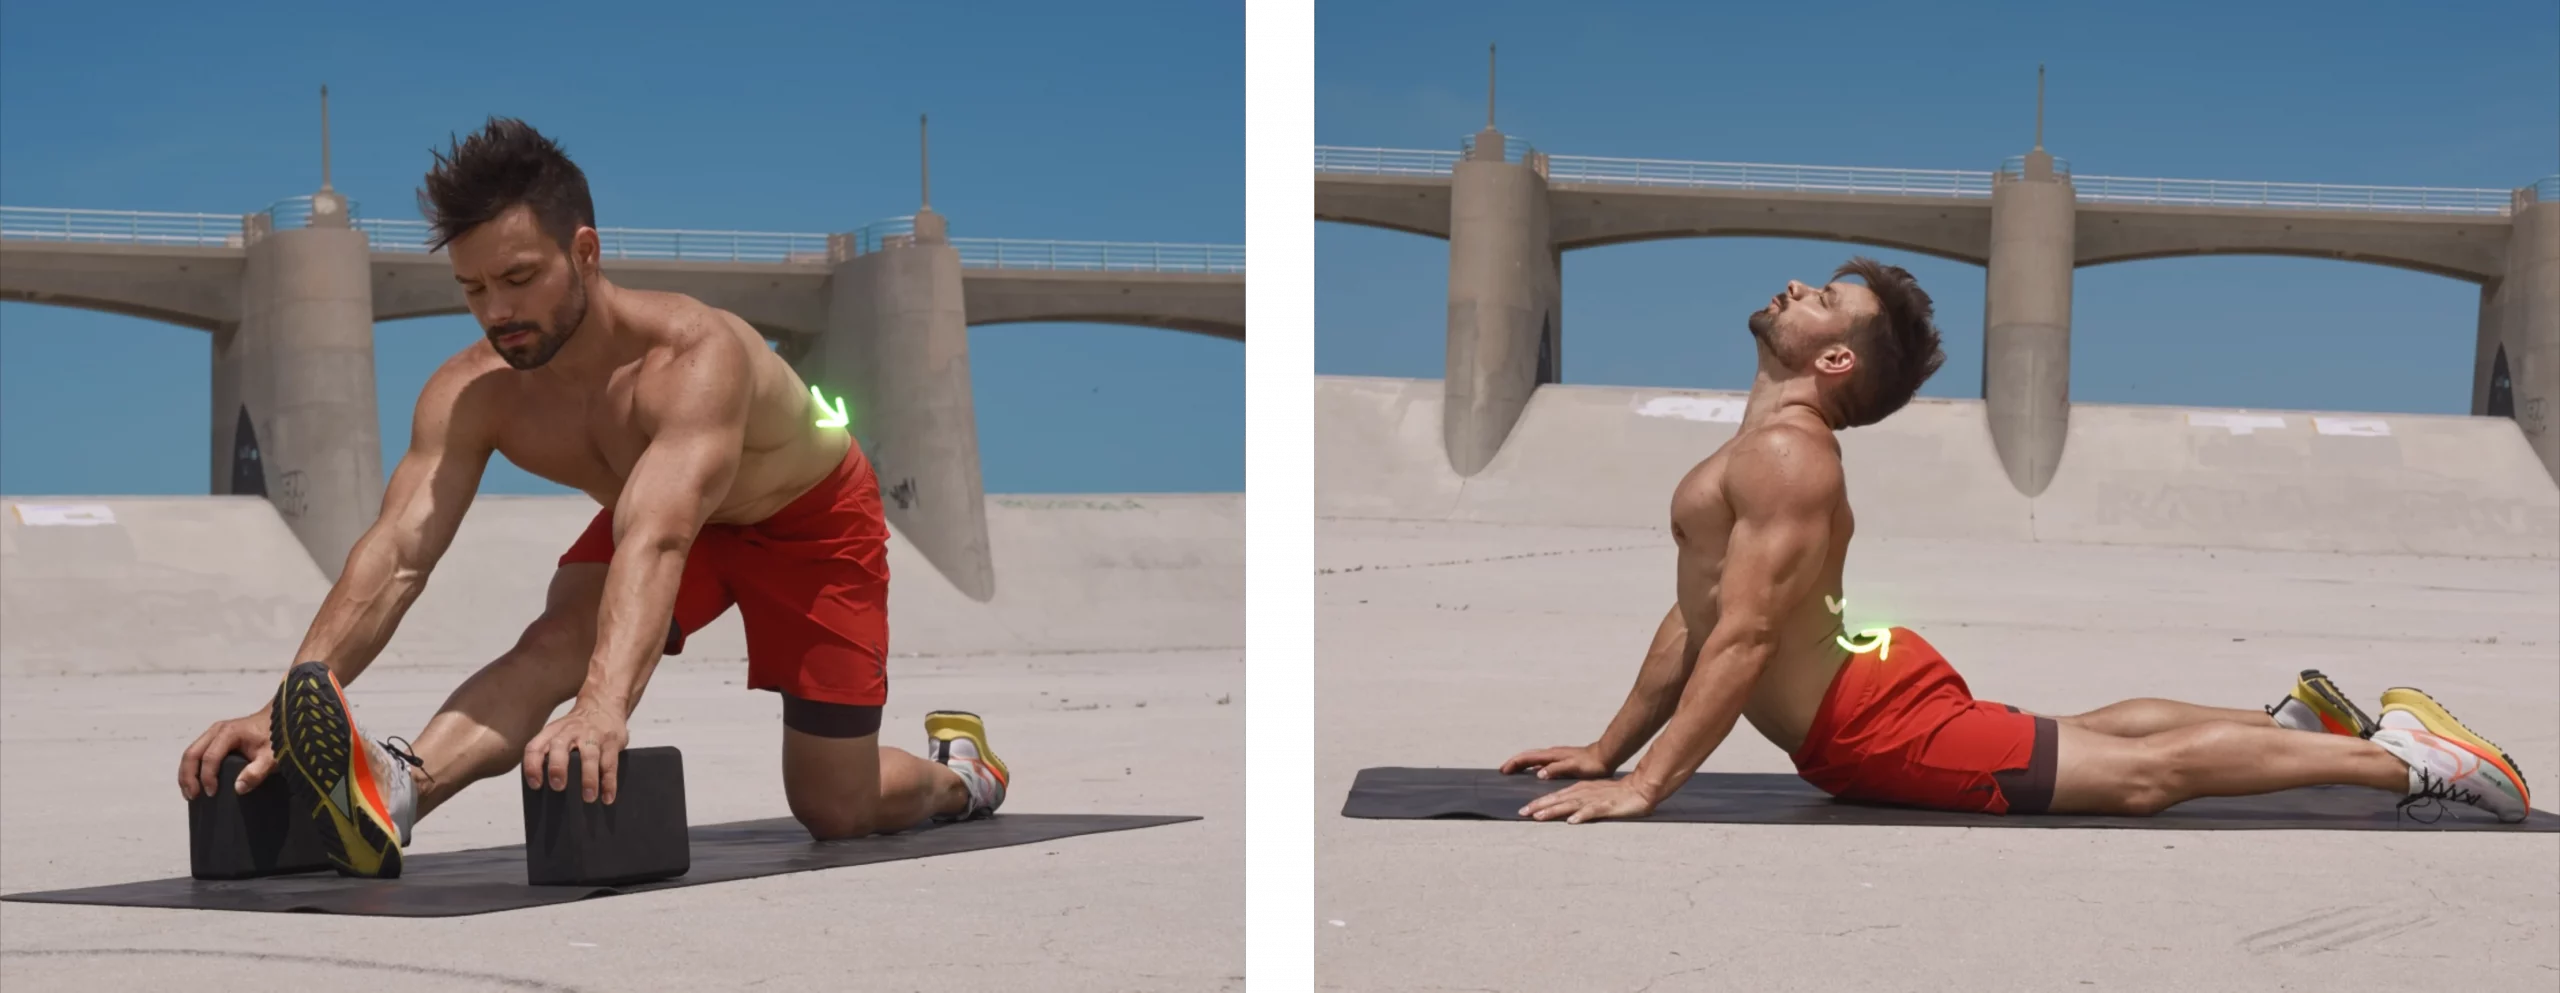
The solution is to engage the lower back. Now it doesn’t matter if you are sitting in the office, standing in the bus or laying on the sofa simply engaging the back is not an easy feat. Try it! How does it feel?
Exactly. You feel nothing. So instead of just trying to tense up we will actively pull on the hips with the back. The idea is to engage the hips towards the anterior pelvic tilt as if we were trying to arch the lower back. Unless you are extremely hyper flexible in your back your lower back will not arch and your body will do exactly what’s needed.
Pulling the hips towards the anterior pelvic til will connect your legs with your shoulders. You will be able to travel pressure through your body into the floor and take control of your position. As soon as your back relaxes your legs will drop and you will fall.
How to train
for this?
Understanding this all is great but actually doing this is a whole different story. We have to train to get good at this concept. We want this concept to happen automatically and as much as possible to gain as much control as humanly possible.
Mobility
The first step here is to understand that the more flexible you are the easier it will be to engage into this direction. The more range of motion you have available the easier it will be to push. Think of it like this:
a snail travels only very slowly. You will see or feel little to no change when watching the snail for a minute. A giraffe on the other hand takes huge steps. You will really know whats going on when it’s walking. It will be the same with your lower back.
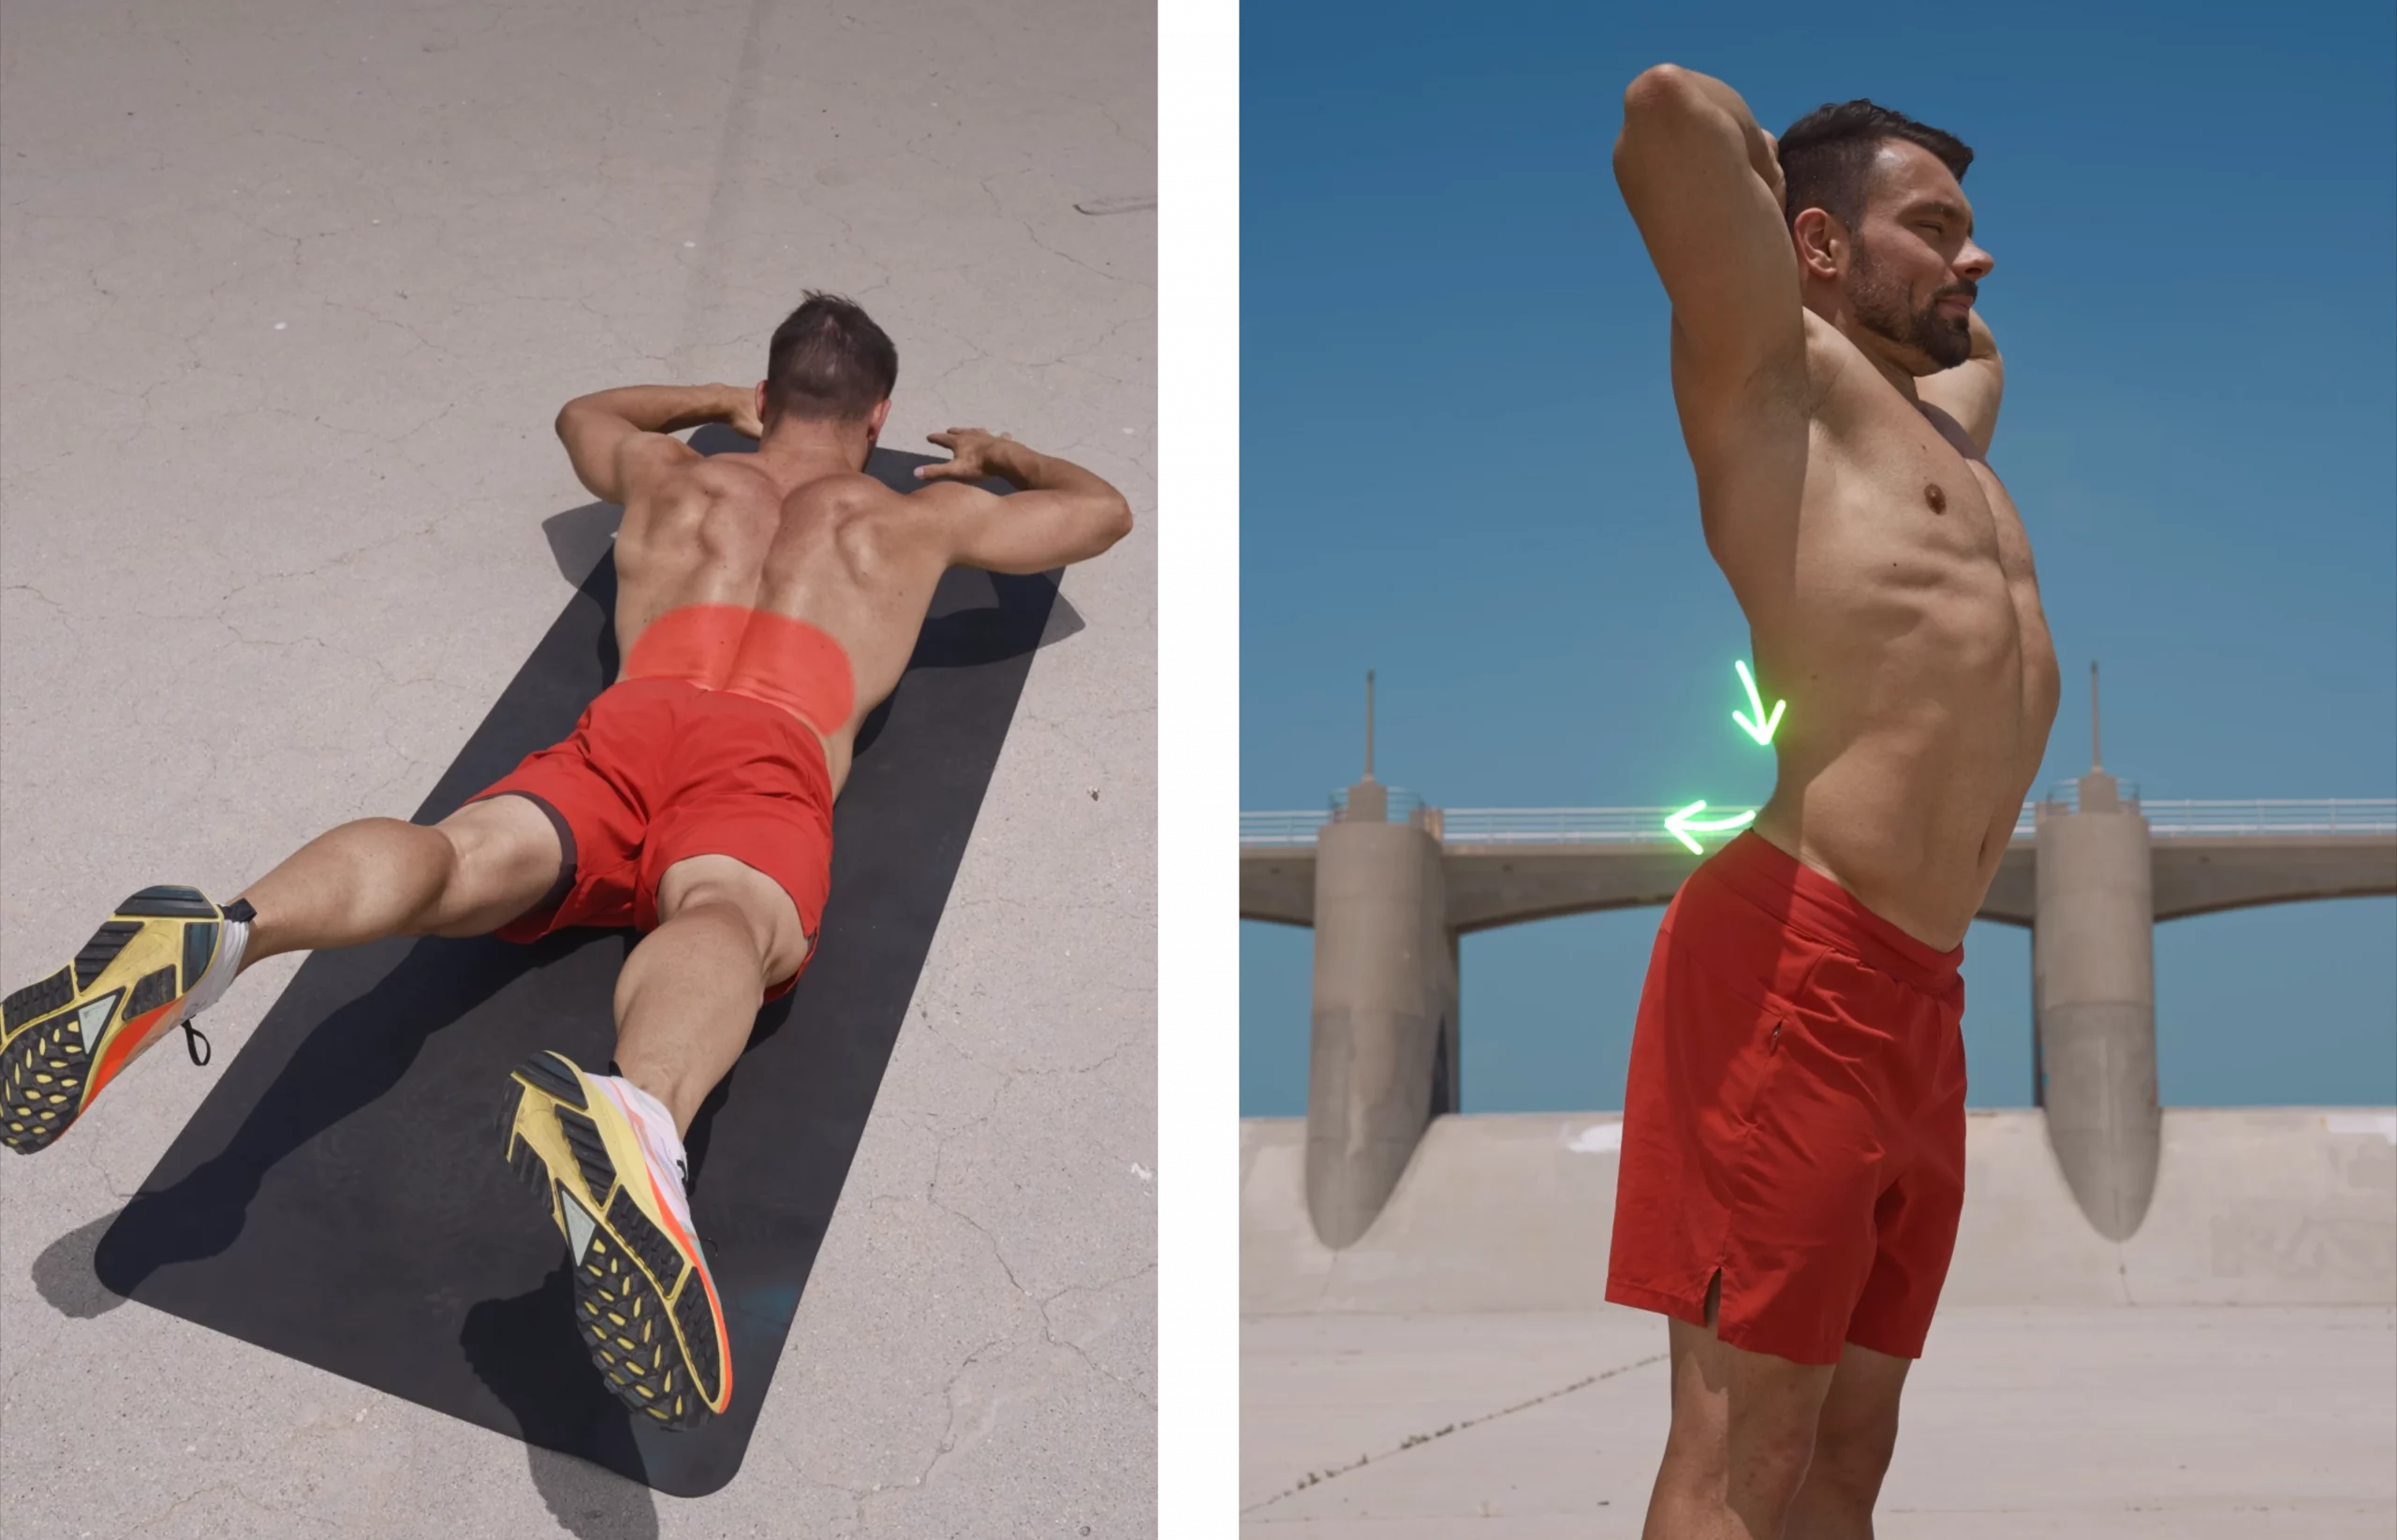
Invest not just into the typical hamstring, pike and pancake stretches but also in some basic back bending like cobra to increase your lower back mobility.
Coordination
Once we have created the necessary range we now have to get into that range. This is not easy. Identifying and using the lower back muscles to pull the hips into an anterior pelvic tilt is possible for everyone but getting so used to to be able to do it upside down might take some time.
One of my favorite progressions for this is doing an L Handstand where the quads are laying on a table. Now slide your legs away from your hips on the table to round the lower back. then pull them towards your and past their starting point to arch the lower back. You can even stand foam rollers or similar behind you to make sure your shoulder is not moving.
To take this up a notch train with your back close to a wall and try to touch the wall with your coccyx but do not allow your shoulders to move.
Advanced Coordination
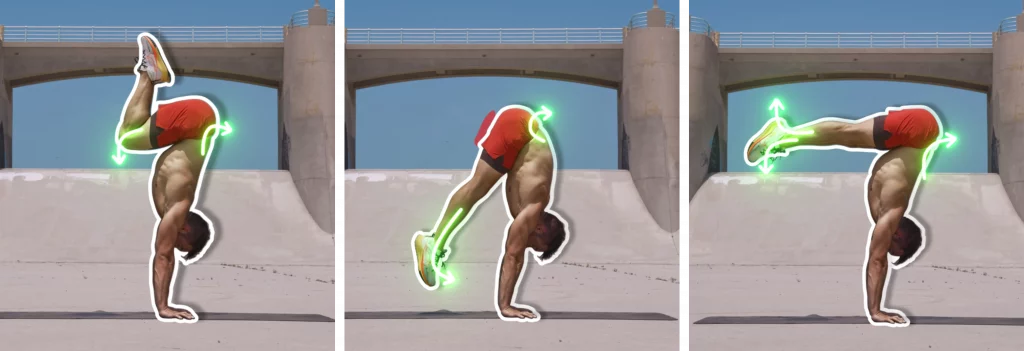
But this is not all. On top of pulling the hips towards the anterior pelvic tilt we also have to pull the legs down. In the tuck handstand we want the knees as close as possible toward the chest and in the press to handstand we want the feet by the wrists to create a mechanical advantage.
This is a completely opposite force which truly is what makes this movement concept so interesting.
You now need your hip flexors to fire up to pull your legs down inside of the hips without letting this affect the position of the hips. Not easy but definitely achievable with some training.
Truly mastering this will give you a completely new understanding to how isolation inside of your body works and what you are truly capable of. All of your movements will start to appear more effortless and become more efficient.
Strength
Last but not least strength plays a huge aspect here as well. You truly are only as strong as your weakest link. If you back is not as strong as the weight of your legs plus the applied pressure of the hip flexors your hips will roll and you will fall.
If your shoulders are not strong enough to stay open with all the weight and forces applied to them they will collapse and you will fall towards the front.
Work for each strength components (shoulders, APT, hip flexors) separately. Once you have the needed mobility and coordination work on them all combined to gain full control of your body!
Practical examples
in specific positions
As mentioned above and in the title we see this engagement concept in multiple different positions throughout your handstand practice. Each comes with its own set of special concepts, criteria and difficulties.
The Tuck handstand
Honestly, I personally think the tuck sums up perfectly why handstands are fascinating and because of this concept will for ever be one of my favorite shapes to talk about.
Whilst the tuck is difficult for most beginners it is easiest when it comes to this concept. Your legs are bent so hamstring flexibility is not an issue, you can pull your legs as hard as possible until they are stopped by your ribs and you can pull on your back as much as possible as you won’t arch anyways.
Here basically everything just works without any bigger restrains.
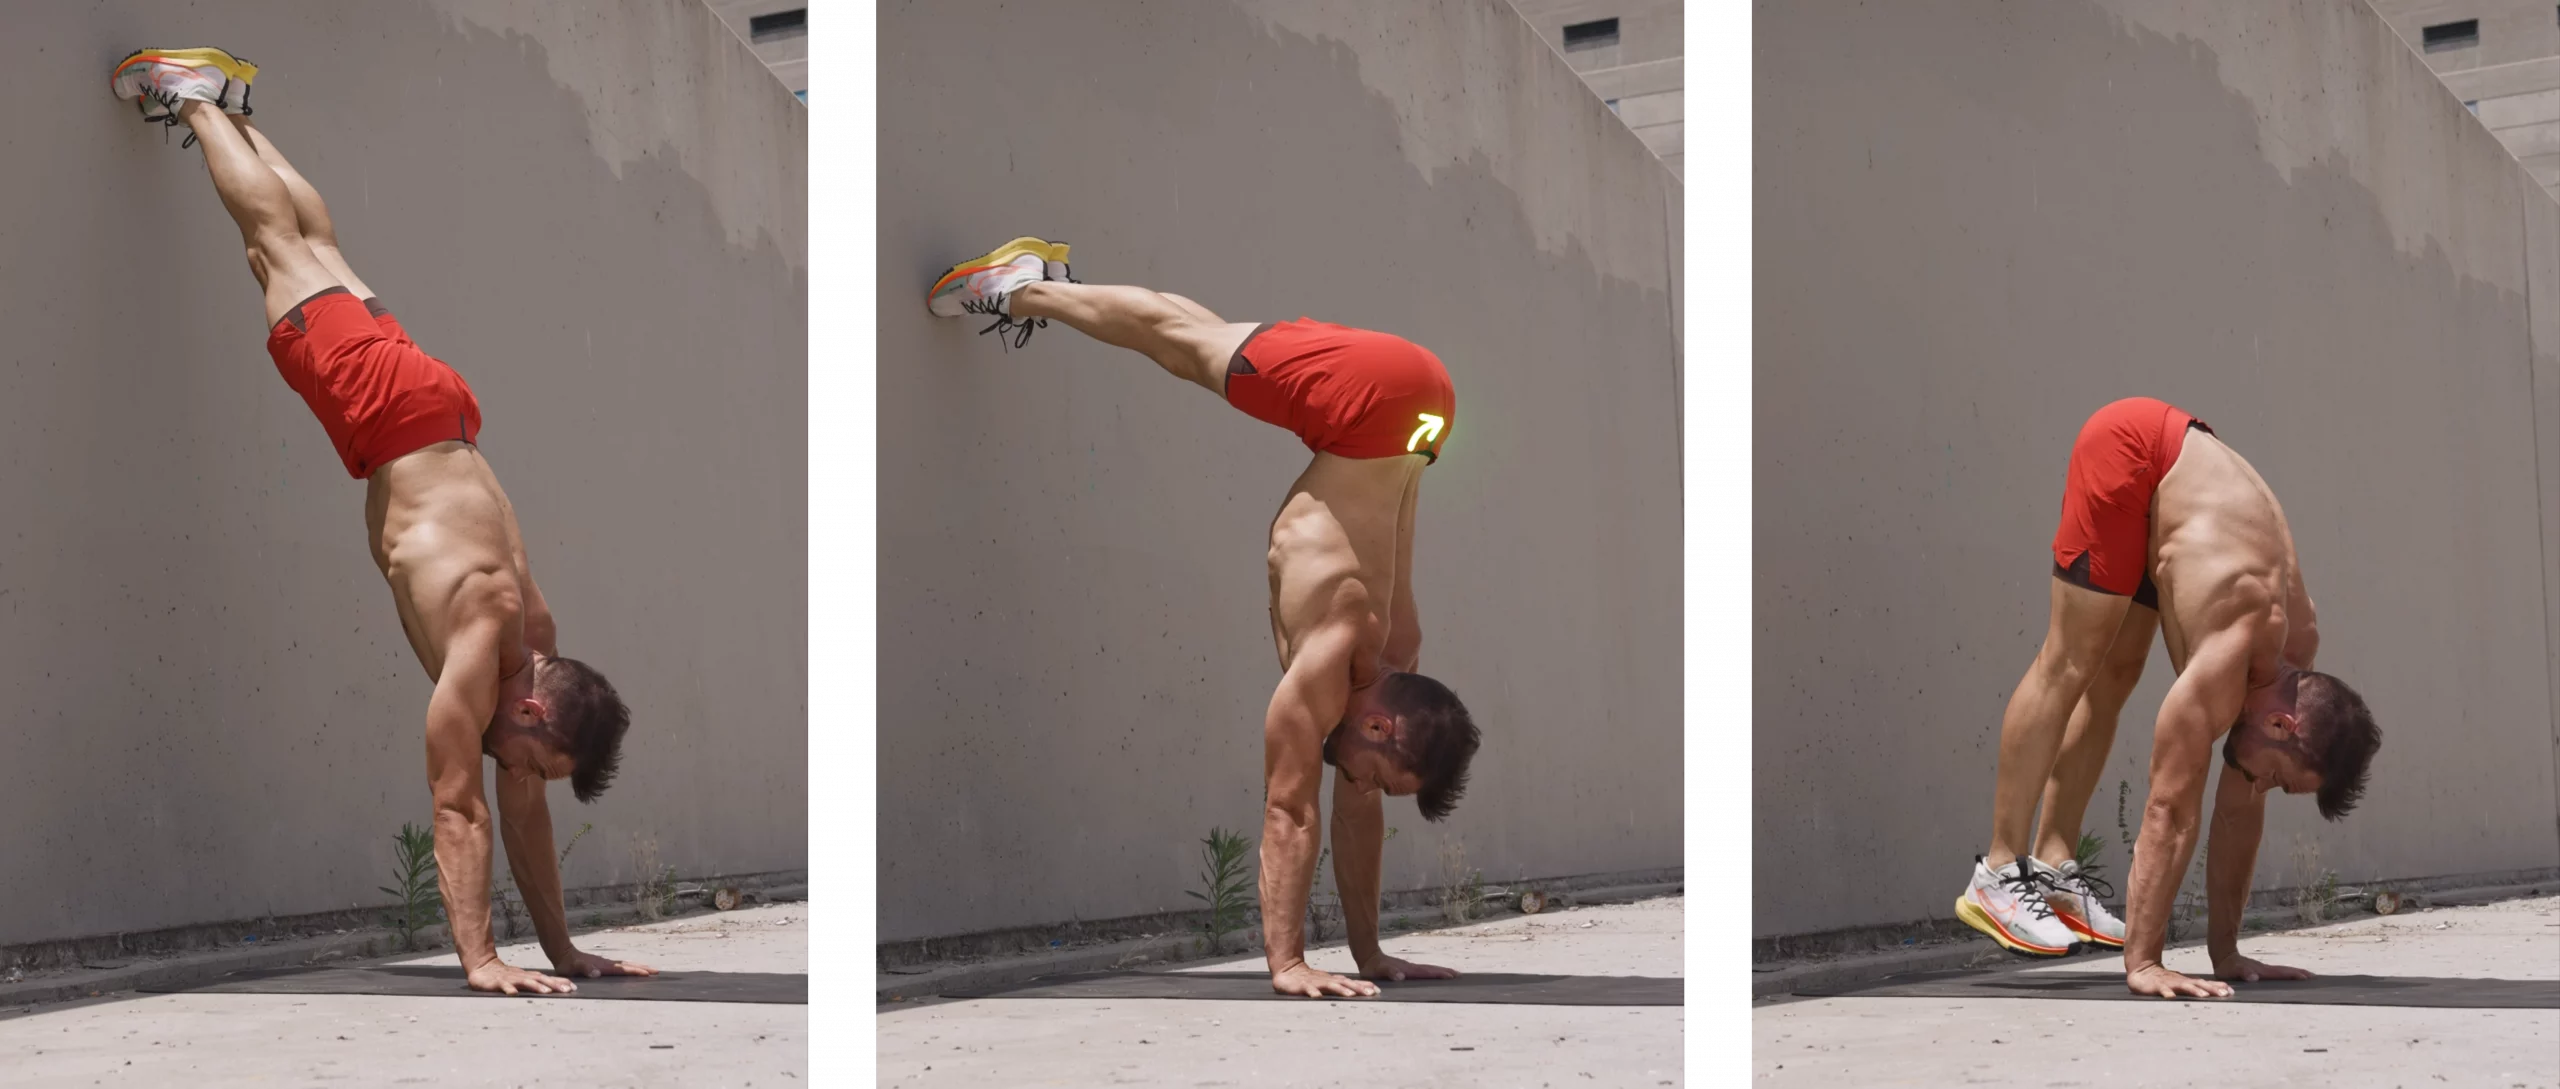
The Press to Handstand
The same forces work here with the main difference that your legs are extended meaning your hamstring mobility is now a possible limiting point. Your hamstring flexibility actively works against your hip flexors making the press engagement harder than in the tuck.
Additionally, this is a movement and not a static position. You want to work on this engagement of the lower back already before your feet leave the floor but eventually you will have to switch from the back pulling and feet pulling in to the legs coming around to finish in a handstand.
The L Handstand
Last but not least back to a more static position the L handstand. This one is tricky because you can not pull to 100%. You only want to pull hard enough for your legs to be exactly parallel to the floor. Depending on your hamstring flexibility this might not be any pulling at all.
Now of course with less engagement in the hip flexors there is also less engagement in the back. This means you will have to judge this one too. Pushing or pulling as much as possible is always significantly easier than just engaging to for example 74,3%.
In the L Handstand it is also able to arch the lower back too much, to push the shoulders out and to end up in something closer to a contortion handstand. Whilst this is not the goal here it can be a beautiful pose to practice.
The Stalder Press to Handstand
This one has the same limitations as the press to handstand but with the added difficulty that you can not pull your hips towards the anterior pelvic tilt from the very start. You have to first bring your hips up and around with a round back until your shoulders are almost fully open before you can engage the back to line yourself up.
This delayed onset of back pulling creates quite a few difficulties for many athletes as we lack patience and trust in our own abilities.
Learning to engage the back and to pull on the hips will not only help your handstand positions and presses tremendously but it will also help you create a stronger bond with your own body and further increase your mind muscle connection.
Invest this time into building the needed mobility, coordination and strength. It will go a long way!


