Step 1 - Understand what’s important
In order to understand how to prepare we first need to know what we have to prepare and to understand that we have to analyze the movement. In our case here we have to take a closer look at the handstand that we are about to do.
Whilst many believe handstands are all about core strength handstands happen almost entirely in the shoulders.
The goal is to elevate the scapula instead of just opening the shoulders into a straight line. It is much better to have a slight angle in the shoulders but to be tall compared to having the shoulders open in a straight line but the scapula being depressed. This is to achieve control, stability but especially for injury prevention purposes. (link to shoulders blog)
To achieve this scapular elevation we have to look at our hands, lock our elbows and cover our ears with the shoulders by pushing as tall as possible.

Step 2 - Find your weak spot


You will know right away if you are lacking strength as you won’t be able to finish the drills and you will constantly be scared to fall on your face. In this case we have to focus on getting stronger. Work on all kinds of planks for your core and push up progressions to build general shoulder and upper body strength.

A lack of mobility manifests itself in difficulty to open the shoulders. You will see that your back is always arched and you are simply unable to achieve a straight handstand line. Do not panic in this case either. With a bit of consistency you will be able to push through easily. While the easy way out here are static, boring, old school shoulder stretches focusing on building specific coordination and strength is significantly more efficient. Yes, of course you have to improve your passive mobility but this will take time. Dedicate a small amount of time every day to passive stretches and stay consistent for a year or two. It will be that long to see drastic changes in your shoulders. In the meantime work on awareness and active drills daily to improve your handstands within the next 8-12 weeks.


Step 3 - Your daily prep routine
If you have made it all the way here the hardest work is done and we are now getting into the fun zone! We know what we have to focus on in a handstand and we have determined our personal weak spots and figured out how to overcome them. Now it is time to get training.
Before every single training we have to warm up. A good warm up does not only get you sweating, it will actively prepare you for your training by activating the needed muscles and by already working on your weak spots.
Assuming you are completely cold, a decent beginners handstand warm up should take up to 30minutes.
Start with some light intensity & low impact cardio to get going. During the summer I enjoy jogging outside or if I am at the gym I will often fall back to some rope skipping. Use this opportunity to sneak in a couple stretches. Mainly focus on your hamstrings. The more flexible they are the easier it is going to be to get up into your handstand and the more freedom of movement you will have.
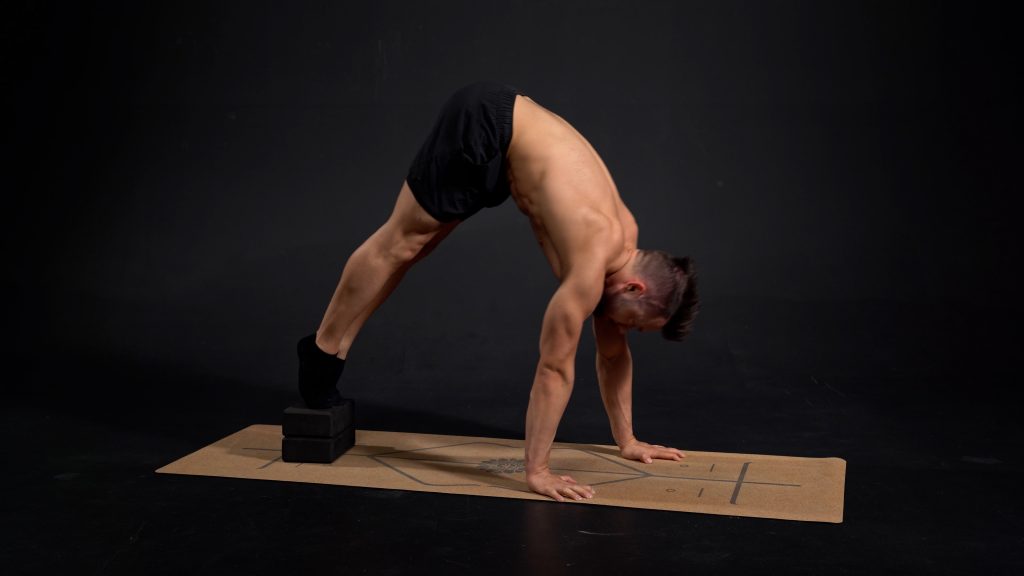
Follow this by shoulder prehab work. Without a doubt this is the most important part of your warm up. Not only will these drills help you to stay healthy and therefore be able to continue doing what you love for a long time but also will these drills actively help you with shoulder coordination and your handstand line.
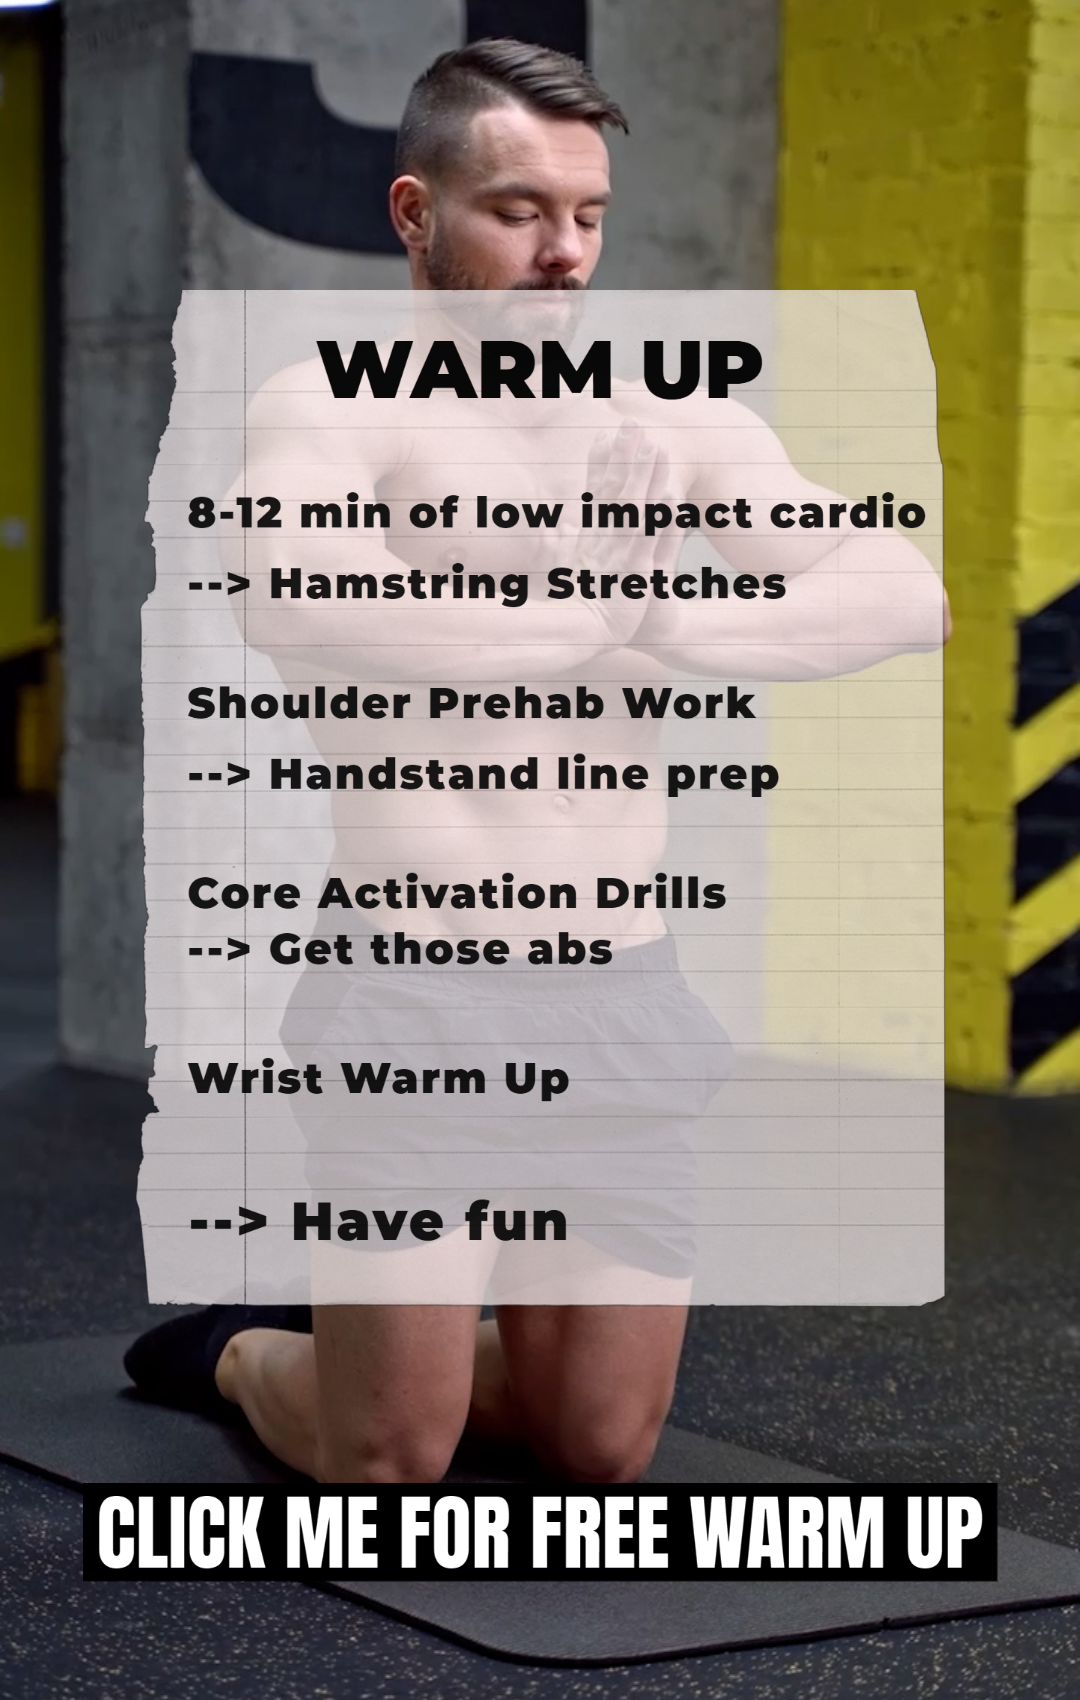
Next up: core activation. While the handstand is not all about the core the mid section of our body of course still plays a big role. It is responsible for tuning our body from an upside down balanced half boiled spaghetti into a gymnast. For that we have to wake up the core muscles to remind them that it is time to get to work.
Last but not least right before getting upside down we have to warm up our wrists. The wrists are made up of a whole lot of small bones. There is not a lot of space in your wrists and when you overuse them you will feel pain and pressure due to inflammation. Taking good care and being respectful towards your wrists is one of the biggest lessons in any hand balancer’s journey to complete upside down body control.
Now there is a reason why they say preparation is the key to success. Before training anything make sure you properly analyze the movement. Without that it is impossible to even know what you are training for! Understand your strength to build on them but find your weak spots and limiting points to improve and work around them.
Gracias por los consejos