How to do your first leg lift
Leg lifts are awesome. They combine flexibility, strength and coordination in a rather unique and interesting way and require hand, core, hip flexors and even back strength making them a great fit into any full body workout routine.
If you are looking to master your very first leg lift or want to improve on your already existing leg lifts to drive your numbers up and to get more efficient when preparing for more advanced drills than I got just the things for you!
What is a Leg Lift?
Leg lifts are a hanging core drill. The goal of the leg lift is to bring the feet up to the hands whilst keeping the hips as low as possible.
This movement mainly relies on hip-flexor and abdominal strength to perform the main movement.
Leg lifts are performed on rings or bars and can either be done hanging in the open space or with back support to reduce motion and to eliminate the possibility of using momentum on the way up.
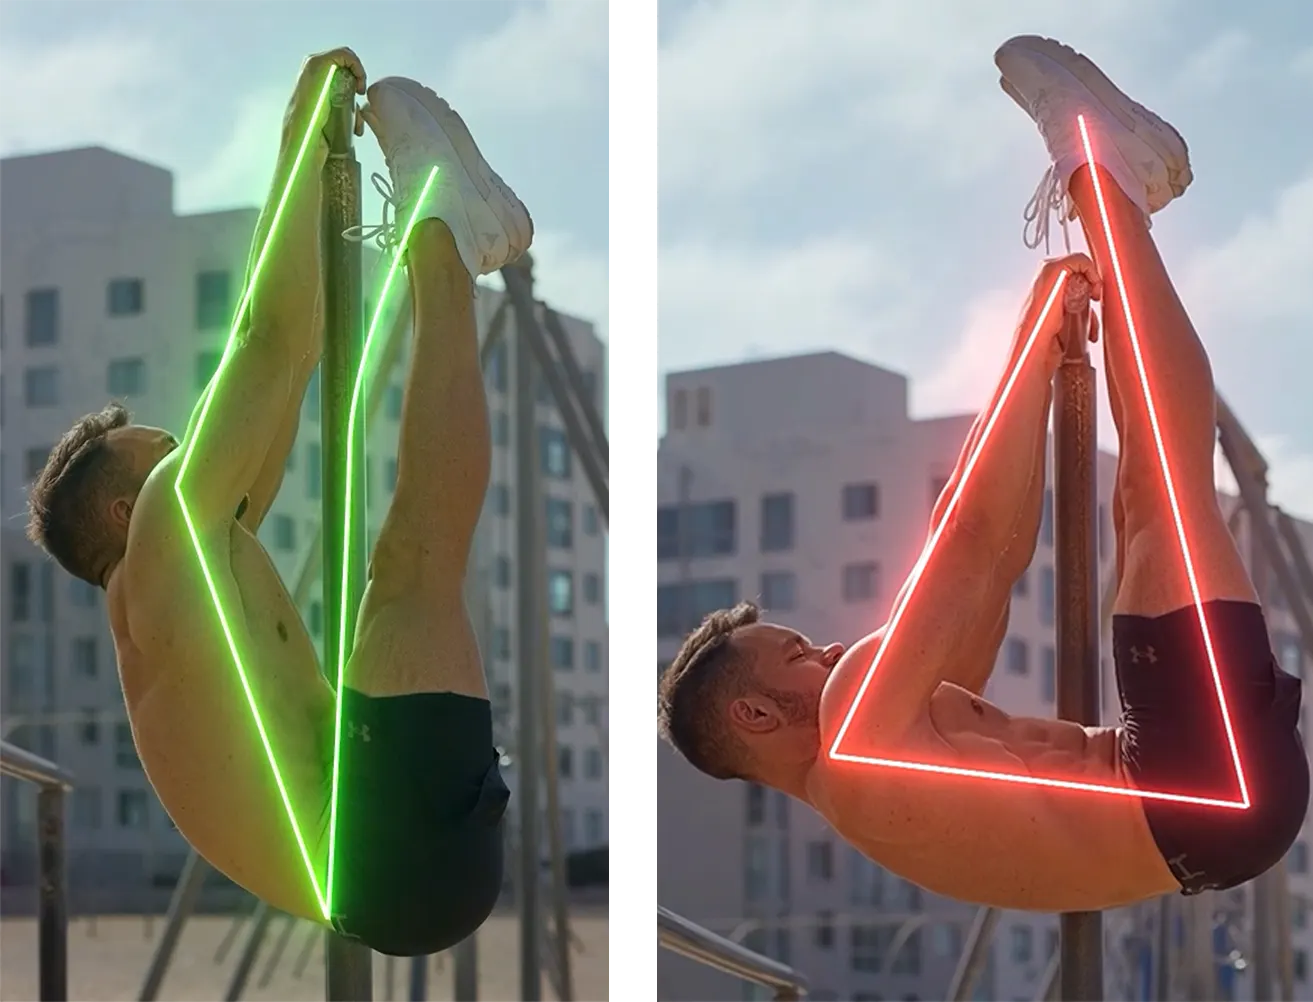
Why should you learn the leg lift?
Leg lifts are some of gymnastics greatest drills and in some form and progression they have to be found in every single gymnastics strength based workout plan.
Develop a stable core that is not only strong but also looks great! No matter if you are training to learn cool skills, get healthier or want sizzling abs at the beach. You will get what you are looking for.
While leg lifts are not exactly a flexibility drill they do require some active flexibility and you will increase your hamstring flexibility a lot working for your leg lifts. The more mobile your hamstrings are the less resistance you will feel trying to bring your legs up. The constant warming up and stretching will without a doubt make you more flexible and increase your quality if life in the long run.
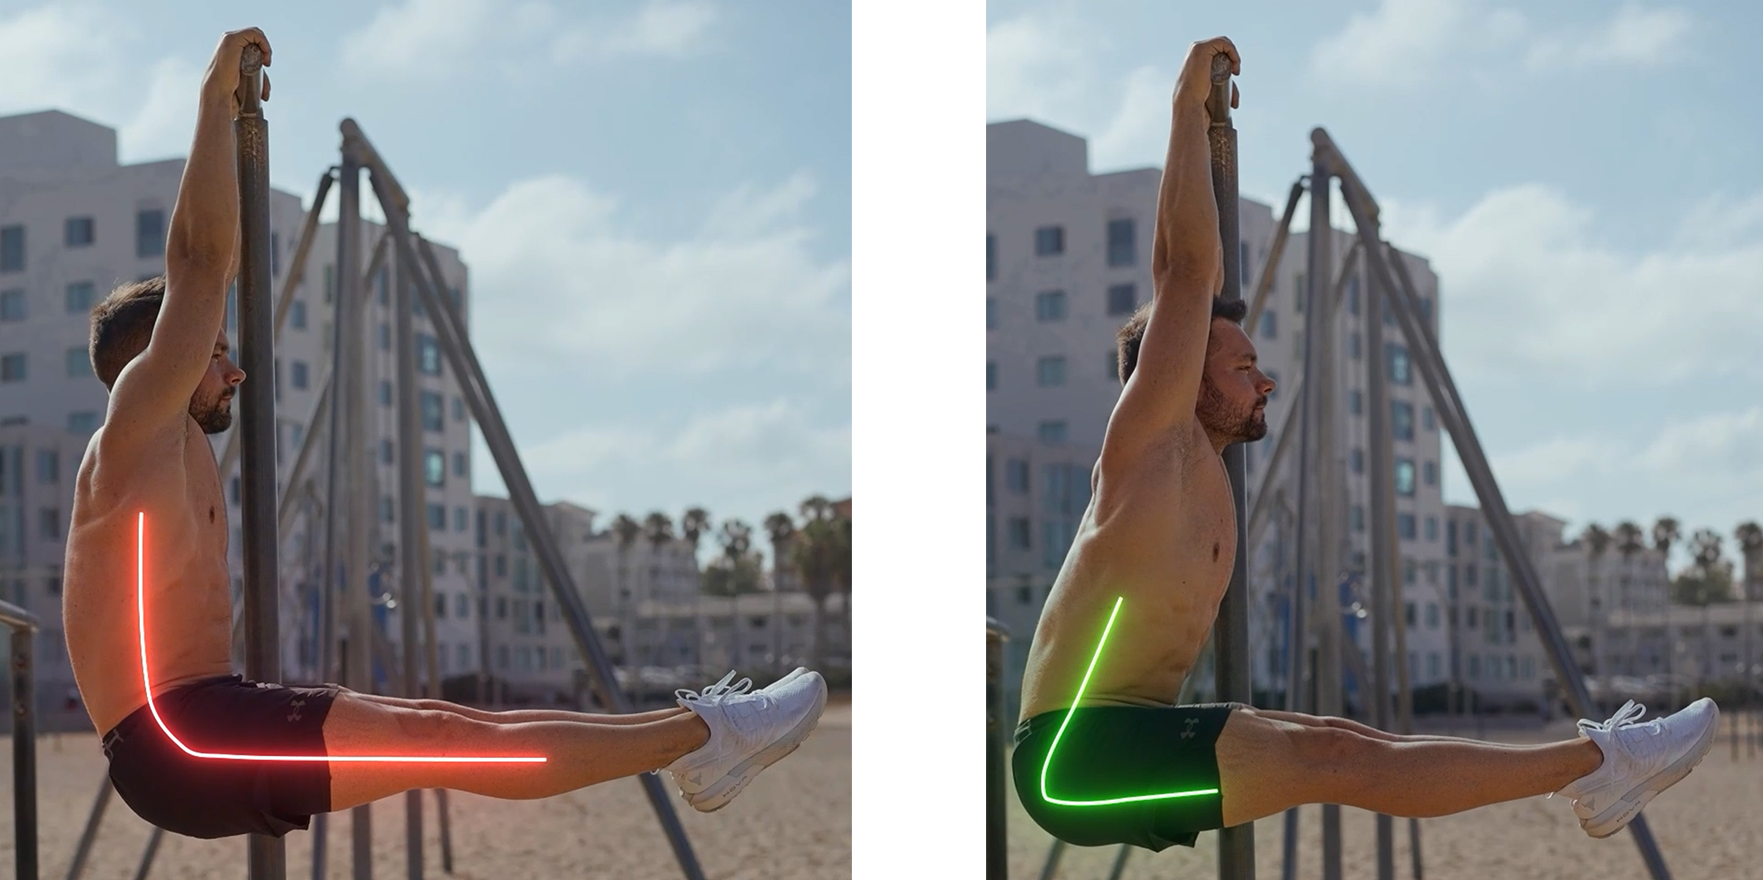
Leg lifts might look simple but there is quite a lot going on. Learning to leg lift and working through the needed progressions will help you increase your body awareness and coordination. The combination of lifting the legs and hip yet keeping the shoulders as open as possible is not easy!
Figuring out how to use your back to stabilize your position and to keep the hips stable is a skill that will help you significantly for your press to handstand and many other advanced handstand skills. Check out this post if you want to learn more about it!
Leg lifts will also help you prep for many calisthenics moves. No matter if it’s the skin the cat, lever or kip up progressions. You have to get upside down before most of these skills. Mastering the leg lift and making them easy will help you invert with ease.
How to do Leg Lifts?
While leg lift rely mainly on hip flexor and core strength they require at the same time grip strength to hold on to the bar and specific scapula and lower back strength to stabilize the position.
In order to get the feet up you also need to have flexible hamstrings. The more flexible your hamstrings are the less resistance you will meet on the way up. If you lack hamstring mobility and you can not bring the feet all the way up you will have to bend your knees slightly and lift the hips . Lifting the hips means you will have to engage your chest and shoulder muscles in the direction of the front lever. This will make you burn out fast and your movement can not stay efficient.
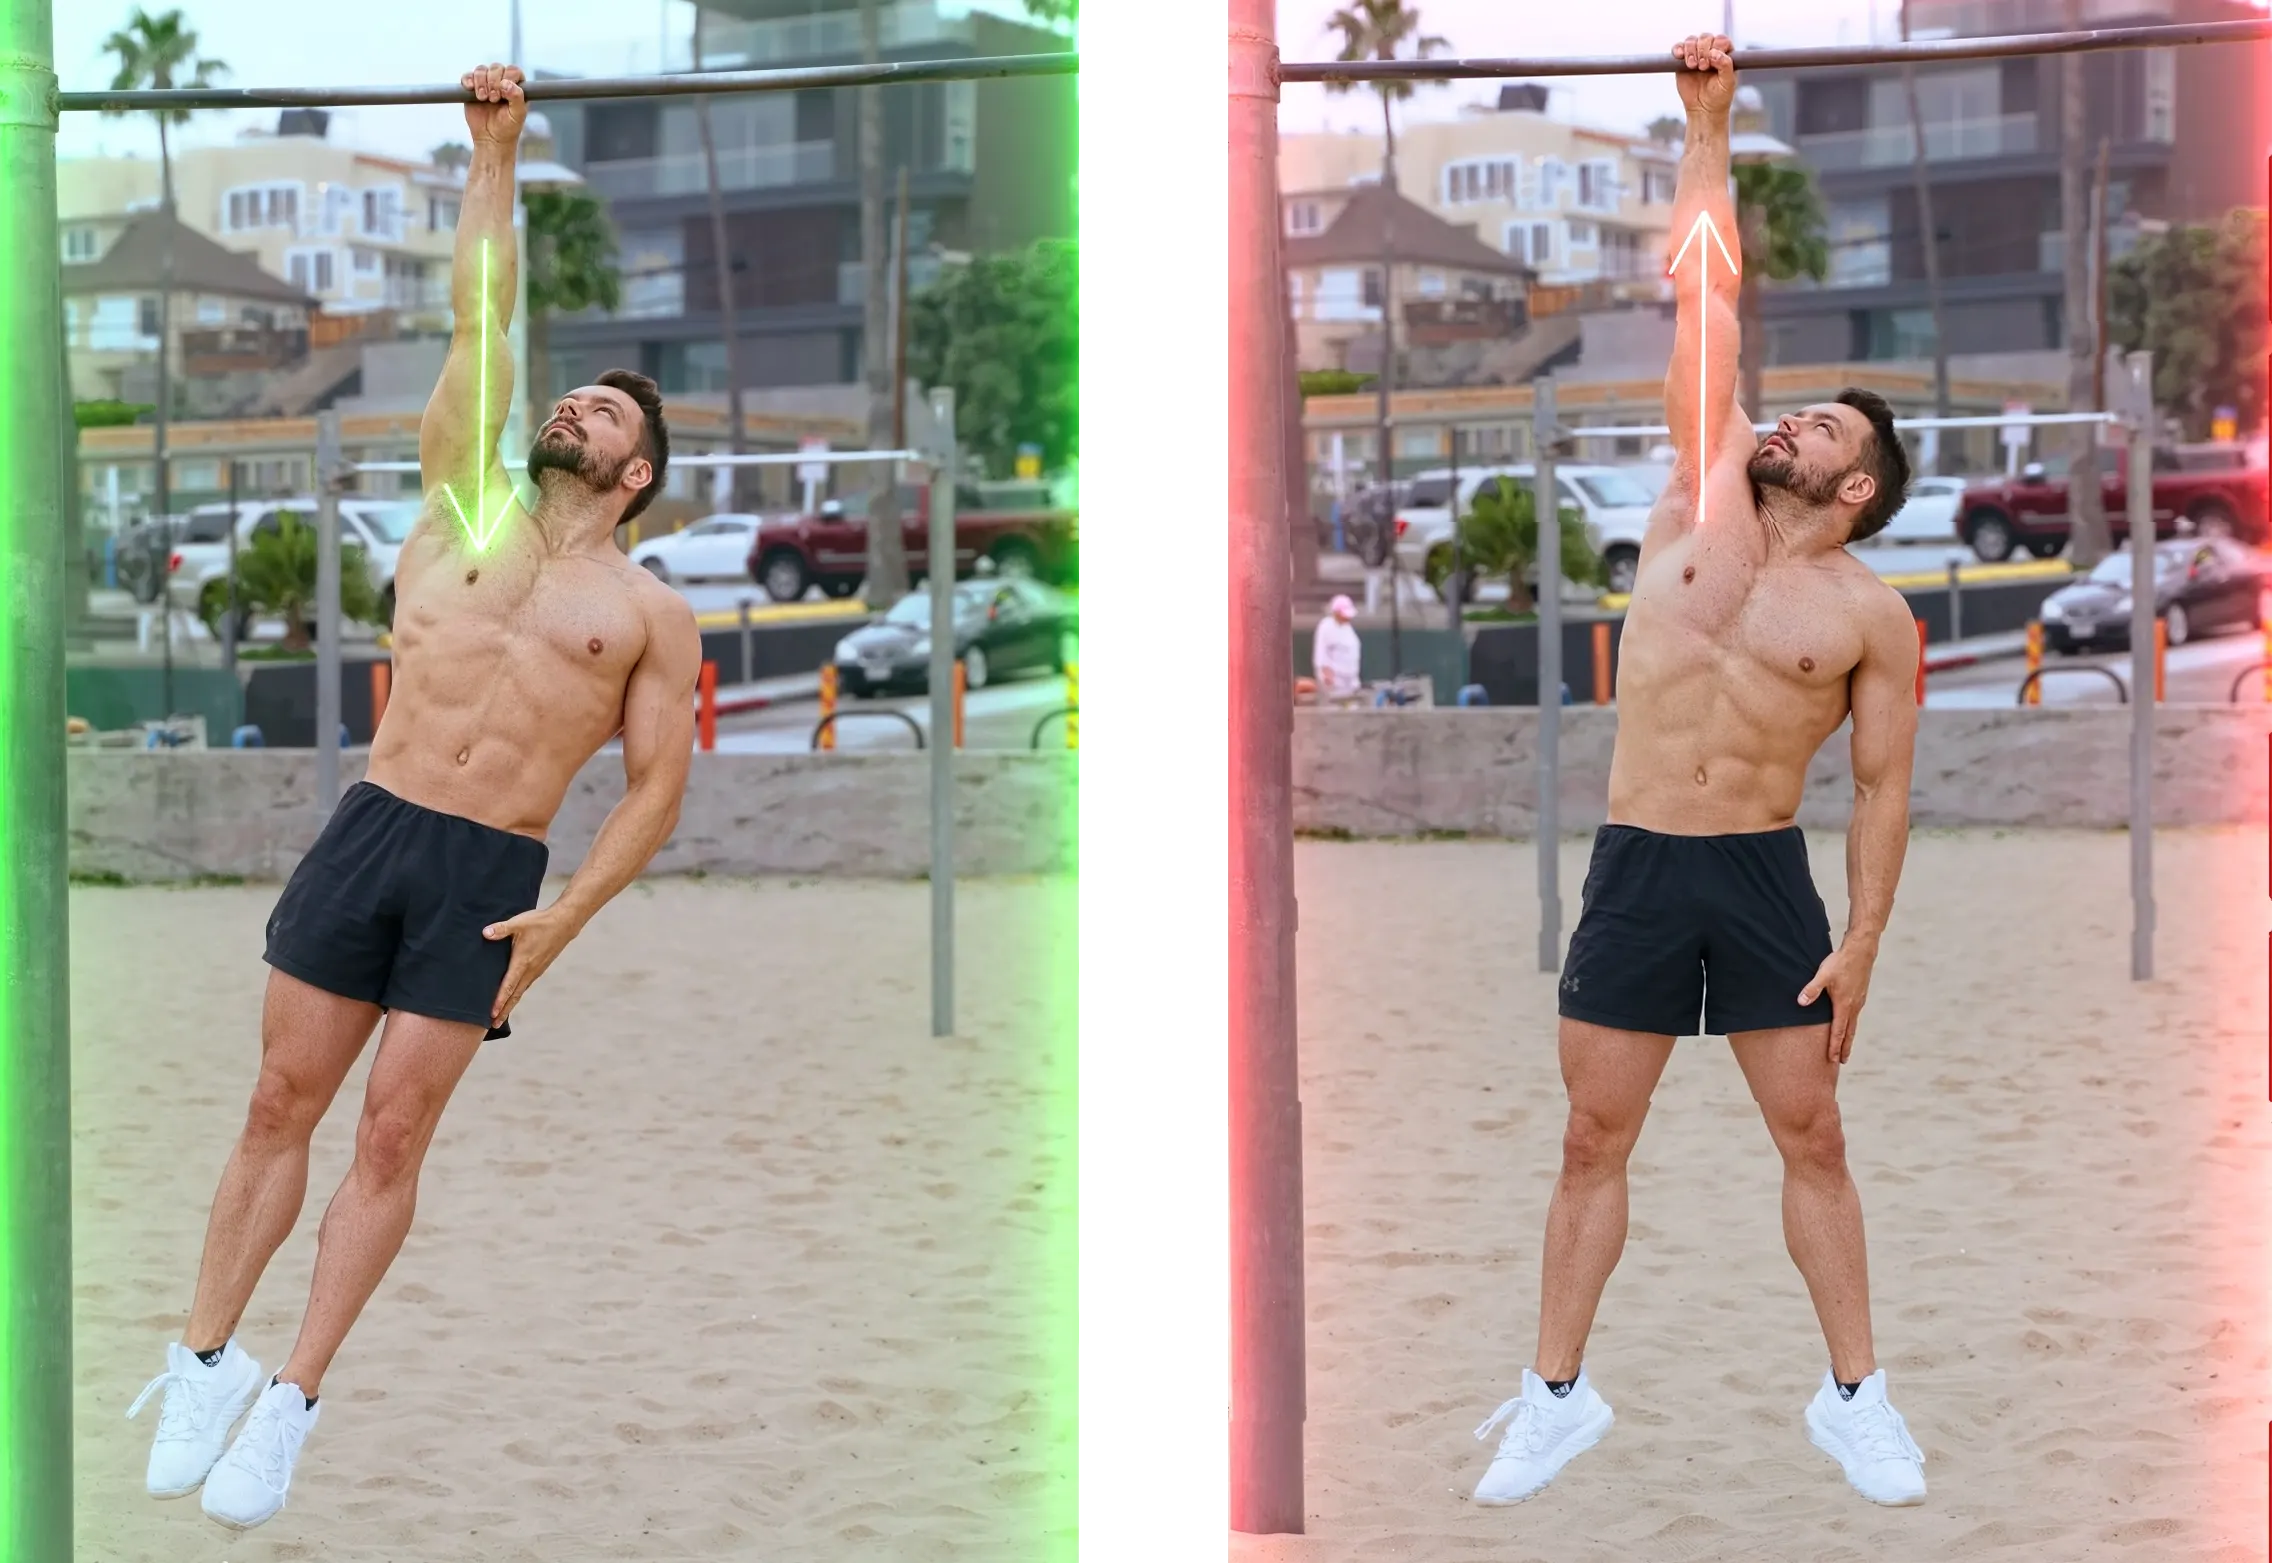
When ever you are performing any kind of hanging drills on the bar or the rings you want to make sure your shoulders stay engaged. Pull them down. Depress your scapula!
Leg Lift Prerequisites
Before we can really start working towards our first leg lift we need to make sure we have a few basics covered. Starting from the top we need strong enough hands to actually hold on to the bar. Moving down we need strong enough and well coordinated enough scapula.
Start by practicing scapula pull ups on 2 hands. Make sure your elbows stay locked and when lowering down go super slow. If you are worried these might not be safe for you yet start my working with an elastic. Either step on it for assistance or stand on the floor, attach the elastic pretty high above you with your hands overhead and pull your shoulders down against the tension of the band.
Once you are able to do around 3 sets of 8-12 clean, slow and controlled scapular pull ups start also incorporating 1 handed dead hands with you shoulder depressed.
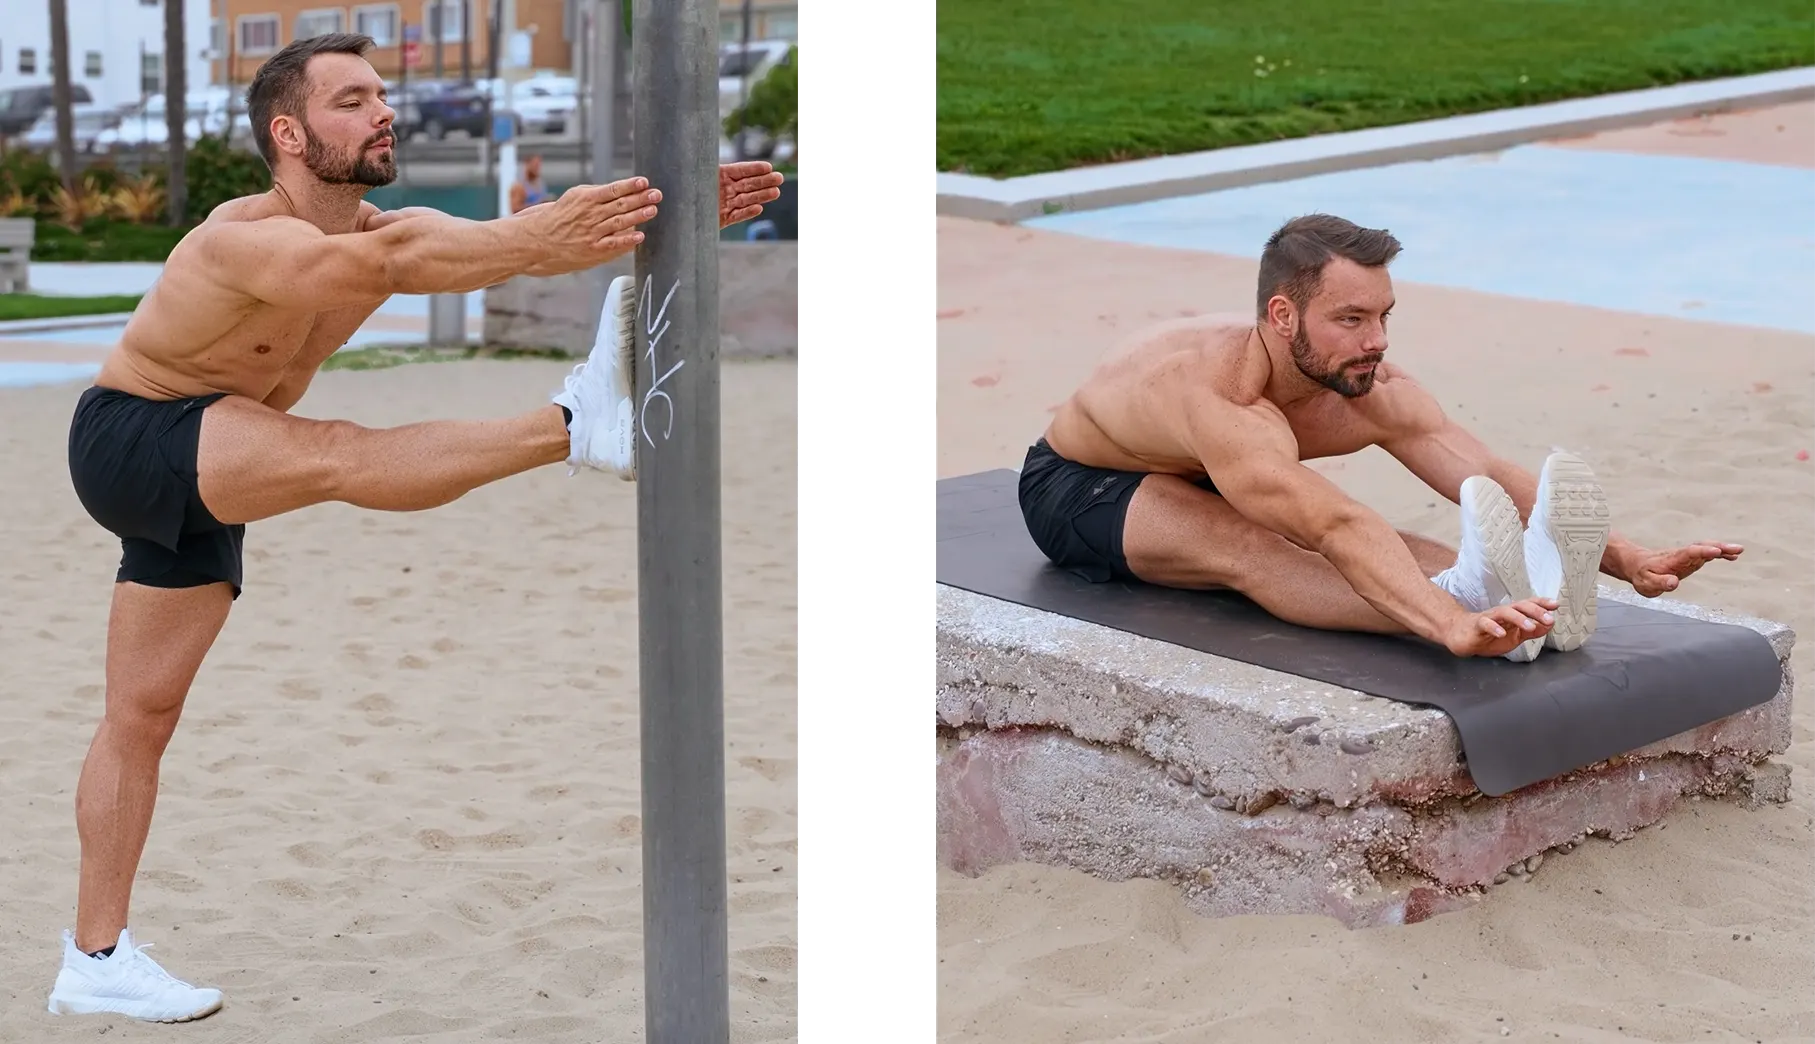
While you are preparing your hands and shoulders simultaneously start working on your hamstring flexibility. Especially focus here on form and alignment. Keep in mind that the goal is not to bring the forehead to the legs but to arch forward with an anterior pelvic tilt. In an ideal world your lower back is arched in all of your hamstring stretches!
All flexibility progress should be slow and you should always break a sweat before stretching. Do not train your flexibility where it is cold, in a windy hallway or under an air conditioning system. It is also not recommended to train flexibility while you are watching TV. Focus on what you are doing. Flexibility training is not easy!
Start by stretching your hamstrings 2-3 times per week for 20min and work your way up to stretching up to 6 times per week.
Working on these prerequisites is an ongoing progress. You might reach your goal eventually and get strong and flexible enough for the things you want to do but this should not mean that you should stop training. Keep maintaining and improving this foundation. Use it or lose it!
How to Train for your first Leg Lift
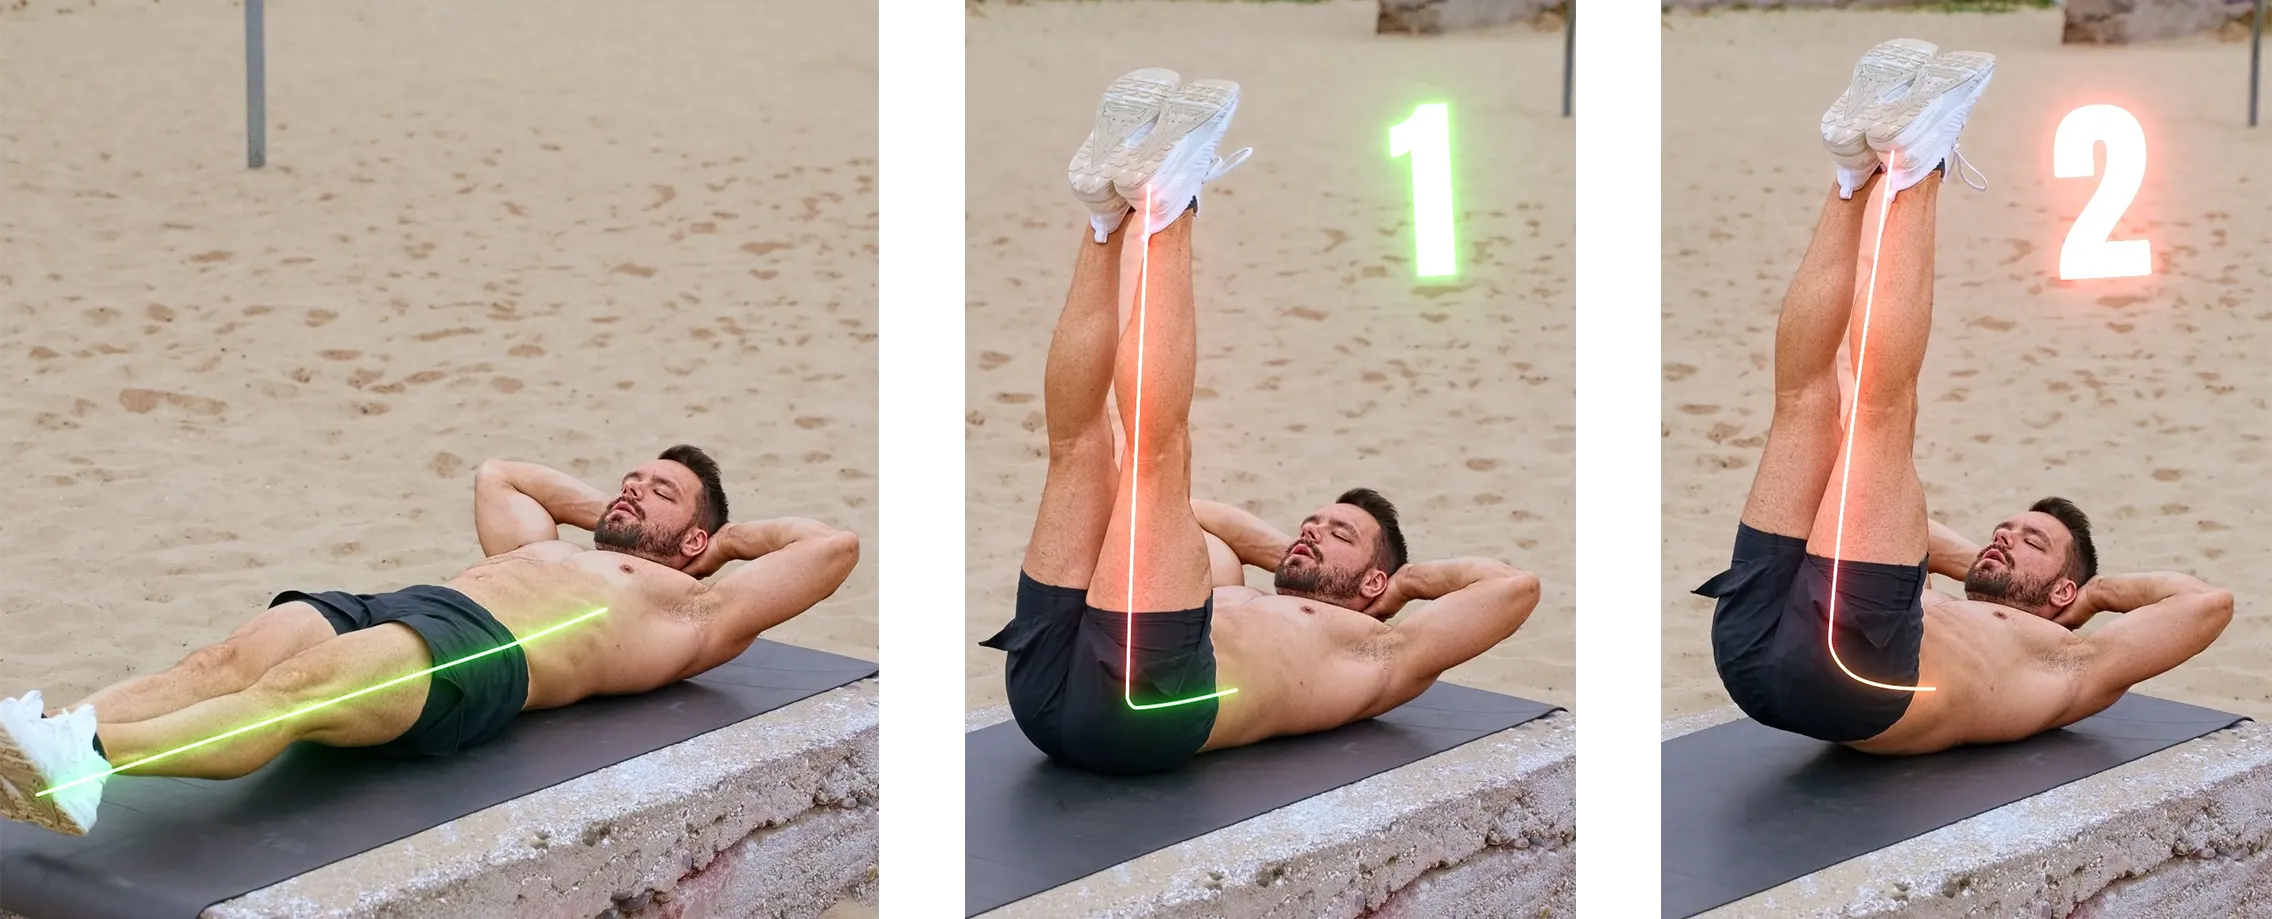
Before we do our leg lifts hanging from a bar we will do them laying on the floor. Start with bent knees before then performing your floor leg lifts with straight knees making it harder as your feet are further away from you.
We want to divide the floor leg lifts into 2 separate movements. First lift the leg only using the hip flexors. Then round your lower back flipping the hips into a posterior pelvic tilt pushing the feet up towards the sky.
Build this coordination here. We will need this seperation of movements soon!
You should be able to do at least 3 sets of 12 of these floor leg lifts before moving on to the next level.
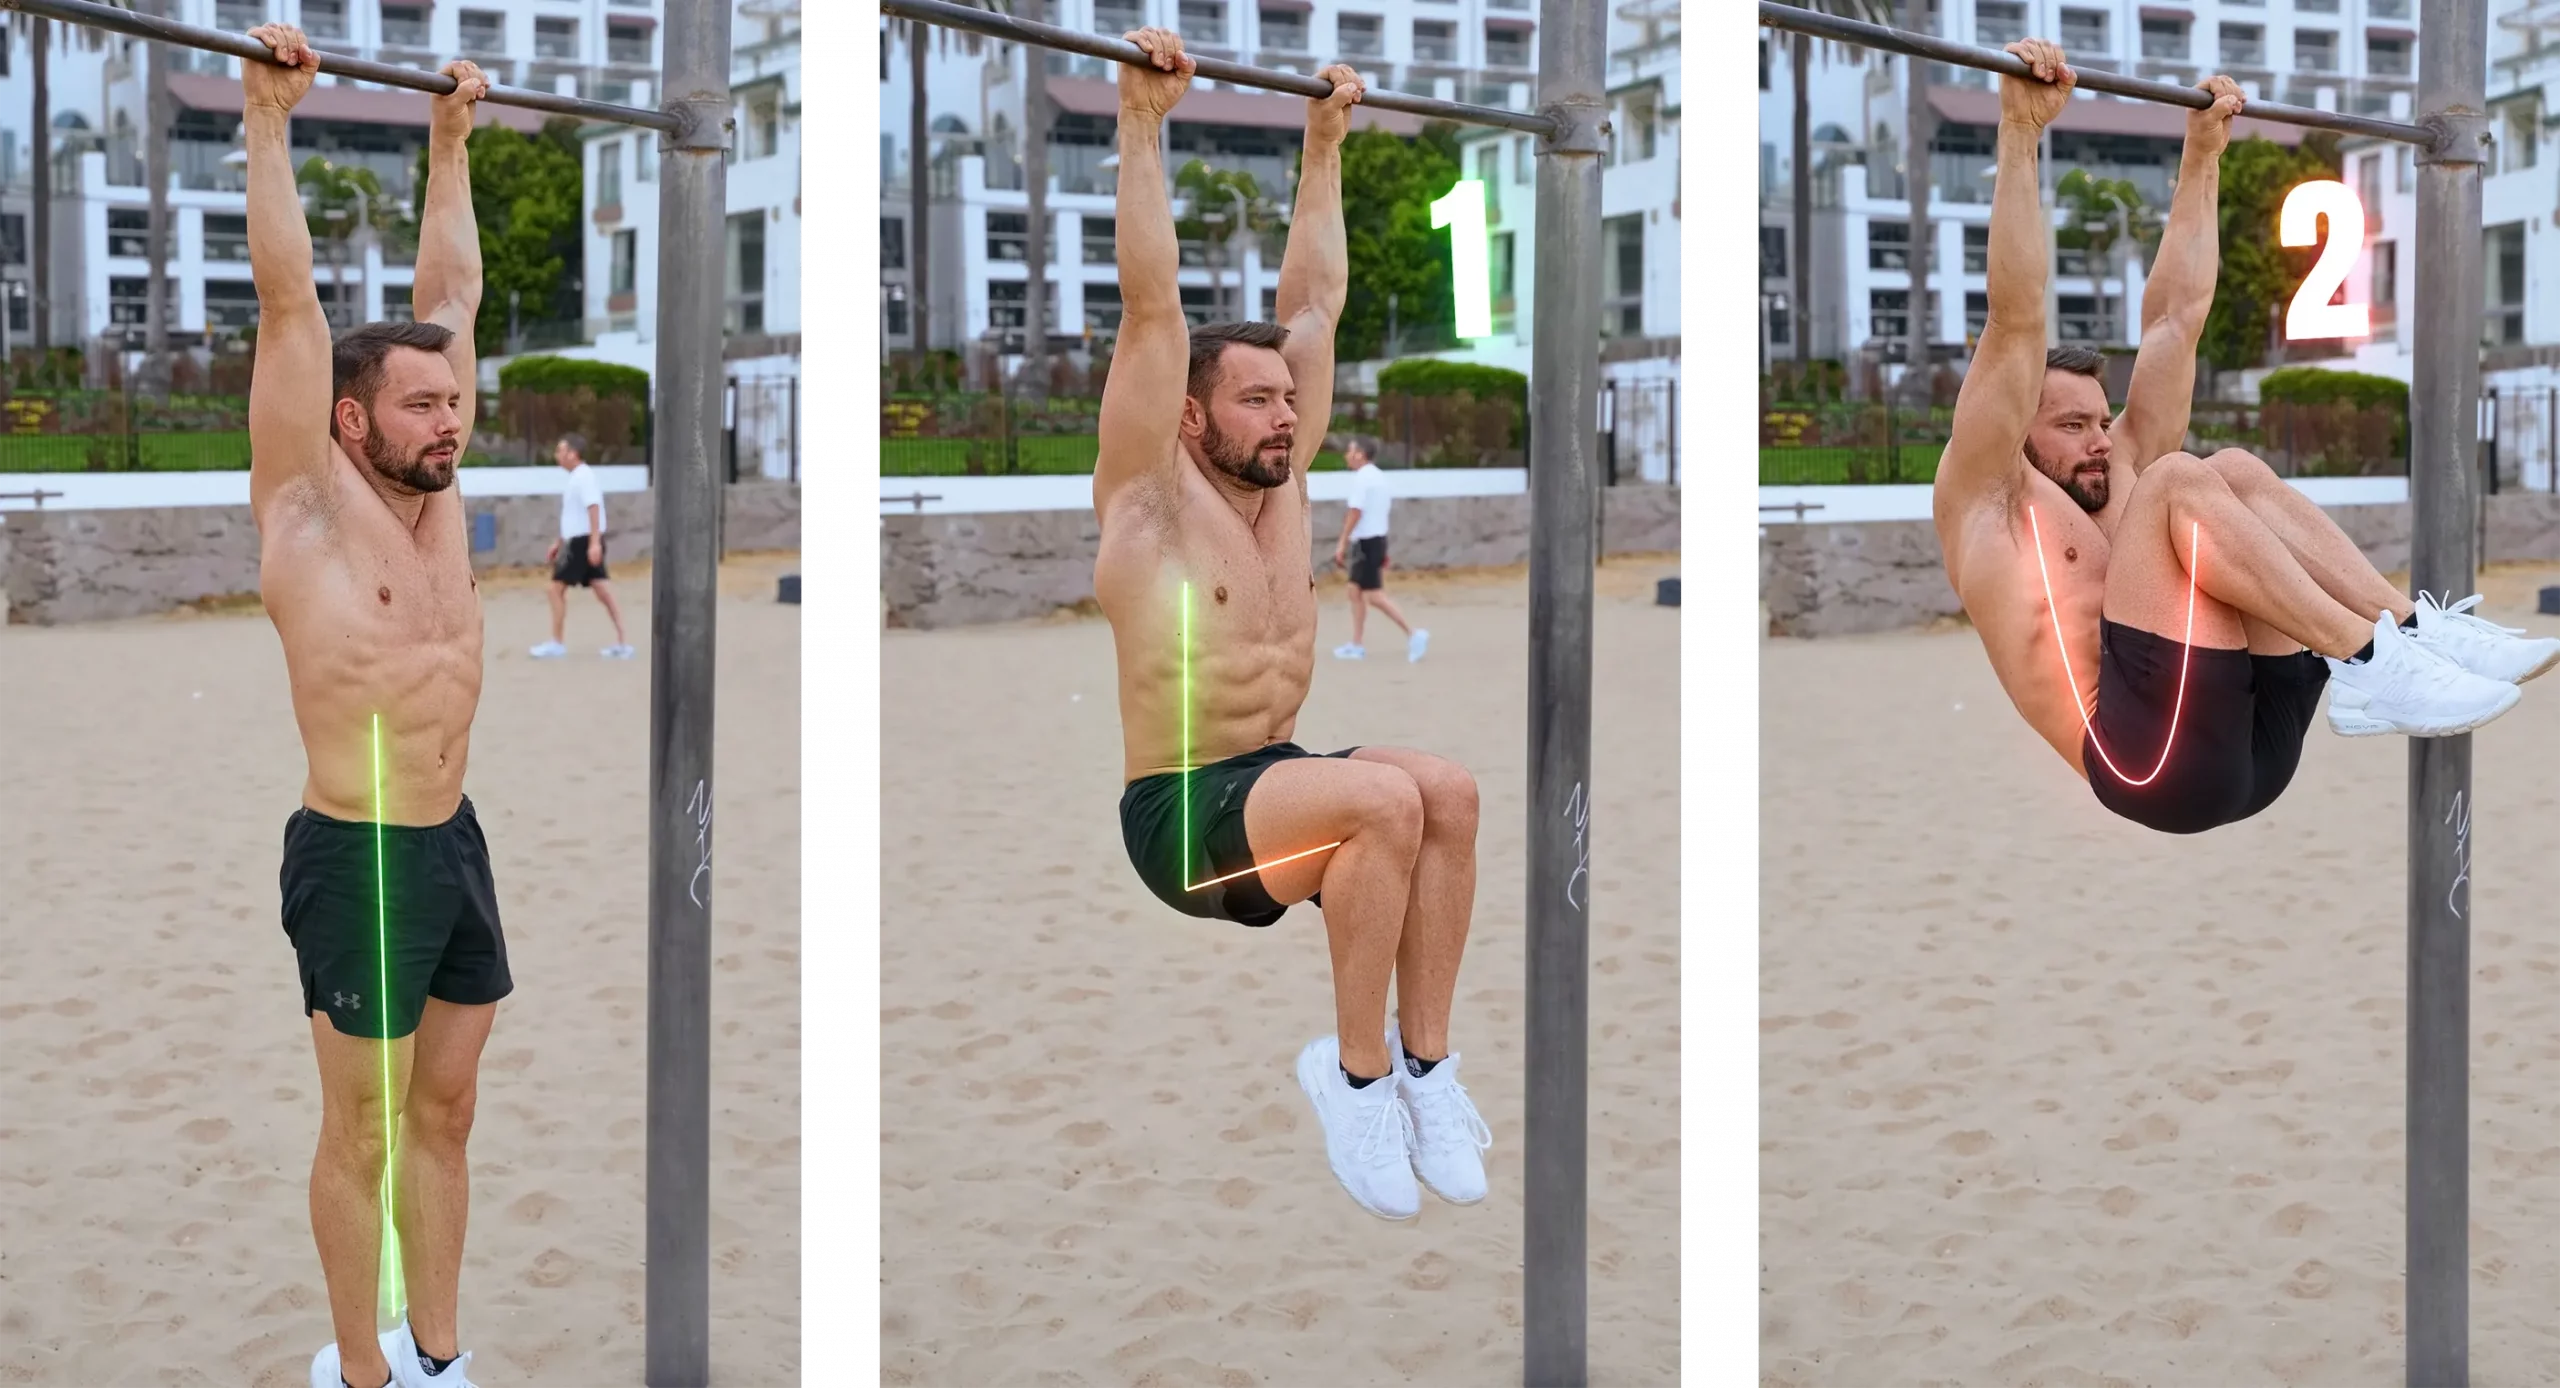
Next up we have hanging progressions on the bar. Start with Single Knee Raises. Make sure to isolate the movement in your hip flexors only. Then raise both knees at the same time. If you can not get both knees up together lift 1, then lift the other and finally bring both knees down together as slow as possible.
Once you are comfortable it’s time t graduate to knee and hip raises. We are now basically back to the 2 movements from the floor. First like the knees only using the hips flexors, then use your abs rolling the hips into a posterior pelvic tilt.
From here you can take many roads. One of my favorites is the knee and hip raise when you then extend your knees on top, slowly bring the hips back into a neutral position and lower the legs down at the end. Make sure to keep dividing your movements.
You can also use an elastic band for help or swing your legs up as high as possible, hold for a moment and then slowly lower back down. Combine these approaches and you will build enough strength to do the full leg lift in due time.
Keep in mind that while we obviously always want to make things as efficient and as effective as possible mechanics don’t always have to be perfect. As long as it challenges you, it changes you!
Secret Leg Lift Tips
While at the end of the day nothing will beat hard work there are a few ways how you can make your leg lift training easier and more efficient.
Use chalk. Powder or liquid. It might not help you get your legs up but it will definitely help you hold on to the bar easier. This means you won’t have to invest as much strength and you get to keep more for your leg lifts. Also more control on the bar will make it slightly easier to engage the right muscles.
Take your shoes off. I know you want to be cool at the gym or the park. Stat off without the shoes. They are heavy and make everything difficult. Leave them on the floor and come back to them later!
Stretch your hamstrings right before getting up for your set. Opening and lengthening the hamstrings will help you pike easier. This will create less resistance on the way up and your legs will feel lighter.
Whilst consistency is key not every training will be perfect. Find peace and enjoyment in the task of training and not just in the results. Training is bitter at time and results do sometimes come slowly. Stay consistent you will get there. I can promise you that!
How to schedule my leg lift training
When training leg lifts you should not be working on them every single day. You have to recover as well. Leg lifts are hard. Every time you train you create micro tears in your muscles. When you rest these micro tears grow back together and you get stronger. Stop resting and you will stop improving.
Start with 2 trainings per week.
After about 2 weeks go for 3 workouts per week.
Over time slowly work up to 4 workouts per week.
Warm up well and stretch your hamstrings before every single leg lift sessions. Don’t forget to stretch your hip flexors and core after the workout.
You can also combine your leg lift training with your already existing routine. Leg lifts fit great in the same workout when you perform pull ups as you probably have a bar available. If grip strength is your main limiting point move the leg lift drills to your push day when your grip is not fatigues from the pulling work.
Keep Leg lifts for ever challenging
Now let’s say you did your first leg lift and you can even do two or 3 or even ten. It is time to crank up the heat and make the leg lifts harder.
The most common way used to increase difficulty of the leg lift is simply by adding some ankle weights. The heavier your feet the more difficult the leg lift becomes. Slowly over time increase resistance by increasing the ankle weights but make sure your form stays clean and you do not swing let your legs just drop down from the top.
If you don’t have ankle weights you can increase difficulty by simply adding holding times to your leg lift. Try touching the bar or go as high as you can but hold on top on every rep for 3 seconds. You can also add a second hold on the half way point down!
One of my coaches and I guess in general gymnastics favorites are top half leg lifts. Instead of lowering to the bottom between reps you hold your legs perfectly parallel to the floor making sure the muscles stay under tension the entire time.
Play around combining all 3 techniques and I promise that you will never stop making gains.
I’ve trained leg lifts my entire life. No matter if I needed to improve technique and full body control, strength or simply wanted to get shredded for the summer: Leg Lifts get it done!


