Here is your full workout for today. This overview includes name, reps, and most important cues. IMPORTANT!! To see the video click the (“+”) symbol next to the exercise name, and it will expand.
Enjoy! Also if you’d rather go through your program offline, download the pdf version here.
General warm up, 6-8min of low intensity cardiovascular exercise. Break a sweat!
| Demo | Exercise | Reps/Sets | How to/Cues |
|---|---|---|---|
| W-Raises | 8 reps | Go slow and focus pulling shoulder blades together | |
| W to Y-Raises | 8 reps | Actively keep lifting arms up on Y-Raises | |
| Back Extensions | 8 reps | Initiate lift by externally rotating your arms until thumb is facing the ceiling | |
| Arm Circles | 8 per direction | Extend arms to the side and create small circular movements | |
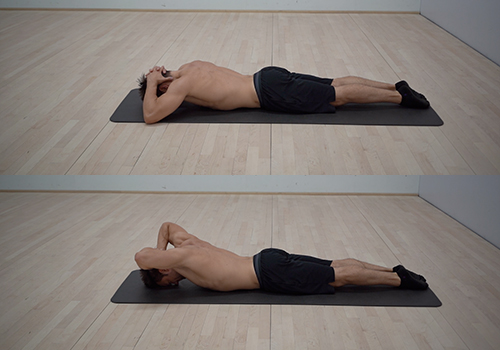
| Elbow Raises | 8 reps | Lift elbows as high as you can | |
| Knees to Chest | 2 reps x 2 | Keep back pressed against floor at all times | |
| Wrist Warm-Up | Few reps each | Choose 2-3 Exercises, or feel free to add your own. Go through these until your wrists feel ready. |
| Demo | Exercise | Reps/Sets | How to/Cues |
|---|---|---|---|
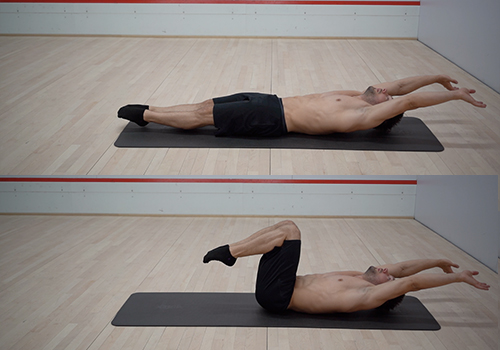
| Handstand Core on Back Pushing Against Wall | 2sets, 6reps | Go slow. Lower back always on floor. Feet keep the same distance to the floor. Look at your hands | |
| Kneeling Shrugs with Elastic | 2sets, 8reps | Elbows locked, Look at Hands, Push out as tall as possible! |
| Demo | Exercise | Reps/Sets | How to/Cues |
|---|---|---|---|
| Wall Walks | 3sets, 2reps | Hands shoulder width apart. Look at your hands. Push out tall. Elbows locked. Core engaged! Do not arch your back! | |
| L-Single Leg Isolations | 2sets, 2reps | Focus on your hips staying parallel. Push out tall. Bring the leg exactly above and do not arch your back | |
| 45° Single Leg Isolations | 2sets, 3reps each leg | Go slow, Shoulders never move. Keep back straight | |
| Tuck Slides | 3sets, 3reps | Knees touch wall and stay together, back straight, shoulders pushing tall | |
| Half Slide Away | 3sets, 2 reps | Keep core engaged. Shoulders come to the front but stay tall. Do not pull your hips! | |
| Tuck Jumps | 2sets, 5reps | Start with your shoulders exactly over your hand and flexed feet. When jumping up keep your knees by your chest and focus on aligning the hips with the already aligned shoulders and hands. You do not have to hold the tuck. You can come straight back down. DO NOT OVER THINK THIS! |
| Demo | Exercise | Reps/Sets | How to/Cues |
|---|---|---|---|
| Scissor Kicks on Back | 1set, 30reps | ||
| Butterfly Kicks on Back | 1set, 30reps | ||
| Sitting Knee Extensions | 1set, 15reps | ||
| Scissor Kick in Forearm Stand | 1set, 10reps | Can also be done in headstand | |
| Butterfly Kicks in Forearm Stand | 1set, 10reps | Can also be done in headstand | |
| Sitting Knee Extensions | 1set, 15reps |
You’ve reached the end of this workout. Go use your legs and get food, a drink or whatever else gives you joy!
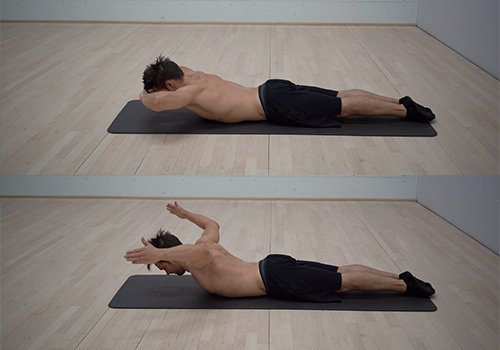
Start lying on your stomach face down. Legs are locked and nothing moves except for arms.
Arms in 90° angle, with elbows aligned around the height of your eyes.
Focus on pulling your shoulder blades together as you lift your arms and chest up off the ground. Then bring your hands back to your forehead, and back again.
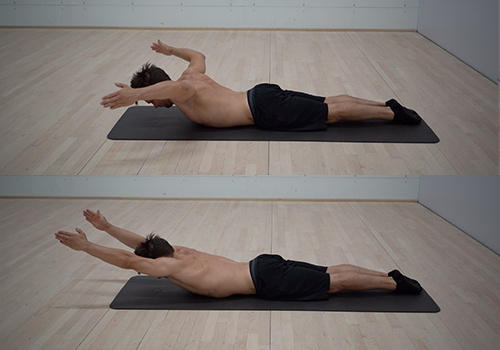
Start by lying on your stomach. Go from a W-Raise into a Y-Raise, meaning extend your arms up in front of you. Once they are extended in front of you lift them up towards the ceiling a little. That is one rep.
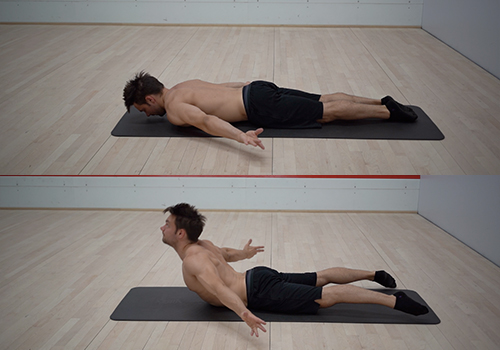
Start by lying on your stomach with your arms extended on each side. Have the back of your hand on the floor. Initiate the lift by externally rotating your arms until your thumb is facing the ceiling. Try to lift your chest up as high as you can, as you squeeze your shoulder blades together and pull your shoulder blades back.
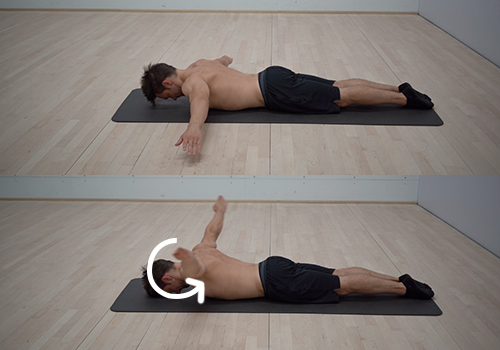
Lying with stomach on floor, extend arms to the side and create small circular movements, forward and backwards. Keep head on ground.
Interlace fingers behind your head and lift elbows as high as you can. Head stays on the ground the entire time. Legs are locked and feet pointed.
Start with back on ground. Lift your arms and shoulders up off the ground slightly. Push through your shoulders to extend your arms overhead, covering your ears with your shoulder. Keep that push throughout the whole motion.
Back stays pressed against the floor - you are trying to keep you ribs in and your core engaged.
To start: lift your legs off the ground into a hollow body hold. Knees are locked and pressed together & feet pointed. From there pull your knees towards your chest. Only go as far as your hip stays in place and doesn't roll up. You want to learn to move your legs individually without having any affect on the rest of your body.
With all wrist warm ups there is no specific number I want you to do, just do them until your wrists are fully warmed up. Generally better take more time to warm up instead of less. Pick the exercises that feel the best for your wrists, and if you already have a wrist warm-up routine, just go with that one.
Exercise 1 - Place palm of hand on the floor in various positions and angles (e.g. fingers facing your knees, fingers pointing to the outside, etc) while you load weight on to your arms gently
Exercise 2 - Place one hand on top of the other and only move your arm around (from straight to bend, imagine you are drawing circles with your elbow)
Exercise 3 - Place back of hands on ground and gently load weight on to your arms. Move around from side to side, front and back to stretch them out a bit.