Shoulder Prehab
Rest between sets: As Needed
Intensity: Light
workout_number sort_number Demo Exercise Reps/Sets How to/Cues
adgj 1 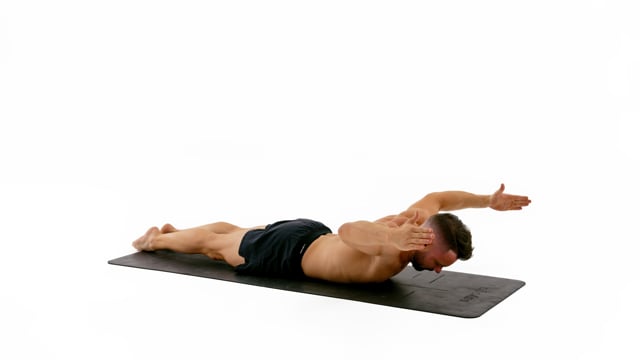
Rotate your hands for the thumbs to point towards the ceiling as your bring your arms to the W. Make sure you have a 90 degrees angle in your shoulders and that your elbows are in line with the shoulders. Pull your hands and elbows up towards the ceiling and not back.Keep your chest on the floor the entire time and rotate your hands for the thumbs to point towards the ceiling.Keep your legs engaged but on the floor. Point your feet and make your ankles touch.
adgj 2 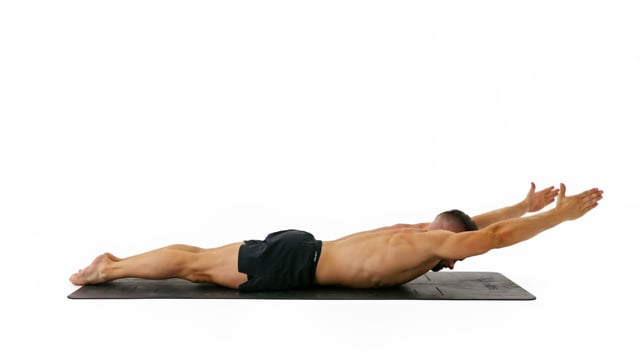
On the way back stop with your elbows in line with your shoulders and a 90 degree angle in your elbows. Lift your forearms towards the ceiling and squeeze on top for a moment.Keep your chest on the floor the entire time and rotate your hands for the thumbs to point towards the ceiling.Keep your legs engaged but on the floor. Point your feet and make your ankles touch.
adgj 3 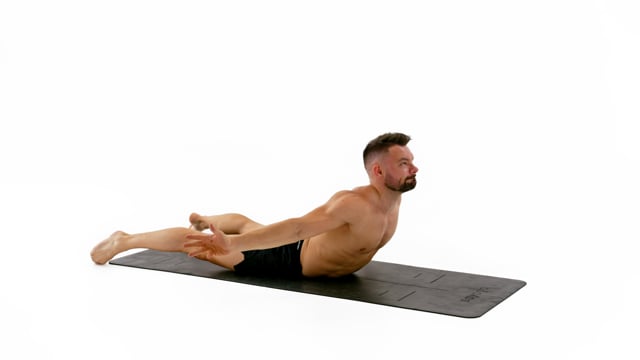
Then externally rotate your arms, squeeze your shoulder blades together in the back, look up towards the ceiling and engage the whole back lifting the upper body of the floor.Keep your feet about shoulder width apart on the floor the entire time.Move slowly! The longer this takes the more control and strength you will develop!
adgj 4 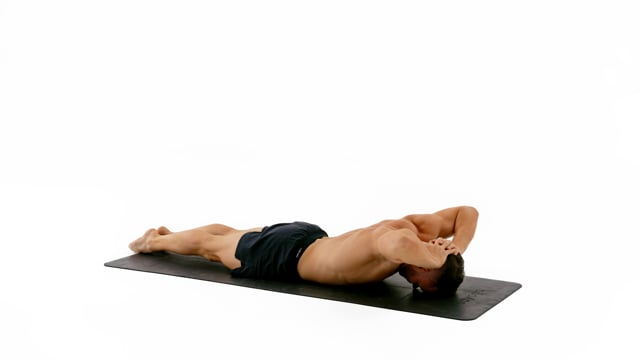
Lift your elbows up as you were trying to make them touch behind your head. Bring them back down slowly. Do not slam them into the floor.Keep your legs engaged but on the floor. Point your feet and make your ankles touch.Move slowly! The longer this takes the more control and strength you will develop!
adgj 5 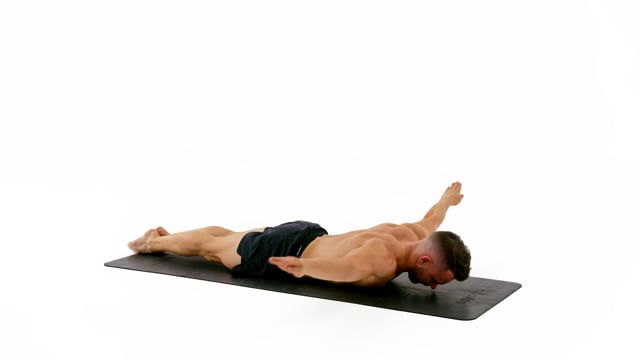
Keep your chest on the floor and lift your head sligthly.Keep your legs engaged but on the floor. Point your feet and make your ankles touch.
6
beh 7 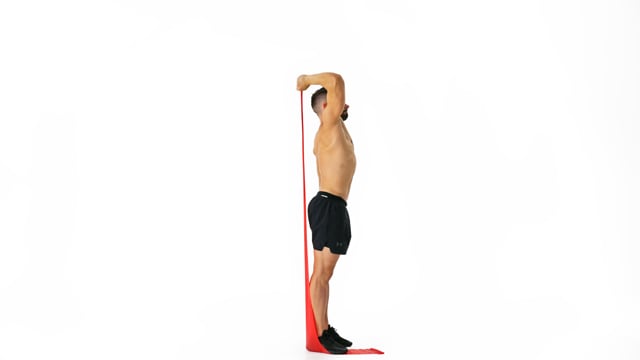
Allow your shoulder to move and elbow to flare naturally as your bend your arm.Engage your core to stabilize your position.Exhale as you extend the arm. Inhale on the way back.
beh 8 
Engage your core to stabilize your position. Minimize arching of the lower back.Lock your elbow and look at your hand.This is a core activation drill and not a back stretch. Do not bend too far towards the back!
beh 9 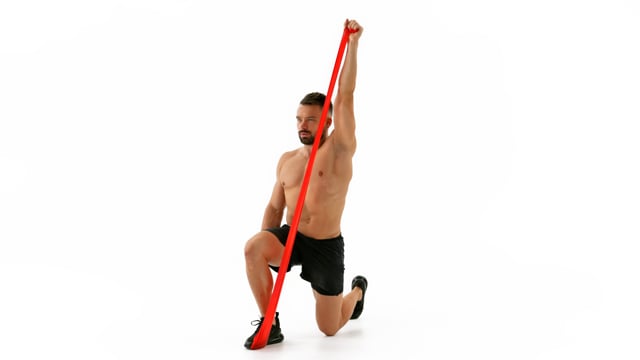
Stop lowering the arm with your elbow next to your shoulder and 90 degrees bent.Engage your core to stabilize your position.Exhale as you extend the arm. Inhale on the way back.
beh 10 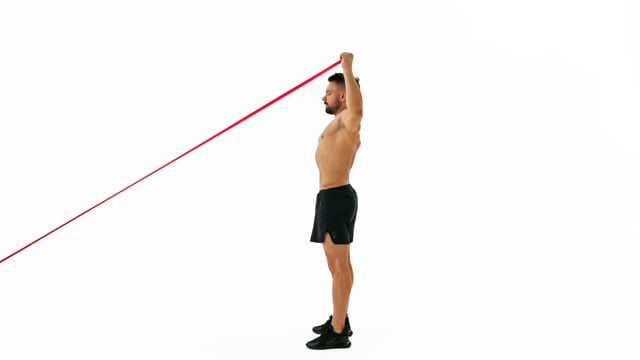
Separate your movements. First pull your hand back and up aligning your elbow with the shoulders, then rotate the arm and finally press the hand overhead. Follow this same path on the way back down.Imagine you had a solid stick going through your shoulders and the working arm all the way to your elbow. Rotate the arm on this axis.Stand far enough from your attachment point so you can apply constant backwards pressure on the elastic as you extend your arm overhead.
beh 11 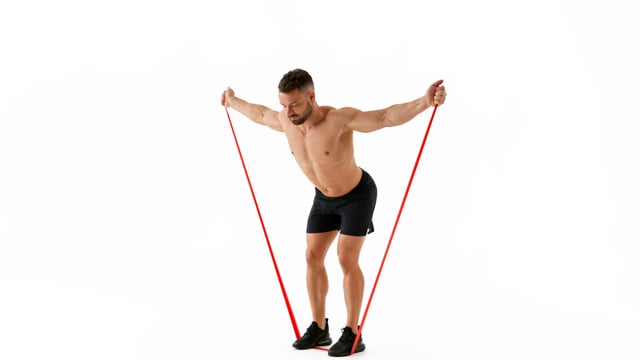
Keep your shoulders low and pull your arms back as if you were trying to touch your elbows behind your back.Rotate your hands so the thumbs are guiding the movement and the elastic is leaving your firsts on the pinky side.Exhale as you pull your arms back.
12
cfi 13 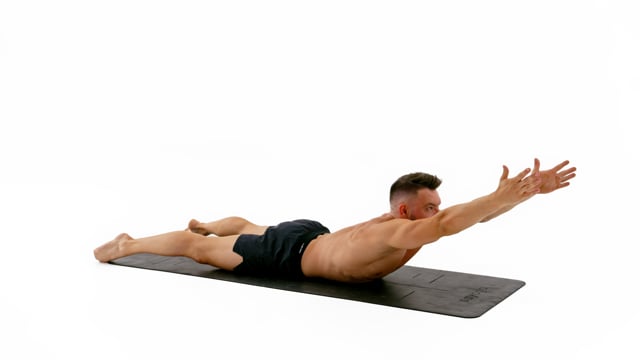
Externally rotate your hands as you move your arms towards the front. As your hands reach the front the thumbs point towards the ceiling. Reverse this as you bring the hands back down.Keep your feet about shoulder width apart on the floor the entire time.Move slowly! The longer this takes the more control and strength you will develop!
cfi 14 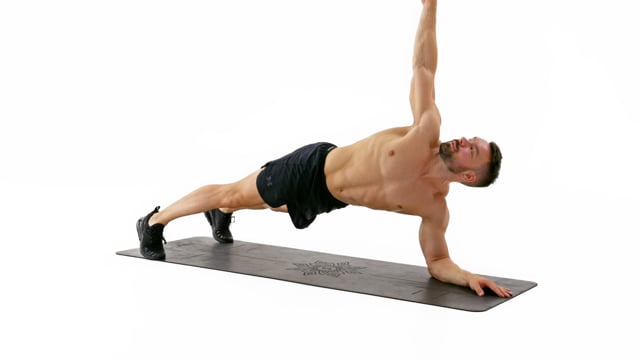
Engage your core and create 1 straight line from your feet all the way through your neck.Look up as you reach towards the ceiling. Both of your arms should end up in 1 straight line.Move slow and stay in control at all times!
cfi 15 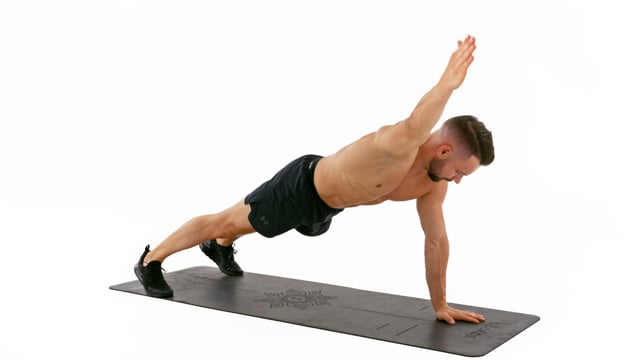
Engage your core and create 1 straight line from your feet all the way through your neck.Lift one arm at the time out diagonally in a 45 degree angle. Your thumb needs to point towards the ceiling.Keep your shoulders and hips immobile.
cfi 16 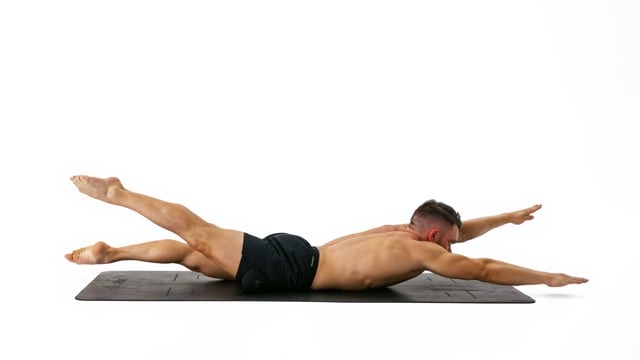
Pull your hands and feet far away from your center to get as long as possible.Keep your core engaged to stabilize your position and isolate the movement into your arms and legs only.Go as fast as possible.
cfi 17 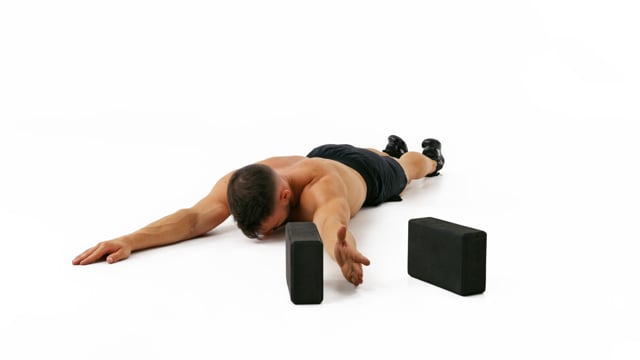
Relax your hands back on the floor between each rep.Keep your chest on the floor the entire time and rotate your hands for the thumbs to point towards the ceiling.Keep your legs engaged but on the floor. Point your feet and make your ankles touch.
Rest between sets: As Needed
Intensity: Light
workout_number sort_number Demo Exercise Reps/Sets How to/Cues
a d g j 1 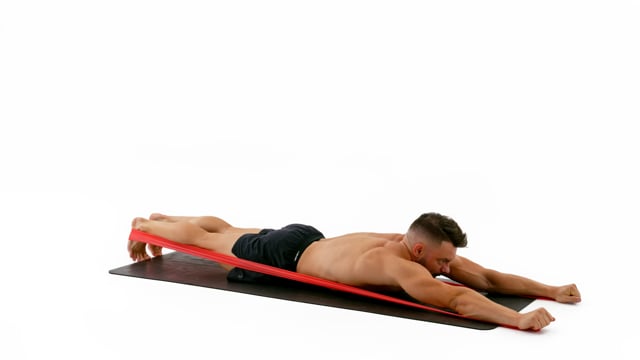
Reach as tall as you can and cover your ears with your shoulders.Lock your elbows and look at your hands.Do not lift your chest off the floor. Isolate the movement into your shoulders.
a d g j 2 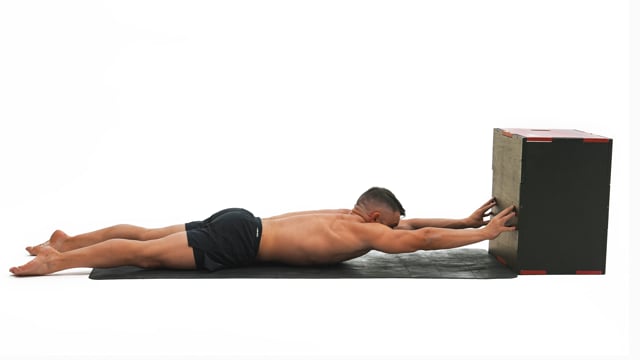
Keep your fingers connected with the wall whilst lifting the hands.Lock your elbows and look at your hands.Do not lift your chest off the floor. Isolate the movement into your shoulders.
a d g j 3 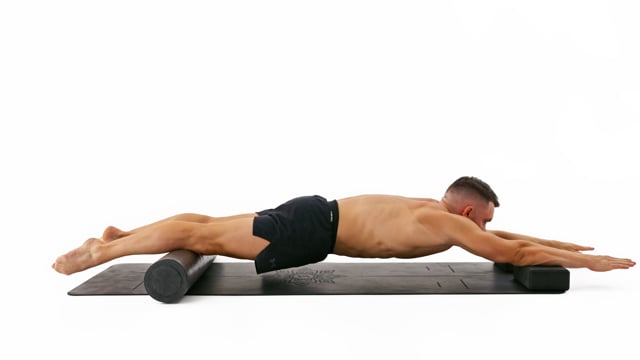
On the bottom end of the body the elevation should be on the quads just before the knees.Look at your hands and keep them around shoulder width apart.Push your lower back up and engage your core to create an even and slightly rounded line.
a d g j 4 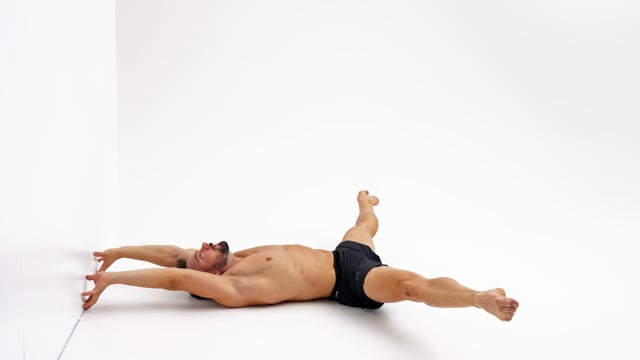
5
b e h k 6 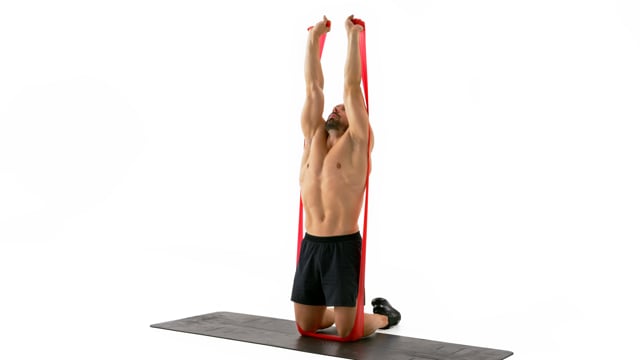
Lock your elbows and look at your hands.Reach towards the ceiling pushing as tall as you can and cover your ears with your shoulders. Make sure the elastic comes out of the back of your hands like an extension of your fingers and not from the thumb or pinky side.Go slow on the way down and keep your elbows locked. Both directions matter!
b e h k 7 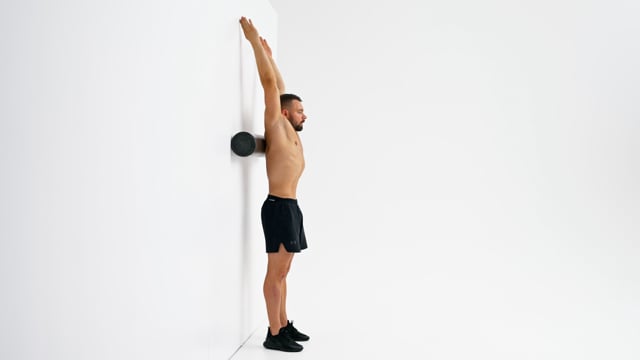
Engage your core and avoid arching your back as good as you can!Look at your hands and keep them around shoulder width apart.
b e h k 8 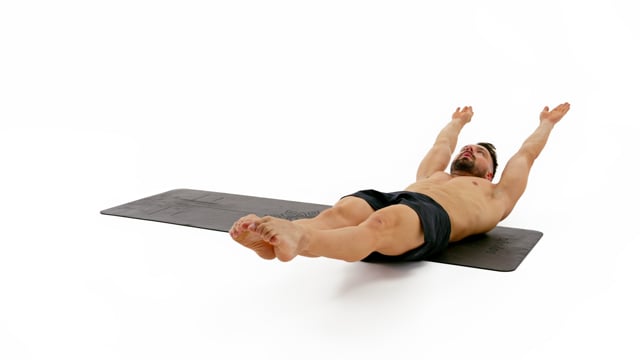
Lock your knees, point your feet and squeeze them together.Keep your head in a neutral position but pull it back slightly as you roll onto your stomach.Engage your entire body from hands to toes.
b e h k 9 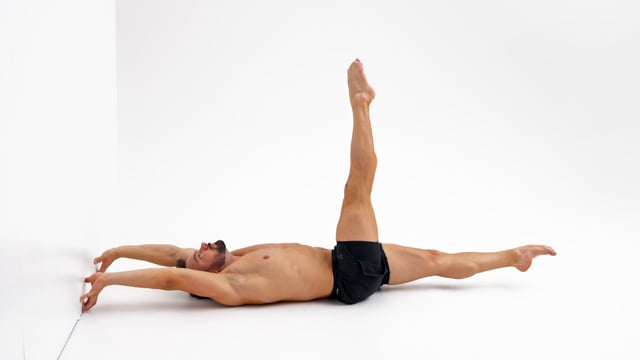
Keep your immobile leg engaged and hover the foot off the floor. Do not allow your hips to move at all during this drill.Lift your hands off the floor and push them into the wall hard by elevating your scapula. Try to cover your ears with your shoulders!Tilt your head back slightly and try to look at your hands to mimic the position you would be in when performing a handstand.
10
c f i l 11 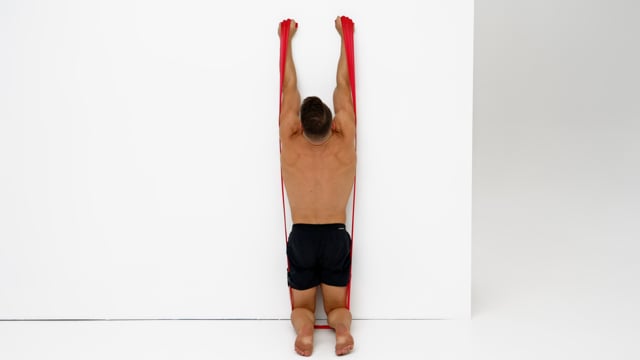
Lock your elbows and look at your hands.Reach towards the ceiling pushing as tall as you can and cover your ears with your shoulders. Make sure the elastic comes out of the back of your hands like an extension of your fingers and not from the thumb or pinky side.Go slow on the way down and keep your elbows locked. Both directions matter!
c f i l 12 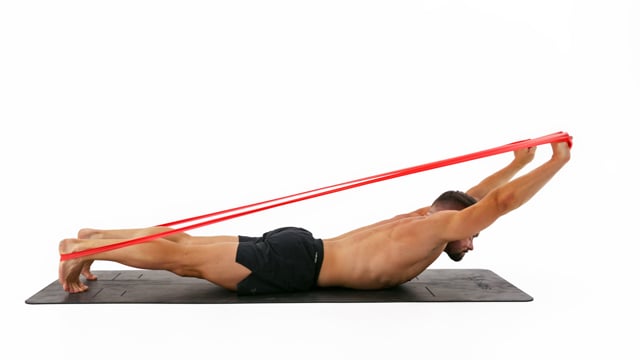
Hover your chin close to the floor.Lock your elbows and look at your hands.Do not lift your chest off the floor. Isolate the movement into your shoulders.
c f i l 13 
On the bottom end of the body the elevation should be on the quads just before the knees.Look at your hands and keep them around shoulder width apart.Push your lower back up and engage your core to create an even and slightly rounded line.
c f i l 14 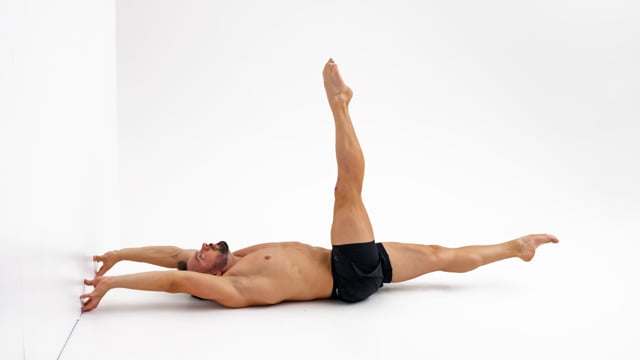
Keep your immobile leg engaged and hover the foot off the floor. Do not allow your hips to move at all during this drill.Lift your hands off the floor and push them into the wall hard by elevating your scapula. Try to cover your ears with your shoulders!Tilt your head back slightly and try to look at your hands to mimic the position you would be in when performing a handstand.
Rest between sets: As Needed
Intensity: Light
Technique Training
Rest between sets: Long enough to recover | Short enough to stay warm
Intensity: Moderate | Focus on form
workout_number sort_number Demo Exercise Reps/Sets How to/Cues
a 1 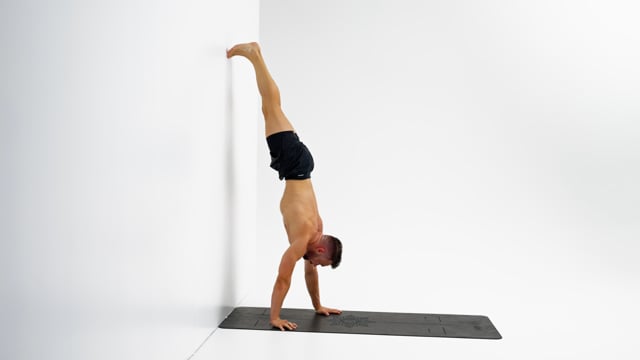
Take small and controlled steps with your hands facing towards the front.Only your feet should touch the wall. Do not place your knees, hips or chest on the wall.Look at the spot in between your hands. Do not look at the wall placing your chin on your chest.
a 2 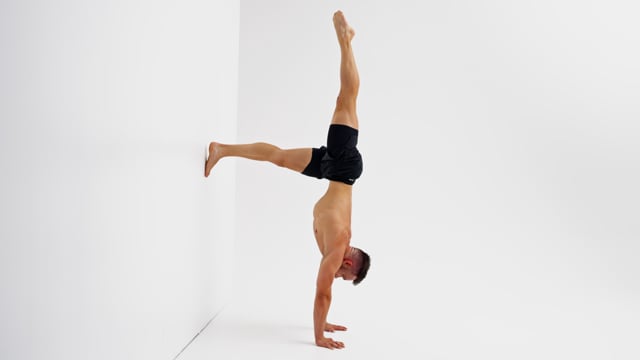
With the leg on top pressure on your shoulders is less horizontal and more vertical. Use this to push out extra tall. Work on holding this newly gained height on the way back down to the starting position.Engage your back and pull your hips into a slight anterior pelvic tilt when you are brining the leg back to the wall to keep your weight in the fingertips. Do not allow your lower back to round when returning to the L.In case of a temporary lack of hamstring flexibility bend your knee slightly to ease the tension.
a 3 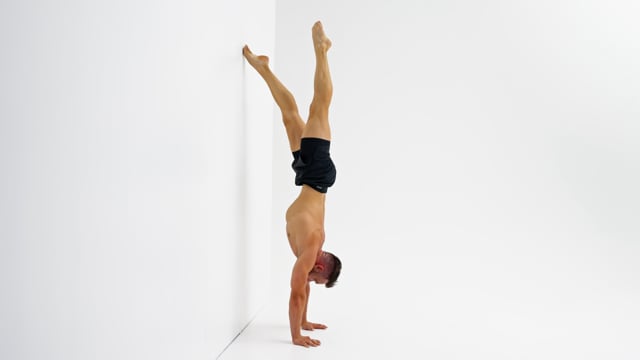
Focus on the way back and isolate the movement in 1 leg at the time. Do not use your top leg as a counter weight.Keep your hips immobile. Do not let your hips slide back towards the wall between reps.Keep your elbows locked and elevate your scapula fully at all times.
a 4 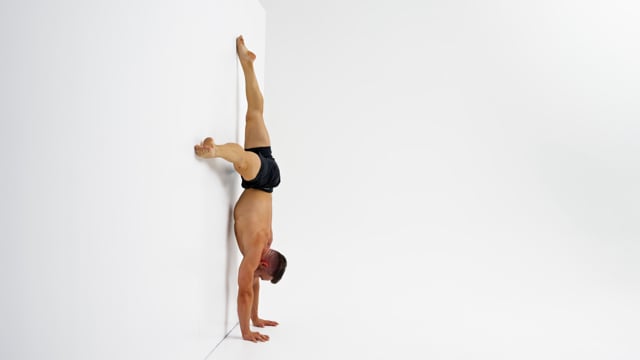
Keep your elbows locked and elevate your scapula fully at all times.Only your feet should touch the wall. Do not place your knees, hips or chest on the wall.Look at the spot in between your hands. Do not look at the wall placing your chin on your chest.
a 5 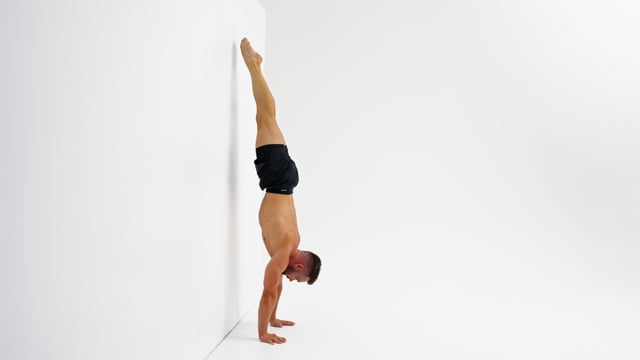
Do not pull your hips or arch your back. Stay in a perfectly straight line from shoulders to toes. The only position change should be in the shoulders and wrists.Move slow and stay in control at all times. Do not use momentum to get off the wall. Do not jump off the wall and do not take 1 foot at the time off the wall.Come back to the wall with your entire body from wrists to toes in 1 straight line.
a 6 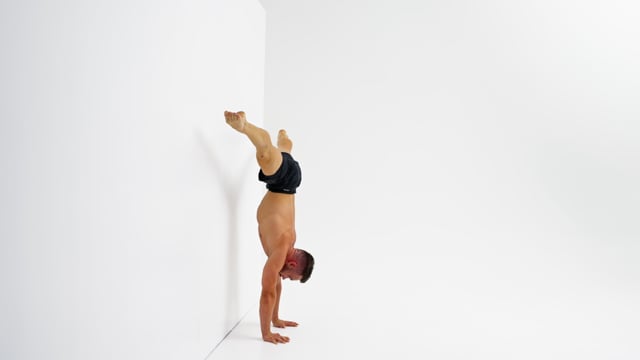
Open your legs into the straddle slowly. Not only will you have to catch your legs against gravity and momentum but also will your body become shorter. If your are not perfectly align this angle change will be surprising for your balance.Move slow and work on staying in control at all times. The goal is not just to jump from one position to the next but even to control the journey between the positions.Keep your elbows locked and elevate your scapula fully at all times.
a 7 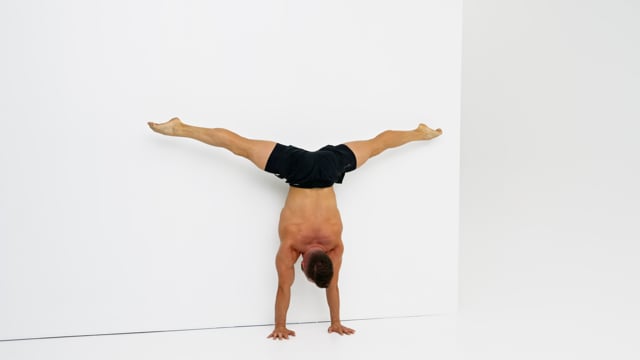
When your legs are together your feet should be in a parallel position. As soon as your legs open they have to rotate externally.Move slow and work on staying in control at all times. The goal is not just to jump from one position to the next but even to control the journey between the positions.Keep your scapula elevated, elbows locked and and the weight in the fingertips at all times. Look at the space in between your hands and engage your legs!
a 8 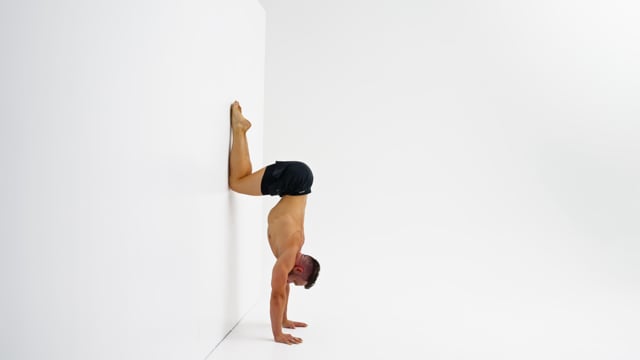
Keep your knees together and make them touch the wall as you pull them down.Pull your knees as low as possible whilst engaging your lower back. In the tuck position your hips need to be in a slight anterior pelvic tilt. As soon as your lower back rounds and your hips flip into a posterior pelvic tilt your knees are too low.Lock your elbows, elevate your scapula and look at the spot in between your hands.
a 9 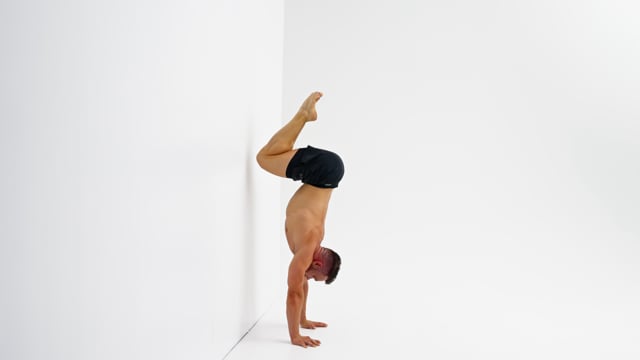
Do not jump off the wall or lean or shoulder excessively towards the front to get off the wall.Take both feet off the wall at the same time!Lock your elbows, elevate your scapula and look at the spot in between your hands.
a 10 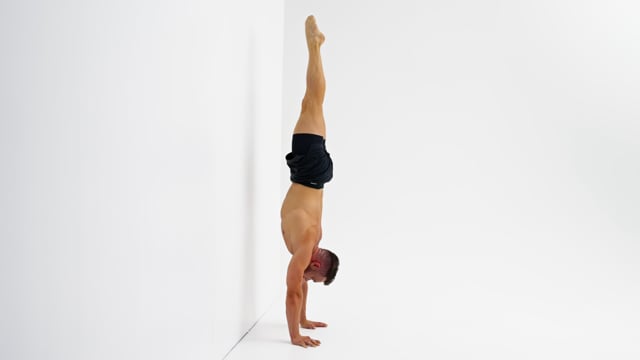
Time your hips and knees. If you were watching this drill from the side the feet should travel down and back up on 1 vertical line.Focus on your shoulders. Keeping them elevate is key here. Do not allow them to close or to slide towards the front.Pull your knees as low as possible in the tuck but stop before your lower back rounds. Engage the muscles in your lower back to pull your hips into a slight anterior pelvic tilt to support the weight of your legs.
a 11 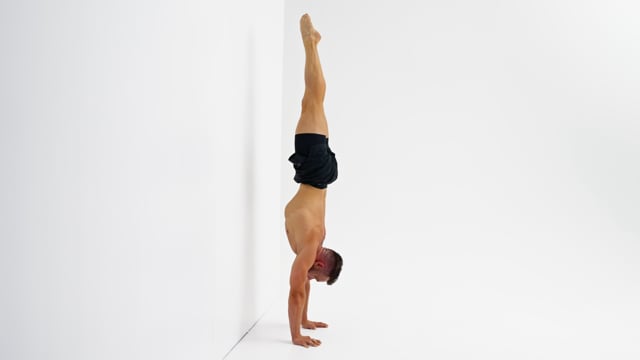
Work on isolating the movement exclusively into your legs! Your elbows should stay locked and the shoulders fully elevated and immobile throughout the entire drill.Hold each position for at least a short moment and bring your body to a visual stop of movement.Do not try to outrun your balance. Stay cool! If something does not go as planned: come to a stop, fix your position and then move on. Alternatively, you can also come down and reset from the top or simply continue.
a 12 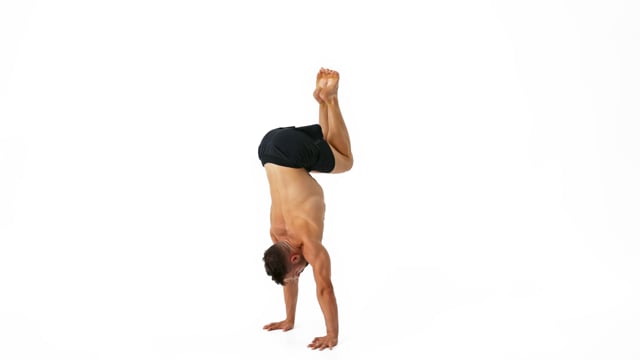
Use your hip flexors to pull your knees down towards your chest to minimize risk of falling over.Engage your lower back to pull on your hips. Do not allow your lower back to round or your shoulders to collapse towards the front.Keep your scapula elevated, elbows locked and and the weight in the fingertips at all times. Look at the space in between your hands and engage your legs!
a 13 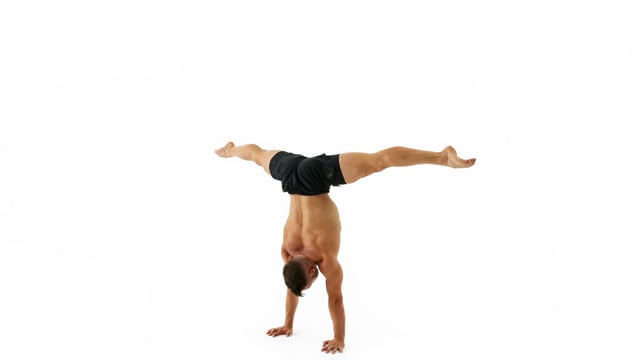
Move slow and work on staying in control at all times. The goal is not just to jump from one position to the next but even to control the journey between the positions.In the straddle handstand push your legs open to lock them in place and to stabilize the position but keep your feet high enough so you do not pike at the hips.In the tuck position bring your knees low enough so that your are stable but hold them high enough so your lower back does not round. Engage the muscles of your lower back to pull your hips into a slight anterior pelvic tilt.
a 14 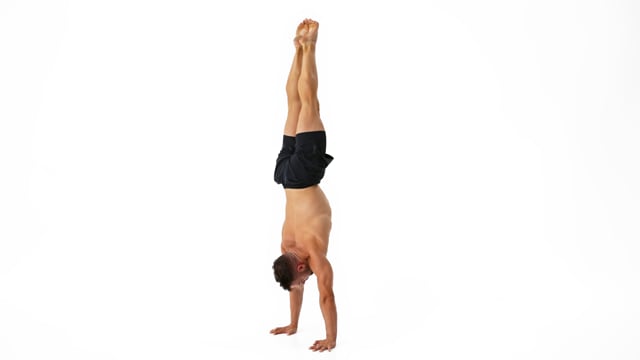
Hold the tuck position before extending the legs up into the straight handstand. To do so engage your lower back to pull the hips into a slight anterior pelvic tilt to align them with your already aligned shoulders and hands. Use your hip flexors to pull your knees towards your chest to minimize the risk of falling over.Time your hips and knee. If you were watching this drill from the side the foot should travel up and back down on one vertical line.Keep your scapula elevated, elbows locked and and the weight in the fingertips at all times. Look at the space in between your hands and engage your legs!
15
16
17
18
19
20
21
22
23
24
b 25 
Take small and controlled steps with your hands facing towards the front.Only your feet should touch the wall. Do not place your knees, hips or chest on the wall.Look at the spot in between your hands. Do not look at the wall placing your chin on your chest.
b 26 
Keep your elbows locked and elevate your scapula fully at all times.Only your feet should touch the wall. Do not place your knees, hips or chest on the wall.Look at the spot in between your hands. Do not look at the wall placing your chin on your chest.
b 27 
With the leg on top pressure on your shoulders is less horizontal and more vertical. Use this to push out extra tall. Work on holding this newly gained height on the way back down to the starting position.Engage your back and pull your hips into a slight anterior pelvic tilt when you are brining the leg back to the wall to keep your weight in the fingertips. Do not allow your lower back to round when returning to the L.In case of a temporary lack of hamstring flexibility bend your knee slightly to ease the tension.
b 28 
Focus on the way back and isolate the movement in 1 leg at the time. Do not use your top leg as a counter weight.Keep your hips immobile. Do not let your hips slide back towards the wall between reps.Keep your elbows locked and elevate your scapula fully at all times.
b 29 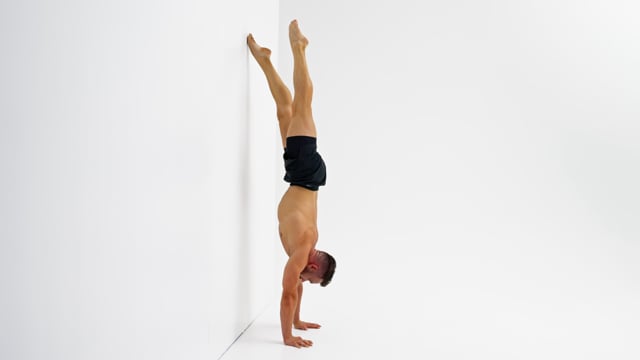
You can not see the wall coming and don't want to place any weight on the wall. You therefore have to move very slowly.Keep your immobile leg perfectly on top of the hands, shoulders & hips. Do not arch it towards the back as a counterweight.Remind yourself how to do a Slide Away. Lean your shoulders towards the front the get the feet off the wall.
b 30 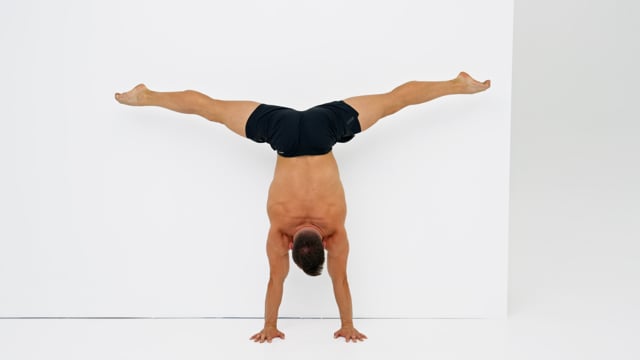
Don't just lock your legs inside of your hips but actively push them open. Do not accidentally close your legs whilst leaning towards the front., Lock your legs inside of your hips. Do not accidentally close your legs whilst leaning towards the front.Do not pull your hips or arch your back. Stay in a perfectly straight line from shoulders to toes. The only position change should be in the shoulders and wrists.Keep your elbows locked and elevate your scapula fully at all times.
b 31 
Engage your glutes whilst closing your legs to avoid piking at the hips.Move slow and work on staying in control at all times. The goal is not just to jump from one position to the next but even to control the journey between the positions.Keep your elbows locked and elevate your scapula fully at all times.
b 32 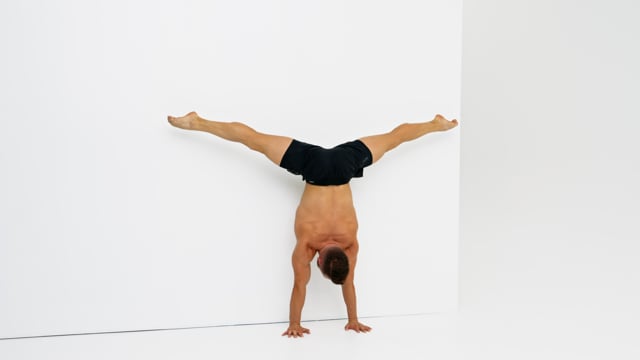
When your legs are together your feet should be in a parallel position. As soon as your legs open they have to rotate externally.Move slow and work on staying in control at all times. The goal is not just to jump from one position to the next but even to control the journey between the positions.Keep your scapula elevated, elbows locked and and the weight in the fingertips at all times. Look at the space in between your hands and engage your legs!
b 33 
Keep your knees together and make them touch the wall as you pull them down.Pull your knees as low as possible whilst engaging your lower back. In the tuck position your hips need to be in a slight anterior pelvic tilt. As soon as your lower back rounds and your hips flip into a posterior pelvic tilt your knees are too low.Lock your elbows, elevate your scapula and look at the spot in between your hands.
b 34 
Do not jump off the wall or lean or shoulder excessively towards the front to get off the wall.Take both feet off the wall at the same time!Lock your elbows, elevate your scapula and look at the spot in between your hands.
b 35 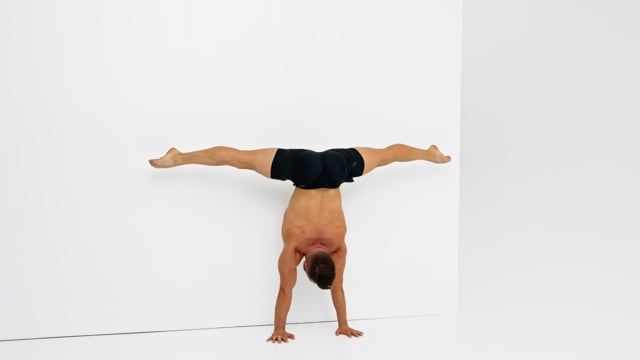
Pull your knees into a tight tuck on the way back to avoid touching the wall.Focus on the rotation of your legs inside of your hips. In the tuck position they are in parallel. When you push them open into the straddle they are externally rotated with your knees looking towards the floor.Lift your legs. Do not let them hang behind in a pancake and drag you down.
b 36 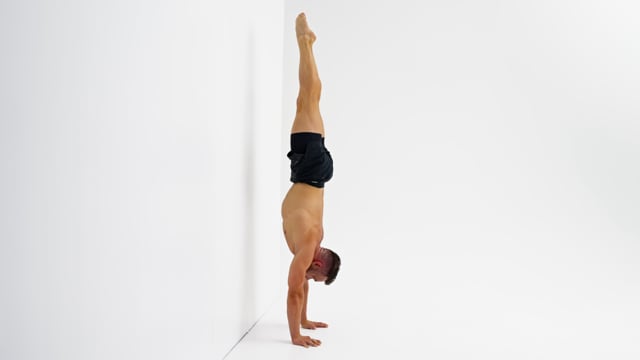
Work on isolating the movement exclusively into your legs! Your elbows should stay locked and the shoulders fully elevated and immobile throughout the entire drill.Hold each position for at least a short moment and bring your body to a visual stop of movement.Do not try to outrun your balance. Stay cool! If something does not go as planned: come to a stop, fix your position and then move on. Alternatively, you can also come down and reset from the top or simply continue.
b 37 
Use your hip flexors to pull your knees down towards your chest to minimize risk of falling over.Engage your lower back to pull on your hips. Do not allow your lower back to round or your shoulders to collapse towards the front.Keep your scapula elevated, elbows locked and and the weight in the fingertips at all times. Look at the space in between your hands and engage your legs!
b 38 
Move slow and work on staying in control at all times. The goal is not just to jump from one position to the next but even to control the journey between the positions.In the straddle handstand push your legs open to lock them in place and to stabilize the position but keep your feet high enough so you do not pike at the hips.In the tuck position bring your knees low enough so that your are stable but hold them high enough so your lower back does not round. Engage the muscles of your lower back to pull your hips into a slight anterior pelvic tilt.
b 39 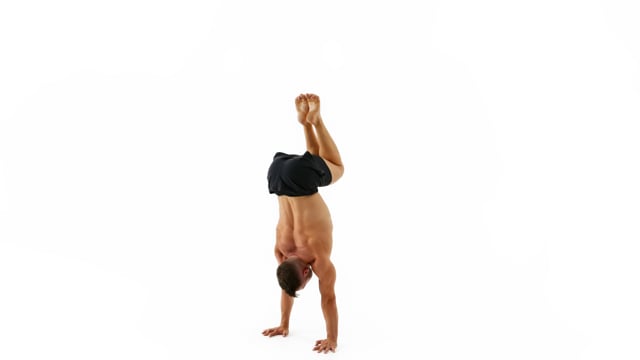
Time your hips and knees. If you were watching this drill from the side the feet should travel down and back up on 1 vertical line.Pull your knees as low as possible in the tuck but stop before your lower back rounds, shoulders close or elbows bend.Focus on your shoulders! Elevate your scapula, lock your elbows, look at your hands and keep your weight in your fingertips at all times.
40
41
42
43
44
45
c 46 
Take small and controlled steps with your hands facing towards the front.Only your feet should touch the wall. Do not place your knees, hips or chest on the wall.Look at the spot in between your hands. Do not look at the wall placing your chin on your chest.
c 47 
With the leg on top pressure on your shoulders is less horizontal and more vertical. Use this to push out extra tall. Work on holding this newly gained height on the way back down to the starting position.Engage your back and pull your hips into a slight anterior pelvic tilt when you are brining the leg back to the wall to keep your weight in the fingertips. Do not allow your lower back to round when returning to the L.In case of a temporary lack of hamstring flexibility bend your knee slightly to ease the tension.
c 48 
Keep your knees together and make them touch the wall as you pull them down.Pull your knees as low as possible whilst engaging your lower back. In the tuck position your hips need to be in a slight anterior pelvic tilt. As soon as your lower back rounds and your hips flip into a posterior pelvic tilt your knees are too low.Lock your elbows, elevate your scapula and look at the spot in between your hands.
c 49 
Do not jump off the wall or lean or shoulder excessively towards the front to get off the wall.Take both feet off the wall at the same time!Lock your elbows, elevate your scapula and look at the spot in between your hands.
c 50 
Pull your knees into a tight tuck on the way back to avoid touching the wall.Focus on the rotation of your legs inside of your hips. In the tuck position they are in parallel. When you push them open into the straddle they are externally rotated with your knees looking towards the floor.Lift your legs. Do not let them hang behind in a pancake and drag you down.
c 51 
Time your hips and knees. If you were watching this drill from the side the feet should travel down and back up on 1 vertical line.Focus on your shoulders. Keeping them elevate is key here. Do not allow them to close or to slide towards the front.Pull your knees as low as possible in the tuck but stop before your lower back rounds. Engage the muscles in your lower back to pull your hips into a slight anterior pelvic tilt to support the weight of your legs.
c 52 
Work on isolating the movement exclusively into your legs! Your elbows should stay locked and the shoulders fully elevated and immobile throughout the entire drill.Hold each position for at least a short moment and bring your body to a visual stop of movement.Do not try to outrun your balance. Stay cool! If something does not go as planned: come to a stop, fix your position and then move on. Alternatively, you can also come down and reset from the top or simply continue.
c 53 
Work on isolating the movement exclusively into your legs! Your elbows should stay locked and the shoulders fully elevated and immobile throughout the entire drill.Hold each position for at least a short moment and bring your body to a visual stop of movement.Do not try to outrun your balance. Stay cool! If something does not go as planned: come to a stop, fix your position and then move on. Alternatively, you can also come down and reset from the top or simply continue.
c 54 
Use your hip flexors to pull your knees down towards your chest to minimize risk of falling over.Engage your lower back to pull on your hips. Do not allow your lower back to round or your shoulders to collapse towards the front.Keep your scapula elevated, elbows locked and and the weight in the fingertips at all times. Look at the space in between your hands and engage your legs!
c 55 
Move slow and work on staying in control at all times. The goal is not just to jump from one position to the next but even to control the journey between the positions.In the straddle handstand push your legs open to lock them in place and to stabilize the position but keep your feet high enough so you do not pike at the hips.In the tuck position bring your knees low enough so that your are stable but hold them high enough so your lower back does not round. Engage the muscles of your lower back to pull your hips into a slight anterior pelvic tilt.
c 56 
Time your hips and knees. If you were watching this drill from the side the feet should travel down and back up on 1 vertical line.Pull your knees as low as possible in the tuck but stop before your lower back rounds, shoulders close or elbows bend.Focus on your shoulders! Elevate your scapula, lock your elbows, look at your hands and keep your weight in your fingertips at all times.
c 57 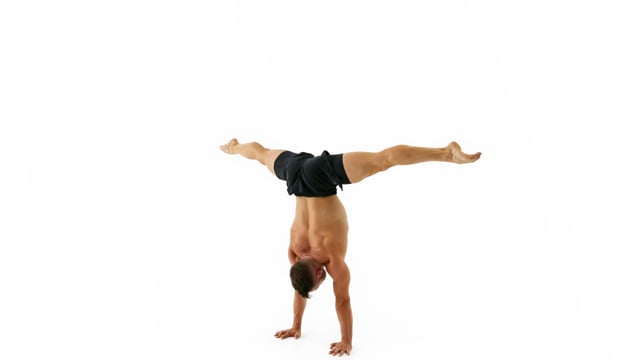
Work on isolating the movement exclusively into your legs! Your elbows should stay locked and the shoulders fully elevated and immobile throughout the entire drill.Hold each position for at least a short moment and bring your body to a visual stop of movement.Do not try to outrun your balance. Stay cool! If something does not go as planned: come to a stop, fix your position and then move on. Alternatively, you can also come down and reset from the top or simply continue.
c 58 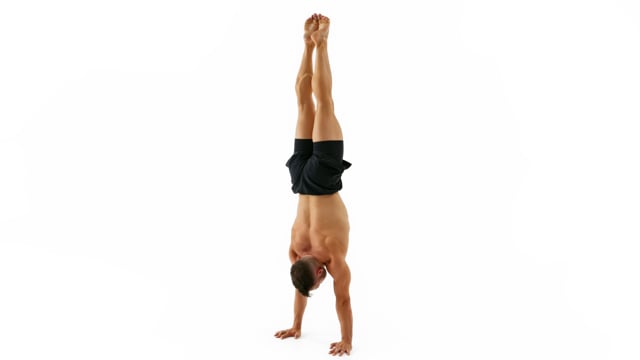
Work on isolating the movement exclusively into your legs! Your elbows should stay locked and the shoulders fully elevated and immobile throughout the entire drill.Hold each position for at least a short moment and bring your body to a visual stop of movement.Do not try to outrun your balance. Stay cool! If something does not go as planned: come to a stop, fix your position and then move on. Alternatively, you can also come down and reset from the top or simply continue.
59
60
61
62
63
64
d 65 
Take small and controlled steps with your hands facing towards the front.Only your feet should touch the wall. Do not place your knees, hips or chest on the wall.Look at the spot in between your hands. Do not look at the wall placing your chin on your chest.
d 66 
With the leg on top pressure on your shoulders is less horizontal and more vertical. Use this to push out extra tall. Work on holding this newly gained height on the way back down to the starting position.Engage your back and pull your hips into a slight anterior pelvic tilt when you are brining the leg back to the wall to keep your weight in the fingertips. Do not allow your lower back to round when returning to the L.In case of a temporary lack of hamstring flexibility bend your knee slightly to ease the tension.
d 67 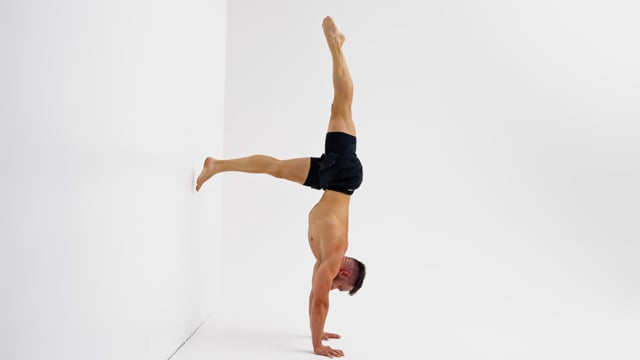
If you feel like you have to arch your back to use the top leg as counter weight your alignment is off. Push out tall from your shoulders and move them on top of the center of your hands instead of trying to force this to work by opening into a banana position.Focus on the way back and isolate the movement in 1 leg at the time. Do not use your top leg as a counter weight.In case of a temporary lack of hamstring flexibility bend your knee slightly to ease the tension.
d 68 
You can not see the wall coming and don't want to place any weight on the wall. You therefore have to move very slowly.Keep your immobile leg perfectly on top of the hands, shoulders & hips. Do not arch it towards the back as a counterweight.Remind yourself how to do a Slide Away. Lean your shoulders towards the front the get the feet off the wall.
d 69 
Do not pull your hips or arch your back. Stay in a perfectly straight line from shoulders to toes. The only position change should be in the shoulders and wrists.Move slow and stay in control at all times. Do not use momentum to get off the wall. Do not jump off the wall and do not take 1 foot at the time off the wall.Come back to the wall with your entire body from wrists to toes in 1 straight line.
d 70 
When your legs are together your feet should be in a parallel position. As soon as your legs open they have to rotate externally.Move slow and work on staying in control at all times. The goal is not just to jump from one position to the next but even to control the journey between the positions.Keep your scapula elevated, elbows locked and and the weight in the fingertips at all times. Look at the space in between your hands and engage your legs!
d 71 
Keep your elbows locked and elevate your scapula fully at all times.Only your feet should touch the wall. Do not place your knees, hips or chest on the wall.Look at the spot in between your hands. Do not look at the wall placing your chin on your chest.
d 72 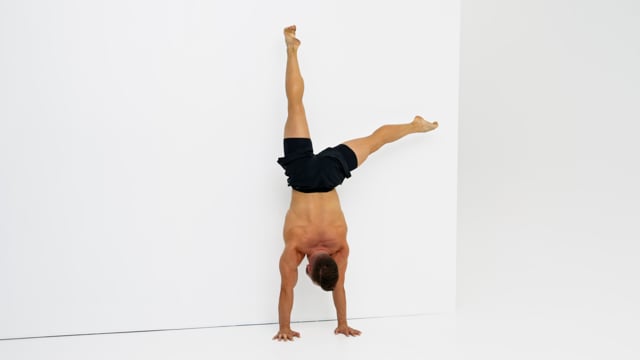
Focus on the rotation of your leg inside of your hip. In the straddle position the leg needs to be externally rotated. When the leg is on top it needs to be in parallel.Keep both elbows locked and shoulders elevated. Due to the nature of the movement you will have more weight on one side of your body. It is up to you to create the visual illusion of the weight staying perfectly even between your hands.You are very close to the wall which forces you to engage properly and follow correct form. If not your foot will touch the wall!
d 73 
Keep your knees together and make them touch the wall as you pull them down.Pull your knees as low as possible whilst engaging your lower back. In the tuck position your hips need to be in a slight anterior pelvic tilt. As soon as your lower back rounds and your hips flip into a posterior pelvic tilt your knees are too low.Lock your elbows, elevate your scapula and look at the spot in between your hands.
d 74 
Engage your glutes when pushing the legs up towards the straight handstand to avoid piking at the hips.Start with a tight tuck. Pull your knees towards the chest using your hips flexors. Stop your hips from sliding into a posterior pelvic tilt through engagement of your lower back.Lock your elbows, elevate your scapula and look at the spot in between your hands.
d 75 
Time your hips and knees. If you were watching this drill from the side the feet should travel down and back up on 1 vertical line.Focus on your shoulders. Keeping them elevate is key here. Do not allow them to close or to slide towards the front.Pull your knees as low as possible in the tuck but stop before your lower back rounds. Engage the muscles in your lower back to pull your hips into a slight anterior pelvic tilt to support the weight of your legs.
d 76 
Work on isolating the movement exclusively into your legs! Your elbows should stay locked and the shoulders fully elevated and immobile throughout the entire drill.Hold each position for at least a short moment and bring your body to a visual stop of movement.Do not try to outrun your balance. Stay cool! If something does not go as planned: come to a stop, fix your position and then move on. Alternatively, you can also come down and reset from the top or simply continue.
d 77 
Use your hip flexors to pull your knees down towards your chest to minimize risk of falling over.Engage your lower back to pull on your hips. Do not allow your lower back to round or your shoulders to collapse towards the front.Keep your scapula elevated, elbows locked and and the weight in the fingertips at all times. Look at the space in between your hands and engage your legs!
d 78 
Time your hips and knees. If you were watching this drill from the side the feet should travel down and back up on 1 vertical line.Pull your knees as low as possible in the tuck but stop before your lower back rounds, shoulders close or elbows bend.Focus on your shoulders! Elevate your scapula, lock your elbows, look at your hands and keep your weight in your fingertips at all times.
d 79 
Work on isolating the movement exclusively into your legs! Your elbows should stay locked and the shoulders fully elevated and immobile throughout the entire drill.Hold each position for at least a short moment and bring your body to a visual stop of movement.Do not try to outrun your balance. Stay cool! If something does not go as planned: come to a stop, fix your position and then move on. Alternatively, you can also come down and reset from the top or simply continue.
80
81
82
83
84
85
86
87
e 88 
Take small and controlled steps with your hands facing towards the front.Only your feet should touch the wall. Do not place your knees, hips or chest on the wall.Look at the spot in between your hands. Do not look at the wall placing your chin on your chest.
e 89 
With the leg on top pressure on your shoulders is less horizontal and more vertical. Use this to push out extra tall. Work on holding this newly gained height on the way back down to the starting position.Engage your back and pull your hips into a slight anterior pelvic tilt when you are brining the leg back to the wall to keep your weight in the fingertips. Do not allow your lower back to round when returning to the L.In case of a temporary lack of hamstring flexibility bend your knee slightly to ease the tension.
e 90 
If you feel like you have to arch your back to use the top leg as counter weight your alignment is off. Push out tall from your shoulders and move them on top of the center of your hands instead of trying to force this to work by opening into a banana position.Focus on the way back and isolate the movement in 1 leg at the time. Do not use your top leg as a counter weight.In case of a temporary lack of hamstring flexibility bend your knee slightly to ease the tension.
e 91 
You can not see the wall coming and don't want to place any weight on the wall. You therefore have to move very slowly.Keep your immobile leg perfectly on top of the hands, shoulders & hips. Do not arch it towards the back as a counterweight.Remind yourself how to do a Slide Away. Lean your shoulders towards the front the get the feet off the wall.
e 92 
Don't just lock your legs inside of your hips but actively push them open. Do not accidentally close your legs whilst leaning towards the front., Lock your legs inside of your hips. Do not accidentally close your legs whilst leaning towards the front.Do not pull your hips or arch your back. Stay in a perfectly straight line from shoulders to toes. The only position change should be in the shoulders and wrists.Keep your elbows locked and elevate your scapula fully at all times.
e 93 
When your legs are together your feet should be in a parallel position. As soon as your legs open they have to rotate externally.Move slow and work on staying in control at all times. The goal is not just to jump from one position to the next but even to control the journey between the positions.Keep your scapula elevated, elbows locked and and the weight in the fingertips at all times. Look at the space in between your hands and engage your legs!
e 94 
Keep your elbows locked and elevate your scapula fully at all times.Only your feet should touch the wall. Do not place your knees, hips or chest on the wall.Look at the spot in between your hands. Do not look at the wall placing your chin on your chest.
e 95 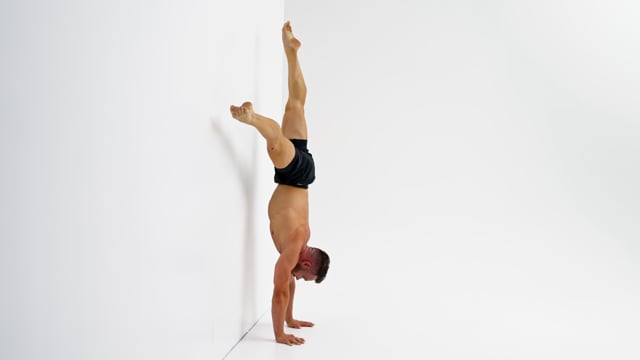
Focus on the rotation of your leg inside of your hip. In the straddle position the leg needs to be externally rotated. When the leg is on top it needs to be in parallel.Keep both elbows locked and shoulders elevated. Due to the nature of the movement you will have more weight on one side of your body. It is up to you to create the visual illusion of the weight staying perfectly even between your hands.You are very close to the wall which forces you to engage properly and follow correct form. If not your foot will touch the wall!
e 96 
Keep your knees together and make them touch the wall as you pull them down.Pull your knees as low as possible whilst engaging your lower back. In the tuck position your hips need to be in a slight anterior pelvic tilt. As soon as your lower back rounds and your hips flip into a posterior pelvic tilt your knees are too low.Lock your elbows, elevate your scapula and look at the spot in between your hands.
e 97 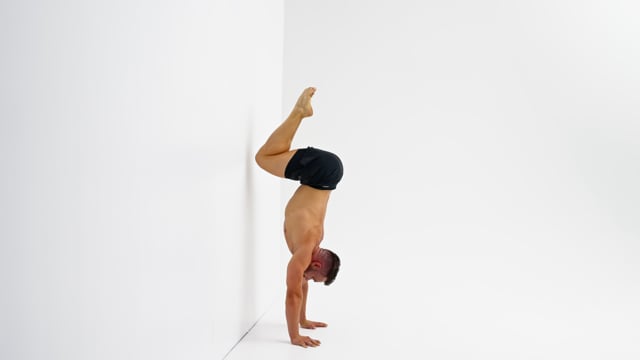
Focus on the rotation of your legs inside of your hips. In the tuck position they are in parallel. When you push them open into the straddle they are externally rotated with your knees looking towards the floor.Lift your legs. Do not let them hang behind in a pancake and drag you down.Start with a tight tuck. Pull your knees towards the chest using your hips flexors. Stop your hips from sliding into a posterior pelvic tilt through engagement of your lower back.
e 98 
Pull your knees into a tight tuck on the way back to avoid touching the wall.Focus on the rotation of your legs inside of your hips. In the tuck position they are in parallel. When you push them open into the straddle they are externally rotated with your knees looking towards the floor.Lift your legs. Do not let them hang behind in a pancake and drag you down.
e 99 
Work on isolating the movement exclusively into your legs! Your elbows should stay locked and the shoulders fully elevated and immobile throughout the entire drill.Hold each position for at least a short moment and bring your body to a visual stop of movement.Do not try to outrun your balance. Stay cool! If something does not go as planned: come to a stop, fix your position and then move on. Alternatively, you can also come down and reset from the top or simply continue.
e 100 
Use your hip flexors to pull your knees down towards your chest to minimize risk of falling over.Engage your lower back to pull on your hips. Do not allow your lower back to round or your shoulders to collapse towards the front.Keep your scapula elevated, elbows locked and and the weight in the fingertips at all times. Look at the space in between your hands and engage your legs!
e 101 
Move slow and work on staying in control at all times. The goal is not just to jump from one position to the next but even to control the journey between the positions.In the straddle handstand push your legs open to lock them in place and to stabilize the position but keep your feet high enough so you do not pike at the hips.In the tuck position bring your knees low enough so that your are stable but hold them high enough so your lower back does not round. Engage the muscles of your lower back to pull your hips into a slight anterior pelvic tilt.
e 102 
Work on isolating the movement exclusively into your legs! Your elbows should stay locked and the shoulders fully elevated and immobile throughout the entire drill.Hold each position for at least a short moment and bring your body to a visual stop of movement.Do not try to outrun your balance. Stay cool! If something does not go as planned: come to a stop, fix your position and then move on. Alternatively, you can also come down and reset from the top or simply continue.
103
104
105
f 106 
Take small and controlled steps with your hands facing towards the front.Only your feet should touch the wall. Do not place your knees, hips or chest on the wall.Look at the spot in between your hands. Do not look at the wall placing your chin on your chest.
f 107 
With the leg on top pressure on your shoulders is less horizontal and more vertical. Use this to push out extra tall. Work on holding this newly gained height on the way back down to the starting position.Engage your back and pull your hips into a slight anterior pelvic tilt when you are brining the leg back to the wall to keep your weight in the fingertips. Do not allow your lower back to round when returning to the L.In case of a temporary lack of hamstring flexibility bend your knee slightly to ease the tension.
f 108 
If you feel like you have to arch your back to use the top leg as counter weight your alignment is off. Push out tall from your shoulders and move them on top of the center of your hands instead of trying to force this to work by opening into a banana position.Focus on the way back and isolate the movement in 1 leg at the time. Do not use your top leg as a counter weight.In case of a temporary lack of hamstring flexibility bend your knee slightly to ease the tension.
f 109 
You can not see the wall coming and don't want to place any weight on the wall. You therefore have to move very slowly.Keep your immobile leg perfectly on top of the hands, shoulders & hips. Do not arch it towards the back as a counterweight.Remind yourself how to do a Slide Away. Lean your shoulders towards the front the get the feet off the wall.
f 110 
When your legs are together your feet should be in a parallel position. As soon as your legs open they have to rotate externally.Move slow and work on staying in control at all times. The goal is not just to jump from one position to the next but even to control the journey between the positions.Keep your scapula elevated, elbows locked and and the weight in the fingertips at all times. Look at the space in between your hands and engage your legs!
f 111 
When your legs are together your feet should be in a parallel position. As soon as your legs open they have to rotate externally.Move slow and work on staying in control at all times. The goal is not just to jump from one position to the next but even to control the journey between the positions.Keep your scapula elevated, elbows locked and and the weight in the fingertips at all times. Look at the space in between your hands and engage your legs!
f 112 
Use your hip flexors to pull your knees down towards your chest to minimize risk of falling over.Engage your lower back to pull on your hips. Do not allow your lower back to round or your shoulders to collapse towards the front.Keep your scapula elevated, elbows locked and and the weight in the fingertips at all times. Look at the space in between your hands and engage your legs!
f 113 
Move slow and work on staying in control at all times. The goal is not just to jump from one position to the next but even to control the journey between the positions.In the straddle handstand push your legs open to lock them in place and to stabilize the position but keep your feet high enough so you do not pike at the hips.In the tuck position bring your knees low enough so that your are stable but hold them high enough so your lower back does not round. Engage the muscles of your lower back to pull your hips into a slight anterior pelvic tilt.
f 114 
Time your hips and knees. If you were watching this drill from the side the feet should travel down and back up on 1 vertical line.Pull your knees as low as possible in the tuck but stop before your lower back rounds, shoulders close or elbows bend.Focus on your shoulders! Elevate your scapula, lock your elbows, look at your hands and keep your weight in your fingertips at all times.
f 115 
Work on isolating the movement exclusively into your legs! Your elbows should stay locked and the shoulders fully elevated and immobile throughout the entire drill.Hold each position for at least a short moment and bring your body to a visual stop of movement.Do not try to outrun your balance. Stay cool! If something does not go as planned: come to a stop, fix your position and then move on. Alternatively, you can also come down and reset from the top or simply continue.
f 116 
Work on isolating the movement exclusively into your legs! Your elbows should stay locked and the shoulders fully elevated and immobile throughout the entire drill.Hold each position for at least a short moment and bring your body to a visual stop of movement.Do not try to outrun your balance. Stay cool! If something does not go as planned: come to a stop, fix your position and then move on. Alternatively, you can also come down and reset from the top or simply continue.
f 117 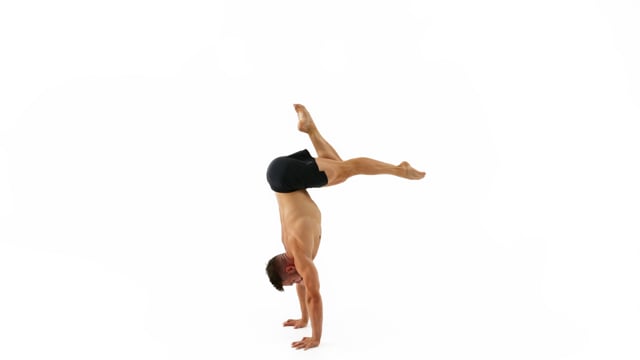
During the tuck leg extensions keep your knees glued together and isolate the movement exclusively into your knees joints.Move slow and try to hold the position with the extended leg for a moment.Engage your lower back to pull on your hips. Do not allow your lower back to round or your shoulders to collapse towards the front.
118
119
120
121
122
123
124
g 125 
Take small and controlled steps with your hands facing towards the front.Only your feet should touch the wall. Do not place your knees, hips or chest on the wall.Look at the spot in between your hands. Do not look at the wall placing your chin on your chest.
g 126 
Do not pull your hips or arch your back. Stay in a perfectly straight line from shoulders to toes. The only position change should be in the shoulders and wrists.Move slow and stay in control at all times. Do not use momentum to get off the wall. Do not jump off the wall and do not take 1 foot at the time off the wall.Come back to the wall with your entire body from wrists to toes in 1 straight line.
g 127 
Don't just lock your legs inside of your hips but actively push them open. Do not accidentally close your legs whilst leaning towards the front., Lock your legs inside of your hips. Do not accidentally close your legs whilst leaning towards the front.Do not pull your hips or arch your back. Stay in a perfectly straight line from shoulders to toes. The only position change should be in the shoulders and wrists.Keep your elbows locked and elevate your scapula fully at all times.
g 128 
When your legs are together your feet should be in a parallel position. As soon as your legs open they have to rotate externally.Move slow and work on staying in control at all times. The goal is not just to jump from one position to the next but even to control the journey between the positions.Keep your scapula elevated, elbows locked and and the weight in the fingertips at all times. Look at the space in between your hands and engage your legs!
g 129 
When your legs are together your feet should be in a parallel position. As soon as your legs open they have to rotate externally.Move slow and work on staying in control at all times. The goal is not just to jump from one position to the next but even to control the journey between the positions.Keep your scapula elevated, elbows locked and and the weight in the fingertips at all times. Look at the space in between your hands and engage your legs!
g 130 
Keep your elbows locked and elevate your scapula fully at all times.Only your feet should touch the wall. Do not place your knees, hips or chest on the wall.Look at the spot in between your hands. Do not look at the wall placing your chin on your chest.
g 131 
Focus on the rotation of your leg inside of your hip. In the straddle position the leg needs to be externally rotated. When the leg is on top it needs to be in parallel.Keep both elbows locked and shoulders elevated. Due to the nature of the movement you will have more weight on one side of your body. It is up to you to create the visual illusion of the weight staying perfectly even between your hands.You are very close to the wall which forces you to engage properly and follow correct form. If not your foot will touch the wall!
g 132 
Focus on the rotation of your leg inside of your hip. In the straddle position the leg needs to be externally rotated. When the leg is on top it needs to be in parallel.Keep both elbows locked and shoulders elevated. Due to the nature of the movement you will have more weight on one side of your body. It is up to you to create the visual illusion of the weight staying perfectly even between your hands.You are very close to the wall which forces you to engage properly and follow correct form. If not your foot will touch the wall!
g 133 
Use your hip flexors to pull your knees down towards your chest to minimize risk of falling over.Engage your lower back to pull on your hips. Do not allow your lower back to round or your shoulders to collapse towards the front.Keep your scapula elevated, elbows locked and and the weight in the fingertips at all times. Look at the space in between your hands and engage your legs!
g 134 
Move slow and work on staying in control at all times. The goal is not just to jump from one position to the next but even to control the journey between the positions.In the straddle handstand push your legs open to lock them in place and to stabilize the position but keep your feet high enough so you do not pike at the hips.In the tuck position bring your knees low enough so that your are stable but hold them high enough so your lower back does not round. Engage the muscles of your lower back to pull your hips into a slight anterior pelvic tilt.
g 135 
Time your hips and knees. If you were watching this drill from the side the feet should travel down and back up on 1 vertical line.Pull your knees as low as possible in the tuck but stop before your lower back rounds, shoulders close or elbows bend.Focus on your shoulders! Elevate your scapula, lock your elbows, look at your hands and keep your weight in your fingertips at all times.
136
137
138
139
140
h 141 
Take small and controlled steps with your hands facing towards the front.Only your feet should touch the wall. Do not place your knees, hips or chest on the wall.Look at the spot in between your hands. Do not look at the wall placing your chin on your chest.
h 142 
Keep your knees together and make them touch the wall as you pull them down.Pull your knees as low as possible whilst engaging your lower back. In the tuck position your hips need to be in a slight anterior pelvic tilt. As soon as your lower back rounds and your hips flip into a posterior pelvic tilt your knees are too low.Lock your elbows, elevate your scapula and look at the spot in between your hands.
h 143 
Do not jump off the wall or lean or shoulder excessively towards the front to get off the wall.Take both feet off the wall at the same time!Lock your elbows, elevate your scapula and look at the spot in between your hands.
h 144 
Pull your knees into a tight tuck on the way back to avoid touching the wall.Focus on the rotation of your legs inside of your hips. In the tuck position they are in parallel. When you push them open into the straddle they are externally rotated with your knees looking towards the floor.Lift your legs. Do not let them hang behind in a pancake and drag you down.
h 145 
Time your hips and knees. If you were watching this drill from the side the feet should travel down and back up on 1 vertical line.Focus on your shoulders. Keeping them elevate is key here. Do not allow them to close or to slide towards the front.Pull your knees as low as possible in the tuck but stop before your lower back rounds. Engage the muscles in your lower back to pull your hips into a slight anterior pelvic tilt to support the weight of your legs.
h 146 
Work on isolating the movement exclusively into your legs! Your elbows should stay locked and the shoulders fully elevated and immobile throughout the entire drill.Hold each position for at least a short moment and bring your body to a visual stop of movement.Do not try to outrun your balance. Stay cool! If something does not go as planned: come to a stop, fix your position and then move on. Alternatively, you can also come down and reset from the top or simply continue.
h 147 
Work on isolating the movement exclusively into your legs! Your elbows should stay locked and the shoulders fully elevated and immobile throughout the entire drill.Hold each position for at least a short moment and bring your body to a visual stop of movement.Do not try to outrun your balance. Stay cool! If something does not go as planned: come to a stop, fix your position and then move on. Alternatively, you can also come down and reset from the top or simply continue.
h 148 
Use your hip flexors to pull your knees down towards your chest to minimize risk of falling over.Engage your lower back to pull on your hips. Do not allow your lower back to round or your shoulders to collapse towards the front.Keep your scapula elevated, elbows locked and and the weight in the fingertips at all times. Look at the space in between your hands and engage your legs!
h 149 
Move slow and work on staying in control at all times. The goal is not just to jump from one position to the next but even to control the journey between the positions.In the straddle handstand push your legs open to lock them in place and to stabilize the position but keep your feet high enough so you do not pike at the hips.In the tuck position bring your knees low enough so that your are stable but hold them high enough so your lower back does not round. Engage the muscles of your lower back to pull your hips into a slight anterior pelvic tilt.
h 150 
Time your hips and knees. If you were watching this drill from the side the feet should travel down and back up on 1 vertical line.Pull your knees as low as possible in the tuck but stop before your lower back rounds, shoulders close or elbows bend.Focus on your shoulders! Elevate your scapula, lock your elbows, look at your hands and keep your weight in your fingertips at all times.
h 151 
Work on isolating the movement exclusively into your legs! Your elbows should stay locked and the shoulders fully elevated and immobile throughout the entire drill.Hold each position for at least a short moment and bring your body to a visual stop of movement.Do not try to outrun your balance. Stay cool! If something does not go as planned: come to a stop, fix your position and then move on. Alternatively, you can also come down and reset from the top or simply continue.
h 152 
Work on isolating the movement exclusively into your legs! Your elbows should stay locked and the shoulders fully elevated and immobile throughout the entire drill.Hold each position for at least a short moment and bring your body to a visual stop of movement.Do not try to outrun your balance. Stay cool! If something does not go as planned: come to a stop, fix your position and then move on. Alternatively, you can also come down and reset from the top or simply continue.
153
154
i 155 
Take small and controlled steps with your hands facing towards the front.Only your feet should touch the wall. Do not place your knees, hips or chest on the wall.Look at the spot in between your hands. Do not look at the wall placing your chin on your chest.
i 156 
Keep your knees together and make them touch the wall as you pull them down.Pull your knees as low as possible whilst engaging your lower back. In the tuck position your hips need to be in a slight anterior pelvic tilt. As soon as your lower back rounds and your hips flip into a posterior pelvic tilt your knees are too low.Lock your elbows, elevate your scapula and look at the spot in between your hands.
i 157 
Do not pull your hips or arch your back. Stay in a perfectly straight line from shoulders to toes. The only position change should be in the shoulders and wrists.Move slow and stay in control at all times. Do not use momentum to get off the wall. Do not jump off the wall and do not take 1 foot at the time off the wall.Come back to the wall with your entire body from wrists to toes in 1 straight line.
i 158 
Don't just lock your legs inside of your hips but actively push them open. Do not accidentally close your legs whilst leaning towards the front., Lock your legs inside of your hips. Do not accidentally close your legs whilst leaning towards the front.Do not pull your hips or arch your back. Stay in a perfectly straight line from shoulders to toes. The only position change should be in the shoulders and wrists.Keep your elbows locked and elevate your scapula fully at all times.
i 159 
Keep your elbows locked and elevate your scapula fully at all times.Only your feet should touch the wall. Do not place your knees, hips or chest on the wall.Look at the spot in between your hands. Do not look at the wall placing your chin on your chest.
i 160 
Focus on the rotation of your leg inside of your hip. In the straddle position the leg needs to be externally rotated. When the leg is on top it needs to be in parallel.Keep both elbows locked and shoulders elevated. Due to the nature of the movement you will have more weight on one side of your body. It is up to you to create the visual illusion of the weight staying perfectly even between your hands.You are very close to the wall which forces you to engage properly and follow correct form. If not your foot will touch the wall!
i 161 
Focus on the rotation of your leg inside of your hip. In the straddle position the leg needs to be externally rotated. When the leg is on top it needs to be in parallel.Keep both elbows locked and shoulders elevated. Due to the nature of the movement you will have more weight on one side of your body. It is up to you to create the visual illusion of the weight staying perfectly even between your hands.You are very close to the wall which forces you to engage properly and follow correct form. If not your foot will touch the wall!
i 162 
If you feel like you have to arch your back to use the top leg as counter weight your alignment is off. Push out tall from your shoulders and move them on top of the center of your hands instead of trying to force this to work by opening into a banana position.Focus on the way back and isolate the movement in 1 leg at the time. Do not use your top leg as a counter weight.In case of a temporary lack of hamstring flexibility bend your knee slightly to ease the tension.
i 163 
You can not see the wall coming and don't want to place any weight on the wall. You therefore have to move very slowly.Keep your immobile leg perfectly on top of the hands, shoulders & hips. Do not arch it towards the back as a counterweight.Remind yourself how to do a Slide Away. Lean your shoulders towards the front the get the feet off the wall.
i 164 
Use your hip flexors to pull your knees down towards your chest to minimize risk of falling over.Engage your lower back to pull on your hips. Do not allow your lower back to round or your shoulders to collapse towards the front.Keep your scapula elevated, elbows locked and and the weight in the fingertips at all times. Look at the space in between your hands and engage your legs!
i 165 
Time your hips and knees. If you were watching this drill from the side the feet should travel down and back up on 1 vertical line.Pull your knees as low as possible in the tuck but stop before your lower back rounds, shoulders close or elbows bend.Focus on your shoulders! Elevate your scapula, lock your elbows, look at your hands and keep your weight in your fingertips at all times.
i 166 
During the tuck leg extensions keep your knees glued together and isolate the movement exclusively into your knees joints.Move slow and try to hold the position with the extended leg for a moment.Engage your lower back to pull on your hips. Do not allow your lower back to round or your shoulders to collapse towards the front.
167
168
j 169 
Take small and controlled steps with your hands facing towards the front.Only your feet should touch the wall. Do not place your knees, hips or chest on the wall.Look at the spot in between your hands. Do not look at the wall placing your chin on your chest.
j 170 
Keep your knees together and make them touch the wall as you pull them down.Pull your knees as low as possible whilst engaging your lower back. In the tuck position your hips need to be in a slight anterior pelvic tilt. As soon as your lower back rounds and your hips flip into a posterior pelvic tilt your knees are too low.Lock your elbows, elevate your scapula and look at the spot in between your hands.
j 171 
Do not jump off the wall or lean or shoulder excessively towards the front to get off the wall.Take both feet off the wall at the same time!Lock your elbows, elevate your scapula and look at the spot in between your hands.
j 172 
Engage your glutes when pushing the legs up towards the straight handstand to avoid piking at the hips.Start with a tight tuck. Pull your knees towards the chest using your hips flexors. Stop your hips from sliding into a posterior pelvic tilt through engagement of your lower back.Lock your elbows, elevate your scapula and look at the spot in between your hands.
j 173 
Focus on the rotation of your legs inside of your hips. In the tuck position they are in parallel. When you push them open into the straddle they are externally rotated with your knees looking towards the floor.Lift your legs. Do not let them hang behind in a pancake and drag you down.Start with a tight tuck. Pull your knees towards the chest using your hips flexors. Stop your hips from sliding into a posterior pelvic tilt through engagement of your lower back.
j 174 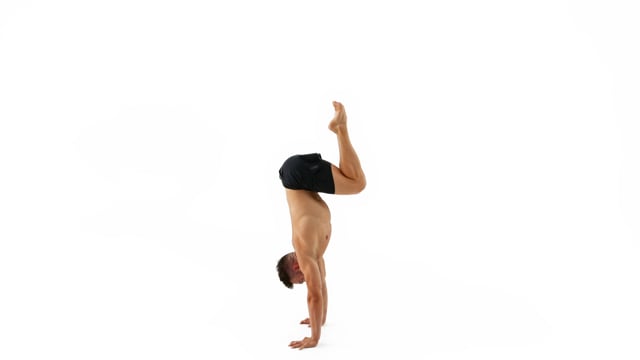
Keep your shoulders on top of the hands at all times.Use your hip flexors to pull your knees down towards your chest to minimize risk of falling over.Do not focus on holding the tuck. The goal is to jump to align the hips with the already aligned hands and shoulders and to come right back down.
j 175 
Time your hips and knees. If you were watching this drill from the side the feet should travel down and back up on 1 vertical line.Pull your knees as low as possible in the tuck but stop before your lower back rounds, shoulders close or elbows bend.Focus on your shoulders! Elevate your scapula, lock your elbows, look at your hands and keep your weight in your fingertips at all times.
j 176 
Move slow and work on staying in control at all times. The goal is not just to jump from one position to the next but even to control the journey between the positions.In the straddle handstand push your legs open to lock them in place and to stabilize the position but keep your feet high enough so you do not pike at the hips.In the tuck position bring your knees low enough so that your are stable but hold them high enough so your lower back does not round. Engage the muscles of your lower back to pull your hips into a slight anterior pelvic tilt.
j 177 
Work on isolating the movement exclusively into your legs! Your elbows should stay locked and the shoulders fully elevated and immobile throughout the entire drill.Hold each position for at least a short moment and bring your body to a visual stop of movement.Do not try to outrun your balance. Stay cool! If something does not go as planned: come to a stop, fix your position and then move on. Alternatively, you can also come down and reset from the top or simply continue.
j 178 
Work on isolating the movement exclusively into your legs! Your elbows should stay locked and the shoulders fully elevated and immobile throughout the entire drill.Hold each position for at least a short moment and bring your body to a visual stop of movement.Do not try to outrun your balance. Stay cool! If something does not go as planned: come to a stop, fix your position and then move on. Alternatively, you can also come down and reset from the top or simply continue.
j 179 
During the tuck leg extensions keep your knees glued together and isolate the movement exclusively into your knees joints.Move slow and try to hold the position with the extended leg for a moment.Engage your lower back to pull on your hips. Do not allow your lower back to round or your shoulders to collapse towards the front.
Endurance Conditioning
Rest between sets: As little as possible
Intensity: Elevated
| workout_number | sort_number | Demo | Exercise | Reps/Sets | How to/Cues |
|---|---|---|---|---|---|
| a | 71 | 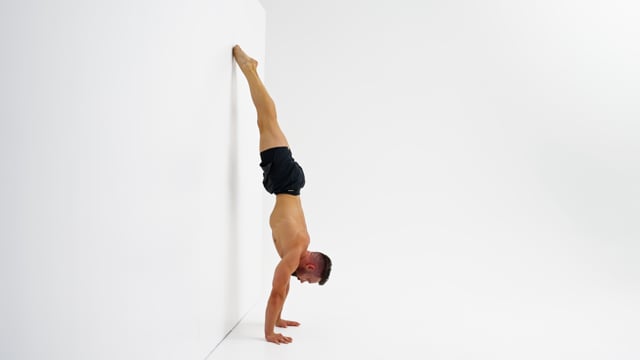 | Handstand Correction - Chest to Wall 1x3 | Do not pull your hips or arch your back. Stay in a perfectly straight line from shoulders to toes. The only position change should be in the shoulders and wrists.Do not place your hands too far away from the wall. The main focus of this drill is not conditioning but technical refinement.Keep your elbows locked and elevate your scapula fully at all times. | |
| a | 72 | 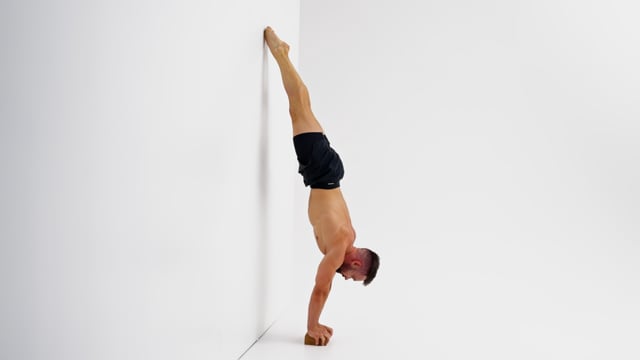 | Narrow Half Slide Away 2x3 | Start with your body in a perfectly straight line. Your feet should be the only thing touching the wall. Lean your shoulders towards the front and slide your feet down the wall. When you are about to wall over push back up.Do not pull your hips or arch your back. Stay in a perfectly straight line from shoulders to toes. The only position change should be in the shoulders and wrists.Keep your elbows locked and elevate your scapula fully at all times. | |
| a | 73 | 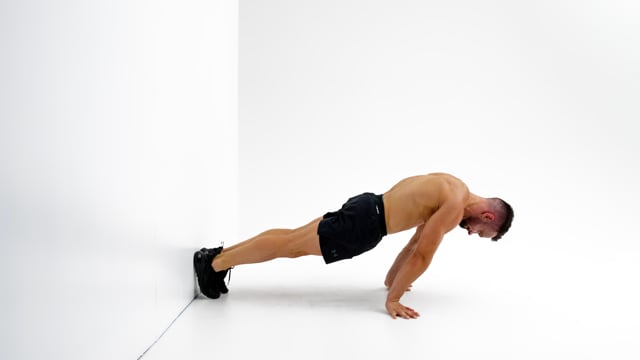 | Pike Planche Lean 2x6 | Place your feet against the wall to prevent them from sliding and mark the distance of your hands to the wall on the floor to measure your progress over time. The closer your hands are the harder this becomes. Use your shoulder muscles and truly get the feeling of pushing your body backwards in each rep. Do not pull back with your hips!Lock your elbows fully. This is a straight arm drill! Rotate the pits of your elbows about 45 degrees towards the front. Externally rotate your hands to ease the pressure on your wrists.Keep your lower back straight and place your hips in a slight posterior pelvic tilt. Engage your core and glutes and align your hips with your feet and shoulders. | |
| a | 74 | 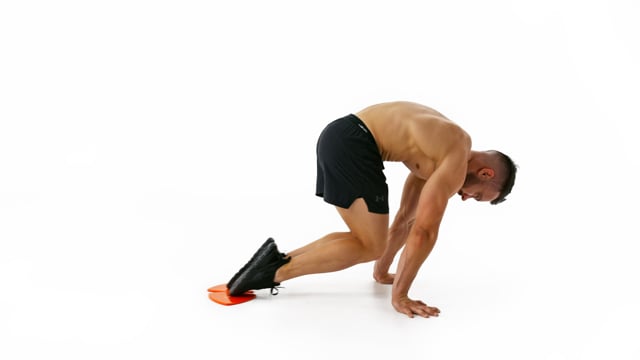 | Tuck Planche Pull 2x4 | Protract and depress your scapula. Do not allow your shoulder blades to stick out behind. Round your back as you pull into the tuck.Keep leaning towards the front as you push your feet back towards their starting position. It should feel as if you were leaning more as you push your feet back. Train with your head close to the wall and stick to a consistent distance to assure constant pressure on your shoulders.Lock your elbows fully. This is a straight arm drill! Rotate the pits of your elbows about 45 degrees towards the front. Externally rotate your hands to ease the pressure on your wrists. | |
| a | 75 | 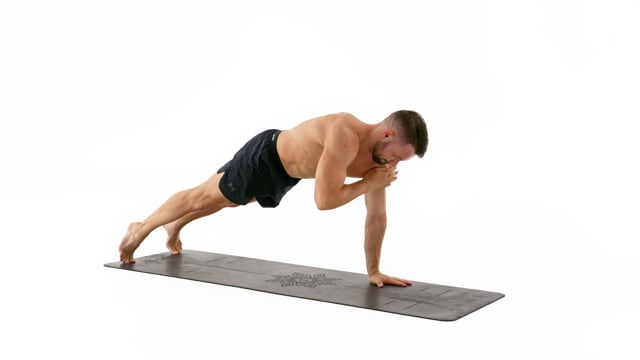 | Superman Shoulder Tap Combi 1x6 | Isolate the arm from the rest of your body when tapping the shoulders and keep your core engaged for stability.Do not allow your body to swing from side to side.Engage your shoulders and protract them slightly. Your shoulder blades should not stick out from your back. | |
| a | 76 | 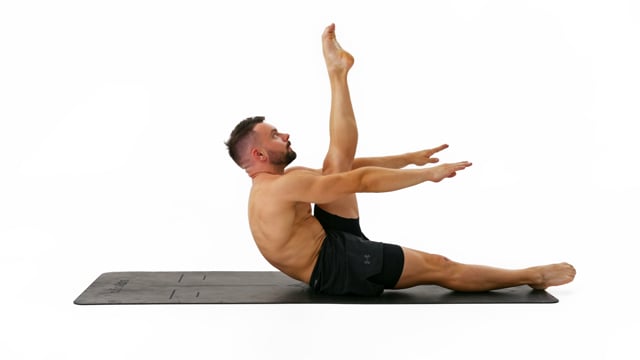 | V-Up Combi 1x8 | Aim with your face towards your foot. Keep your back as straight as possible, shoulders down and arms engaged.Keep the immobile leg on the floor for control and balance. As you bring both legs up open them sligthly to reach in between.1 repetition equals 1 V-Up with each leg and 2 with both! | |
| 77 | |||||
| 78 | |||||
| b | 79 | 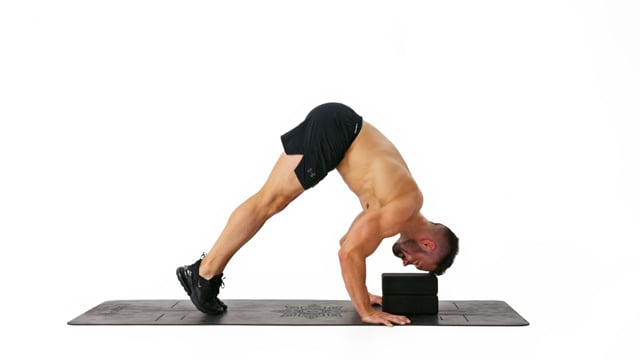 | Partial Pike Push Up 2x6 | Look at your hands and elevate your scapula in the starting position. Allow your scapula to depress naturally as you bend your arms.Allow your elbows to flare out naturally but aim to keep them approximately at a 45 degree angle.Your upper body should travel down and back up on 1 diagonal line. Do not arch your back and do not push your shoulders towards your feet on top. Do not aim your nose towards the floor but your forehead. | |
| b | 80 | 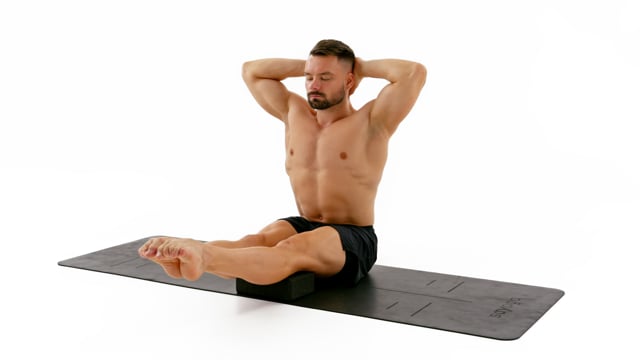 | Sitting Knee Extension with Hands behind Head 2x8 | Point your feet at the ankle and curl your toes.Sit up straight with your hands relaxed on the floor next to you and your shoulders down. | |
| b | 81 | 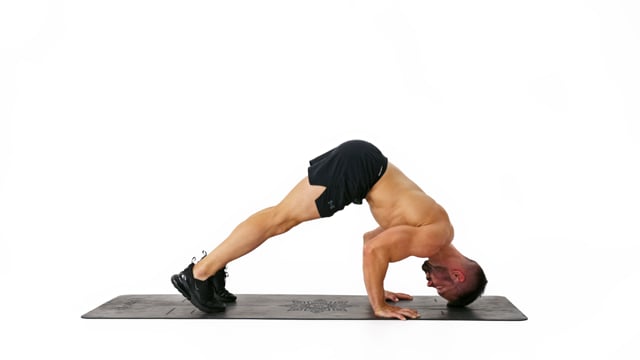 | Pike Push Up Negative 2x4 | From your starting position draw an imaginary line starting at your hips through your shoulders and head. Extend this line until it hits the floor. Use this spot as a target for your head when lowering.Consider placing a pillow on the floor underneath your head for added safety and comfort.Allow your elbows to flare out naturally but aim to keep them approximately at a 45 degree angle. | |
| b | 82 | 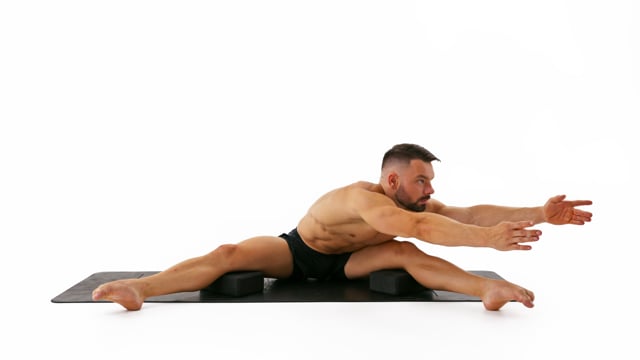 | Pancake Single Knee Extension Combi 2x6 each side | Fully and especially purposely lock your knees in every single rep. Your quads should be on fire.Reach far towards the front and especially look in front during your pancake.Point your feet at the ankle and curl your toes. | |
| 83 | |||||
| 84 | |||||
| 85 | |||||
| 86 | |||||
| c | 87 |  | Tuck Slide 2x6 | Keep your knees together and make them touch the wall as you pull them down.Pull your knees as low as possible whilst engaging your lower back. In the tuck position your hips need to be in a slight anterior pelvic tilt. As soon as your lower back rounds and your hips flip into a posterior pelvic tilt your knees are too low.Lock your elbows, elevate your scapula and look at the spot in between your hands. | |
| c | 88 |  | Wall Walk 2x6 | Take small and controlled steps with your hands facing towards the front.Only your feet should touch the wall. Do not place your knees, hips or chest on the wall.Look at the spot in between your hands. Do not look at the wall placing your chin on your chest. | |
| c | 89 | 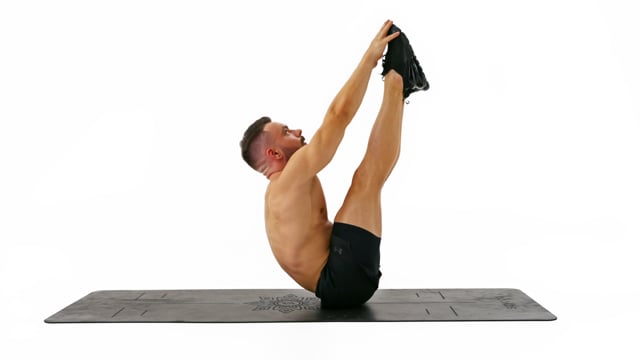 | V-Up 2x6 | Lock your knees, point your feet and squeeze them together.Do not relax on the floor between reps. Instead slow the downward movement down a stop just before your heels, hands or head hit the floor.Engage your arms to be able to swing them dynamically. | |
| c | 90 | 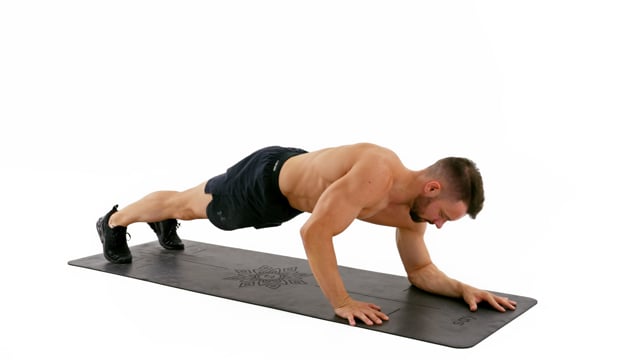 | Forearm Plank Walk Up 30sec | Engage your core and create 1 straight line from your feet all the way through your neck.Walk up to a push up and back down to the forearm plank using your core muscles to keep your hips and shoulders squared. Slow down on your descent to minimize impact.Protract and depress your scapula. Do not allow your shoulder blades to stick out behind. | |
| c | 91 | 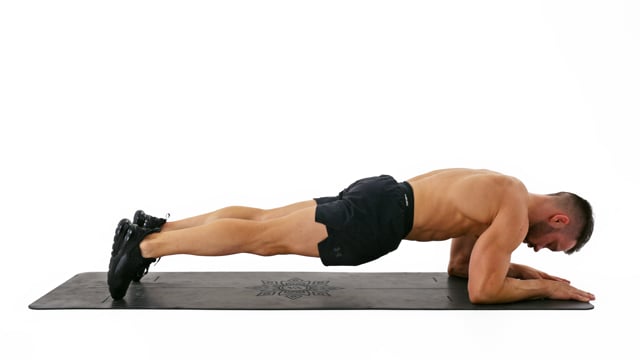 | Valentines Day Special 30sec | Engage your core and create 1 straight line from your feet all the way through your neck.Point and flex your feet to push your shoulders out towards the front and the opposite direction. Keep your body line intact!Protract and depress your scapula. Do not allow your shoulder blades to stick out behind. | |
| c | 92 | 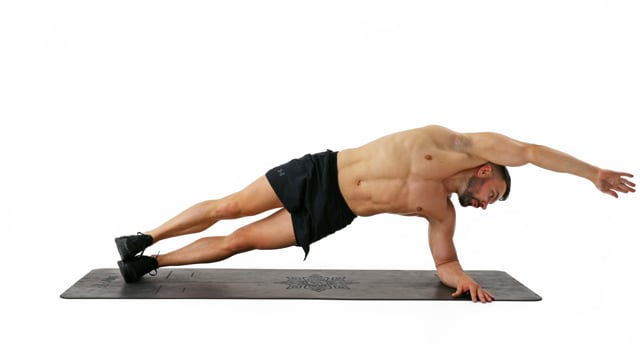 | Side Forearm Plank Reach 30sec | Reach with your top arm underneath yourself rotating your torso but keeping your hips stable and immobile.Place your feet on top of each other. | |
| c | 93 |  | Forearm Plank Walk Up 30sec | Engage your core and create 1 straight line from your feet all the way through your neck.Walk up to a push up and back down to the forearm plank using your core muscles to keep your hips and shoulders squared. Slow down on your descent to minimize impact.Protract and depress your scapula. Do not allow your shoulder blades to stick out behind. | |
| c | 94 |  | Valentines Day Special 30sec | Engage your core and create 1 straight line from your feet all the way through your neck.Point and flex your feet to push your shoulders out towards the front and the opposite direction. Keep your body line intact!Protract and depress your scapula. Do not allow your shoulder blades to stick out behind. | |
| c | 95 |  | Side Forearm Plank Reach 30sec | Reach with your top arm underneath yourself rotating your torso but keeping your hips stable and immobile.Place your feet on top of each other. | |
| c | 96 |  | Forearm Plank Walk Up 30sec | Engage your core and create 1 straight line from your feet all the way through your neck.Walk up to a push up and back down to the forearm plank using your core muscles to keep your hips and shoulders squared. Slow down on your descent to minimize impact.Protract and depress your scapula. Do not allow your shoulder blades to stick out behind. | |
| c | 97 |  | Valentines Day Special 30sec | Engage your core and create 1 straight line from your feet all the way through your neck.Point and flex your feet to push your shoulders out towards the front and the opposite direction. Keep your body line intact!Protract and depress your scapula. Do not allow your shoulder blades to stick out behind. | |
| c | 98 |  | Side Forearm Plank Reach 30sec | Reach with your top arm underneath yourself rotating your torso but keeping your hips stable and immobile.Place your feet on top of each other. | |
| 99 | |||||
| 100 | |||||
| 101 | |||||
| d | 102 | 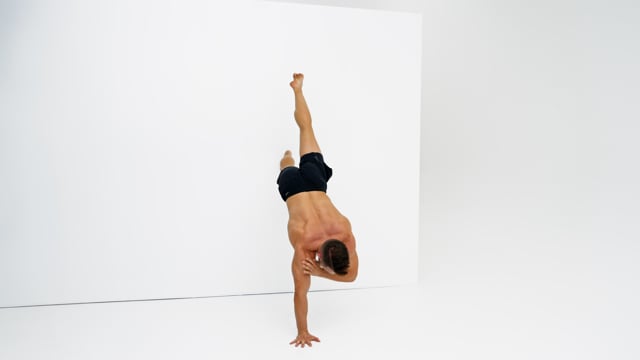 | L Handstand Single Leg Walk Out Shoulder Tap 1x4 | Take small and controlled steps with your hands facing towards the front.Keep your shoulders on top of the center of the hands and squared with your hips.Elevate your scapula to cover your ears with your shoulders and stabilize your core to avoid swinging the hips from side to side. | |
| d | 103 | 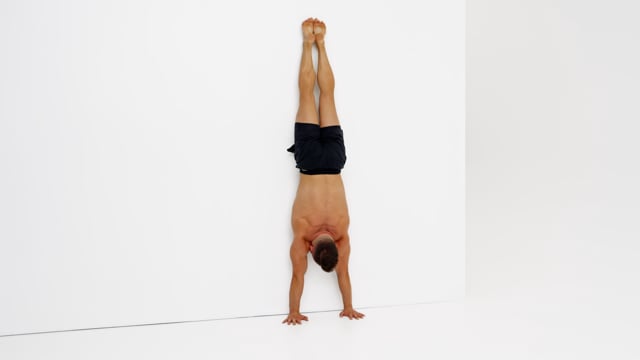 | Wall Handstand Shrug 1x12 | Lock your elbows and look at your hands.Move especially slow and careful on the way down when you depress your scapula to protect your shoulders from impact and to build strength and awareness in this vulnerable position.Engage your legs! They make up a significant part of your handstand. Lock your knees, point your feet and squeeze the water out of them. | |
| d | 104 |  | Pike Planche Lean 2x6 | Place your feet against the wall to prevent them from sliding and mark the distance of your hands to the wall on the floor to measure your progress over time. The closer your hands are the harder this becomes. Use your shoulder muscles and truly get the feeling of pushing your body backwards in each rep. Do not pull back with your hips!Lock your elbows fully. This is a straight arm drill! Rotate the pits of your elbows about 45 degrees towards the front. Externally rotate your hands to ease the pressure on your wrists.Keep your lower back straight and place your hips in a slight posterior pelvic tilt. Engage your core and glutes and align your hips with your feet and shoulders. | |
| d | 105 |  | Tuck Planche Pull 2x4 | Protract and depress your scapula. Do not allow your shoulder blades to stick out behind. Round your back as you pull into the tuck.Keep leaning towards the front as you push your feet back towards their starting position. It should feel as if you were leaning more as you push your feet back. Train with your head close to the wall and stick to a consistent distance to assure constant pressure on your shoulders.Lock your elbows fully. This is a straight arm drill! Rotate the pits of your elbows about 45 degrees towards the front. Externally rotate your hands to ease the pressure on your wrists. | |
| d | 106 |  | Boat to Superman Side Roll 1x3 each side | Lock your knees, point your feet and squeeze them together.Keep your head in a neutral position but pull it back slightly as you roll onto your stomach.Engage your entire body from hands to toes. | |
| d | 107 | 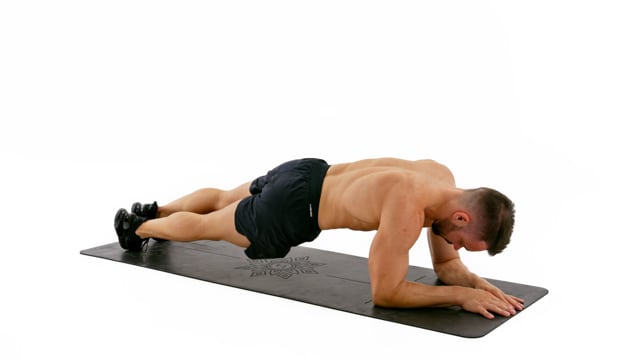 | Forearm Plank Skiing 1x40sec | Engage your core and create 1 straight line from your feet all the way through your neck.Keep your shoulders stable and immobile as you shift your hips from side to side.Protract and depress your scapula. Do not allow your shoulder blades to stick out behind. | |
| 108 | |||||
| 109 | |||||
| e | 110 | 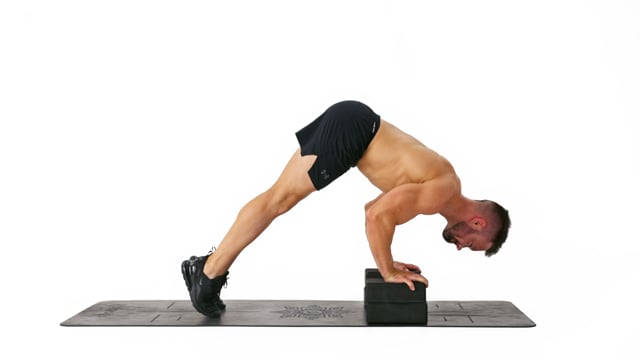 | Pike Push Up - Elevated Hands 2x8 | Begin by leaning your shoulders towards the front to load weight into the fingertips. Stay hand heavy throughout the entire rep.Allow your elbows to flare out naturally but aim to keep them approximately at a 45 degree angle.Your upper body should travel down and back up on 1 diagonal line. Do not arch your back and do not push your shoulders towards your feet on top. Do not aim your nose towards the floor but your forehead. | |
| e | 111 | 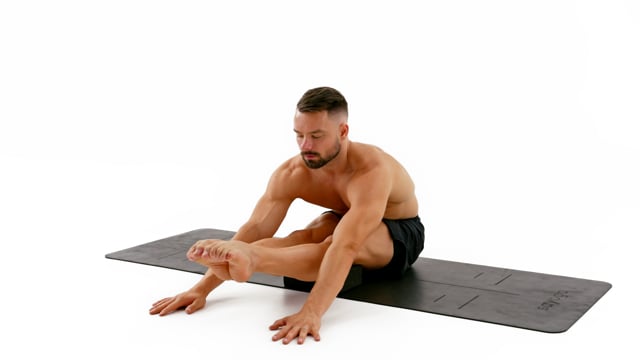 | Folded Knee Extension 2x8 | Keep your ankles together and lock your knees so your feet lift off the floor. Feel your quads engaging on top and squeeze for a moment.Point your feet at the ankle and curl your toes. | |
| e | 112 | 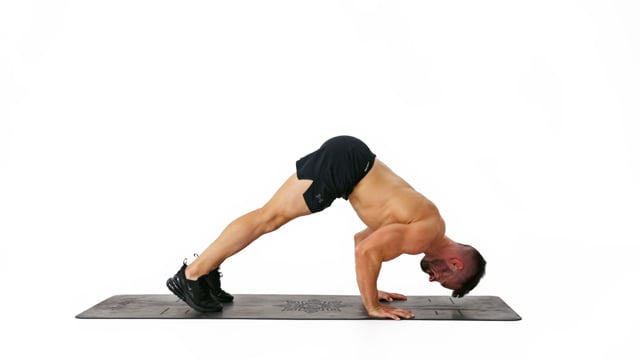 | Pike Push Up Bottom Hold 2xmax hold | Consider placing a pillow on the floor underneath your head for added safety and comfort.Allow your elbows to flare out naturally but aim to keep them approximately at a 45 degree angle.Engage your core to keep your back straight. | |
| e | 113 | 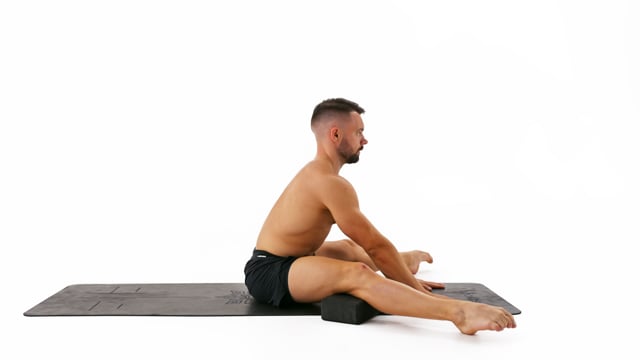 | Pancake Knee Extension Combi 2x8 | Fully and especially purposely lock your knees in every single rep. Your quads should be on fire.Reach far towards the front and especially look in front during your pancake.Point your feet at the ankle and curl your toes. | |
| 114 | |||||
| 115 | |||||
| 116 | |||||
| 117 | |||||
| f | 118 | 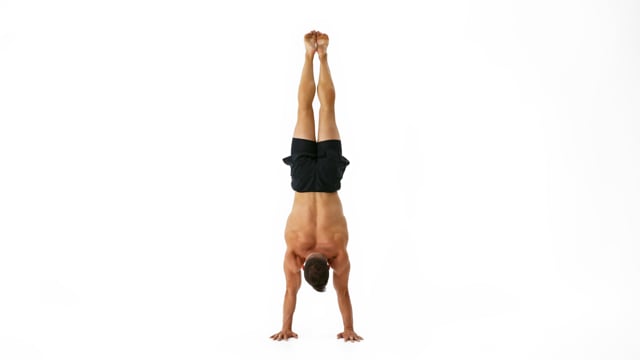 | Freestanding Handstand Hold max hold | Look at the spot between your hands at all times!Do not walk. If you feel like you have to take a step come down instead, reset and go again. | |
| f | 119 | 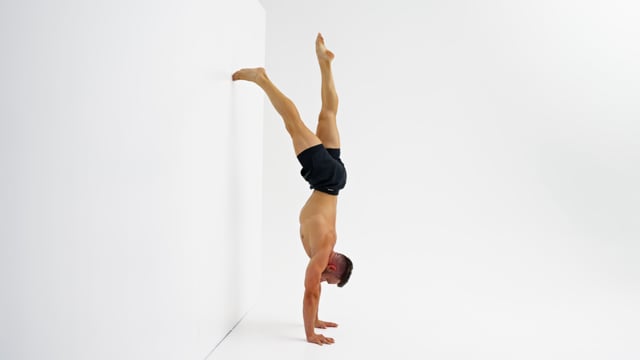 | Handstand Hold - Wall Assisted max hold | Keep your elbows locked and elevate your scapula fully at all times.Look at the spot in between your hands. Do not look at the wall placing your chin on your chest.Finish your exercise with a clean walk away. You are not done until your feet are back on the floor. | |
| f | 120 | 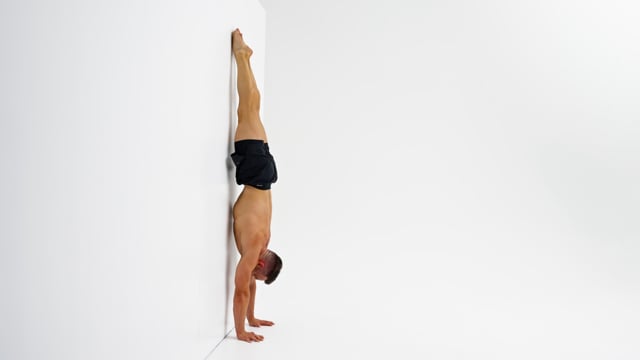 | Wall Handstand Hold max hold | Only your feet should touch the wall. Do not place your knees, hips or chest on the wall.Look at the spot in between your hands. Do not look at the wall placing your chin on your chest.Finish your exercise with a clean walk away. You are not done until your feet are back on the floor. | |
| f | 121 | 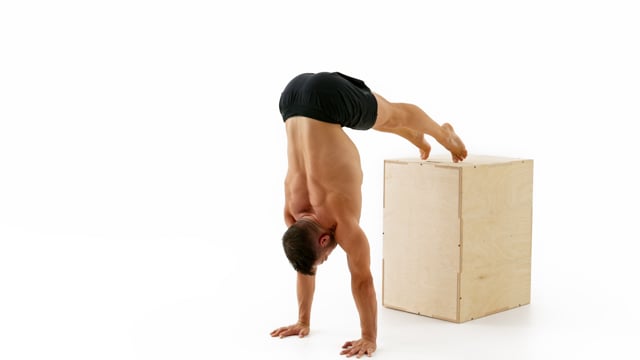 | L Handstand Hold - Feet on Box max hold | Make sure your shoulders stay right on top of the center of your hands. Do not push them open in the direction of your armpits or allow them to close and slide in the direction of your back.Lock your elbows and look at your hands.In case of a temporary lack of hamstring flexibility bend your knees slightly to ease the tension. | |
| f | 122 | 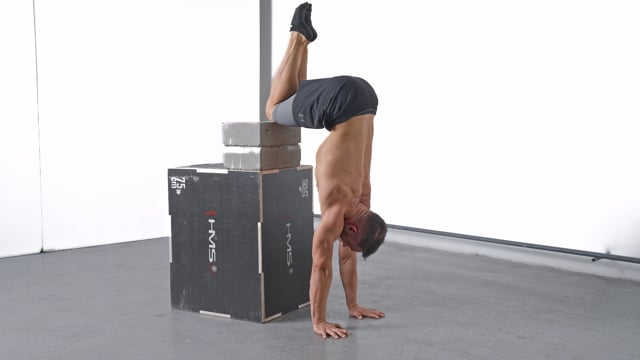 | Box Tuck - Hold max hold | Keep your knees fully bent and heels close to your glutes. Place your shoulders on top of the center of your hands.Make sure the box for your tuck is high enough. Your hips have to be in a slight anterior pelvic tilt and never in a posterior one. Only place the knees on the box.Finish your exercise with a clean walk away. You are not done until your feet are back on the floor. | |
| f | 123 | 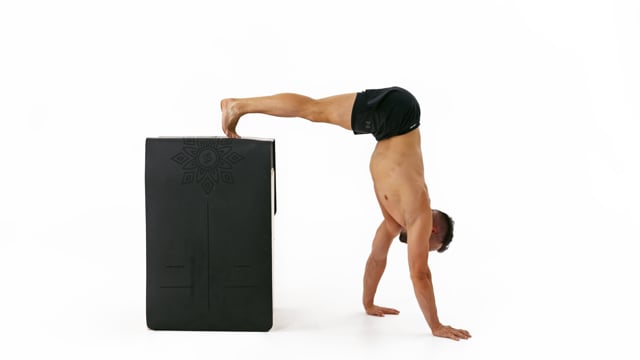 | L Handstand Walk - Feet on Box max hold | Take small and controlled steps with your hands facing towards the front.Do not look at the box. Instead focus on a spot on the floor in between your hands.Place your feet on a box, table or kitchen counter for the legs to be about parallel to the floor. Do not place your feet against the wall! | |
| f | 124 | 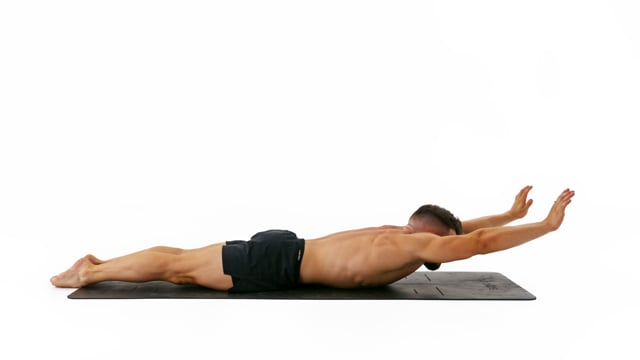 | Shoulder Lift on Floor max hold | Hover your chin close to the floor.Lock your elbows and look at your hands.Do not lift your chest off the floor. Isolate the movement into your shoulders. | |
| 125 | |||||
| h | 126 |  | Partial Pike Push Up Max | Look at your hands and elevate your scapula in the starting position. Allow your scapula to depress naturally as you bend your arms.Allow your elbows to flare out naturally but aim to keep them approximately at a 45 degree angle.Your upper body should travel down and back up on 1 diagonal line. Do not arch your back and do not push your shoulders towards your feet on top. Do not aim your nose towards the floor but your forehead. | |
| h | 127 |  | Pike Push Up Bottom Hold Max | Consider placing a pillow on the floor underneath your head for added safety and comfort.Allow your elbows to flare out naturally but aim to keep them approximately at a 45 degree angle.Engage your core to keep your back straight. | |
| h | 128 | 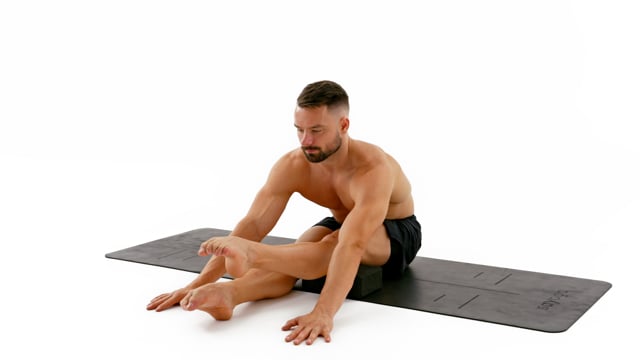 | Folded Single Knee Extension 2x12 | Fully and especially purposely lock your knee in every single rep. Your quad should be on fire. Keep the immobile leg engaged and stable on the floor the entire time.Point your feet at the ankle and curl your toes.Keep your back as straight as possible whilst placing your hands on the floor in front. To increase difficulty reach further towards the front. |