Let's get to work!
Handstand Workout - B
Here is your full workout for today. This overview includes name, reps, and most important cues. IMPORTANT!! To see the video click the (“+”) symbol next to the exercise name, and it will expand.
Look after yourself and only do what feels safe enough.
Make sure to warm up well.
Dashboard | Workout
Specific Warm Up
| Demo | Exercise | Reps/Sets | How to/Cues |
|---|---|---|---|
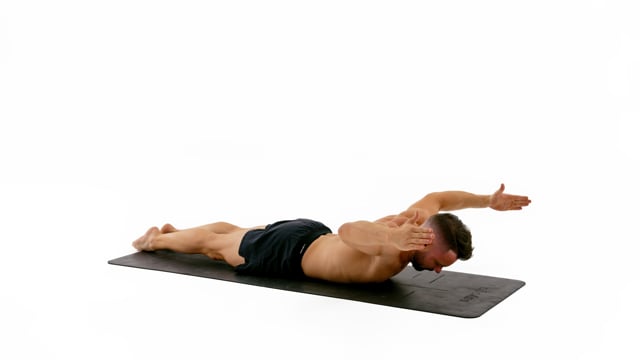 | Forehead to W 1x8 | Rotate your hands for the thumbs to point towards the ceiling as your bring your arms to the W. Make sure you have a 90 degrees angle in your shoulders and that your elbows are in line with the shoulders. Pull your hands and elbows up towards the ceiling and not back.Keep your chest on the floor the entire time and rotate your hands for the thumbs to point towards the ceiling.Keep your legs engaged but on the floor. Point your feet and make your ankles touch. | |
 | Straight to W 1x8 | On the way back stop with your elbows in line with your shoulders and a 90 degree angle in your elbows. Lift your forearms towards the ceiling and squeeze on top for a moment.Keep your chest on the floor the entire time and rotate your hands for the thumbs to point towards the ceiling.Keep your legs engaged but on the floor. Point your feet and make your ankles touch. | |
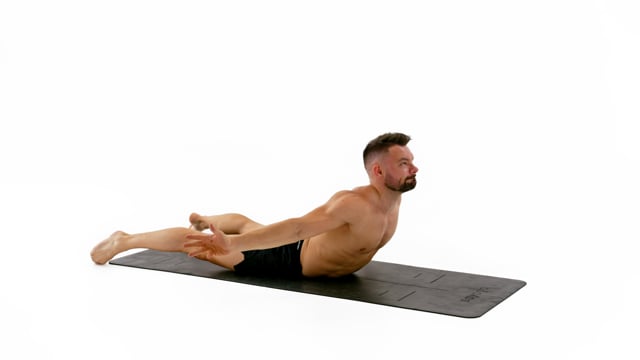 | Back Extension 1x8 | Then externally rotate your arms, squeeze your shoulder blades together in the back, look up towards the ceiling and engage the whole back lifting the upper body of the floor.Keep your feet about shoulder width apart on the floor the entire time.Move slowly! The longer this takes the more control and strength you will develop! | |
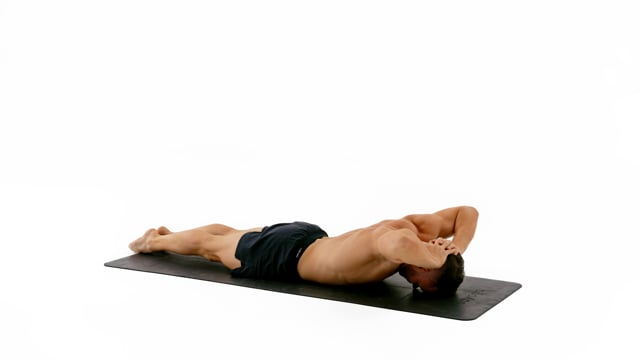 | Elbow Lift 1x8 | Lift your elbows up as you were trying to make them touch behind your head. Bring them back down slowly. Do not slam them into the floor.Keep your legs engaged but on the floor. Point your feet and make your ankles touch.Move slowly! The longer this takes the more control and strength you will develop! | |
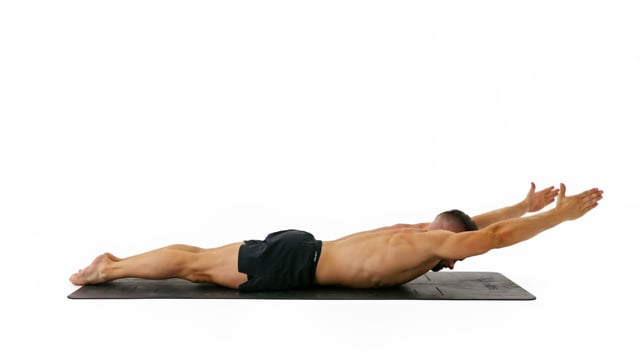
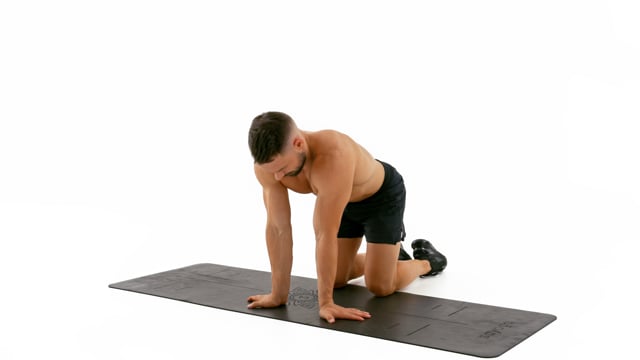
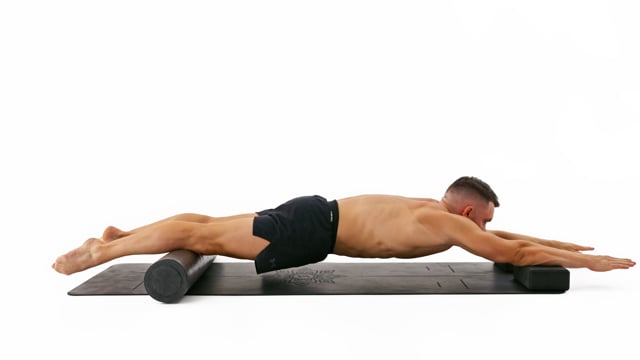 | Elevated Handstand Engagement on Stomach 2x4 | On the bottom end of the body the elevation should be on the quads just before the knees.Look at your hands and keep them around shoulder width apart.Push your lower back up and engage your core to create an even and slightly rounded line. | |
 | Wrist Warm Up as needed | Rotate, twist and move them to stretch them in each direction.Spend more time in positions where you feel less mobile or even stiff.Keep your elbows locked and hands shoulder wide apart. | |
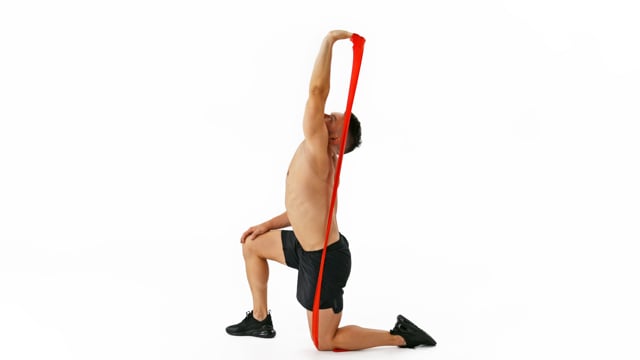 | Overhead Wrist Curl 2x8 each side | Place your hand overhead, lock your elbow and elevate your scapula. Look towards the front.Open your hand every time your wrist moves into extension and fully close as you move into flexion.Train your forearm muscles and fingers in exactly the way that you need the when fighting for balance in handstand or when gripping a bar or rings. |
Handstand Technique Refinement
| Demo | Exercise | Reps/Sets | How to/Cues |
|---|---|---|---|
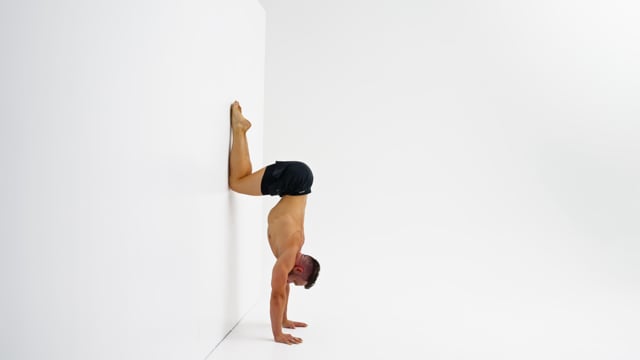
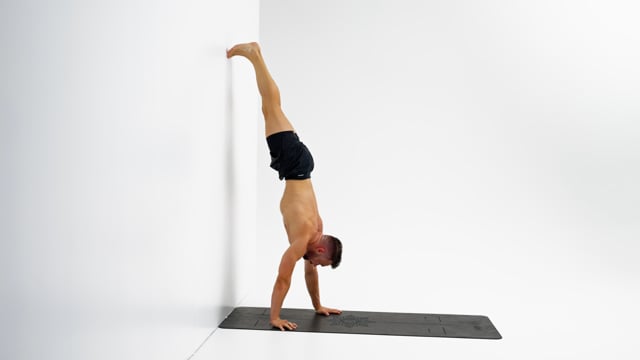 | Wall Walk 1x3 | Take small and controlled steps with your hands facing towards the front.Only your feet should touch the wall. Do not place your knees, hips or chest on the wall.Look at the spot in between your hands. Do not look at the wall placing your chin on your chest. | |
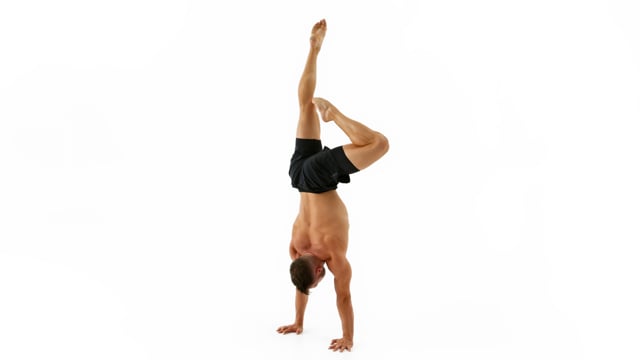
 | Tuck Slide 1x4 | Keep your knees together and make them touch the wall as you pull them down.Pull your knees as low as possible whilst engaging your lower back. In the tuck position your hips need to be in a slight anterior pelvic tilt. As soon as your lower back rounds and your hips flip into a posterior pelvic tilt your knees are too low.Lock your elbows, elevate your scapula and look at the spot in between your hands. | |
 | Tuck Take Off Leg Circles 1x1 each | ||
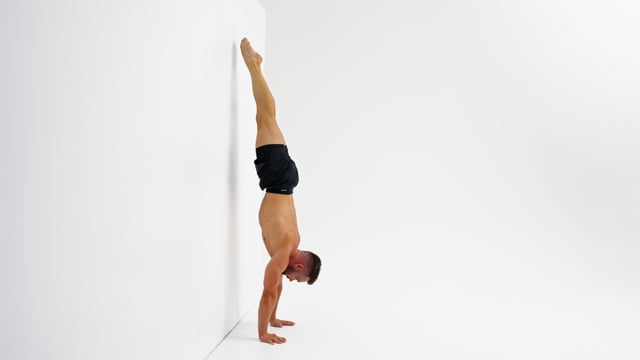 | Slide Away 1x3 | Do not pull your hips or arch your back. Stay in a perfectly straight line from shoulders to toes. The only position change should be in the shoulders and wrists.Move slow and stay in control at all times. Do not use momentum to get off the wall. Do not jump off the wall and do not take 1 foot at the time off the wall.Come back to the wall with your entire body from wrists to toes in 1 straight line. | |
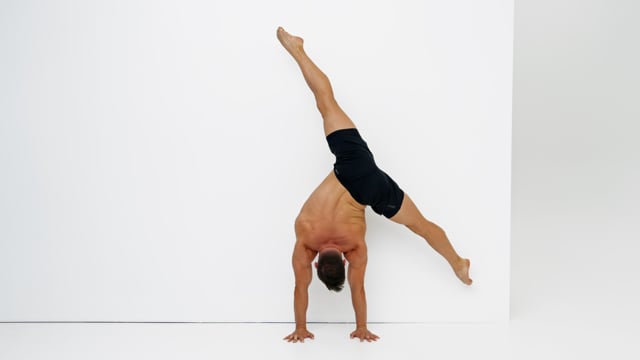
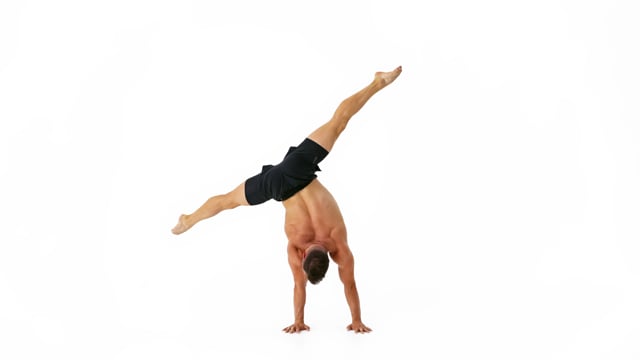
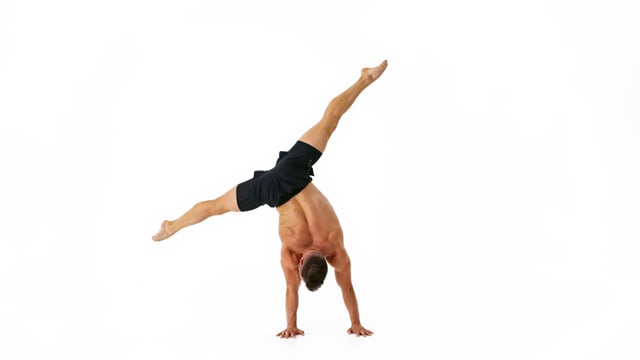
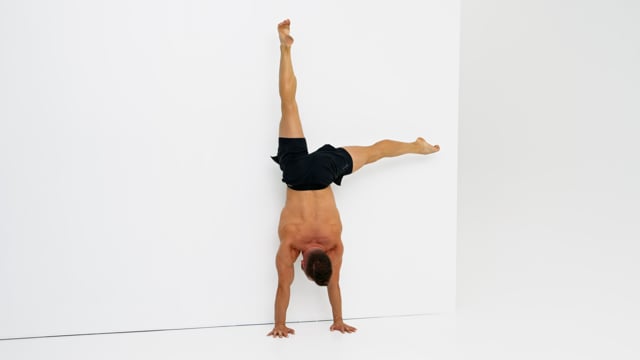 | Slide Away to Lateral Single Leg Isolation 1x2 each side | Focus on the rotation of your leg inside of your hip. In the straddle position the leg needs to be externally rotated. When the leg is on top it needs to be in parallel.Keep both elbows locked and shoulders elevated. Due to the nature of the movement you will have more weight on one side of your body. It is up to you to create the visual illusion of the weight staying perfectly even between your hands.You are very close to the wall which forces you to engage properly and follow correct form. If not your foot will touch the wall! | |
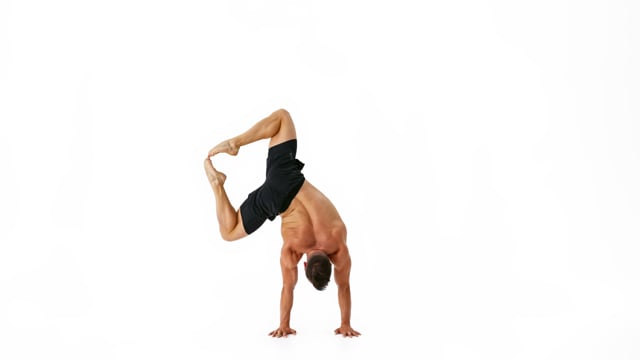
 | Diamond Single Leg Circles from Straight 1x1 each side & each direction | ||
 | Extended Diamond Single Leg Circle from Straight - Diamond L Straddle 1x2 each side |
Side Warm Up
| Demo | Exercise | Reps/Sets | How to/Cues |
|---|---|---|---|
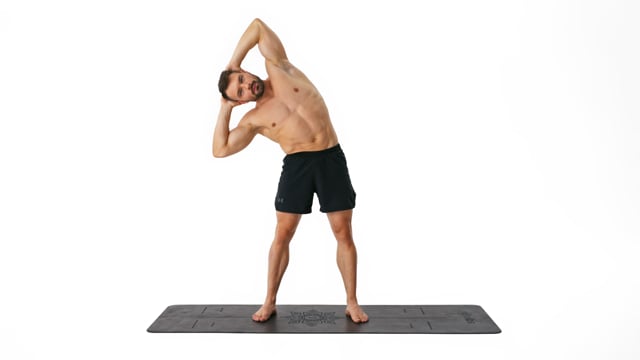 | Standing Side Bend 6x each side | Imagine you are in a toaster. You do not want to burn your elbows, chest, back or glutes. Do not rotate!Isolate the side bend between your last rib and the hip bones.Keep both of your shoulders in line with your hips. Gently drive your bottom shoulder towards the front and the top one towards the back. | |
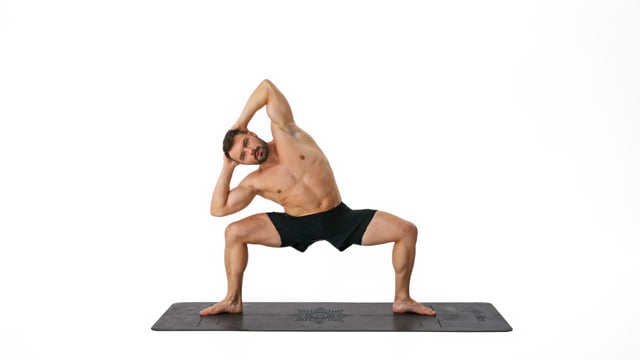 | Deep Plie Side Bend 4x each side | Externally rotate your feet on the floor, push your knees back and hips towards the front as you Plie down.Isolate the side bend between your last rib and your hips bones. Stay in the deep plie and do not allow your shoulders to rotate.Keep your shoulders low and far away from your ears. | |
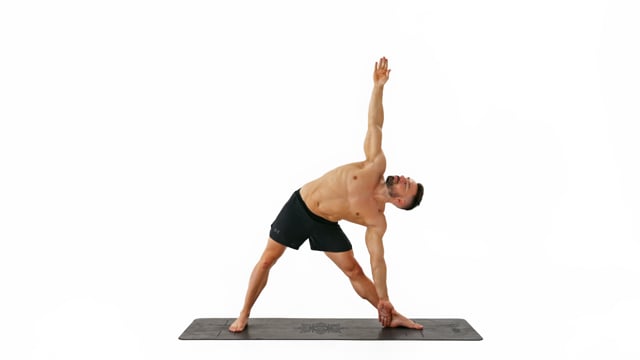 | Triangle Pose 15sec each side | Place your hand on the floor in front of the foot.Keep both of your shoulders in line with your hips. Gently drive your bottom shoulder towards the front and the top one towards the back.Look towards the front and reach with your top arm far over to the side. |
Side Bend Training
| Demo | Exercise | Reps/Sets | How to/Cues |
|---|---|---|---|
 | Straddle Slide Away Deep Side Bend 2x2 each side | Start small and work deeper over time. Always put quality first! It is normal that one side will be easier than the other.Keep your shoulders stable and isolate the side bend between your last rib and the hip bones! Do not allow the shoulder that you are side bending on to collapse towards the front. Look at the spot in between your hands. Do not shift your gaze!Push your legs open and externally rotate them inside the hips to lock them. Do not allow one of them to close or slide out! | |
 | Deep Side Bend 2x2 each side | Keep your shoulders stable and isolate the side bend between your last rib and the hip bones! Do not allow the shoulder that you are side bending on to collapse towards the front. Look at the spot in between your hands. Do not shift your gaze!Push your legs open and externally rotate them inside the hips to lock them. Do not allow one of them to close or slide out!Start small and work deeper over time. Always put quality first! It is normal that one side will be easier than the other. | |
 | Deep Side Bend - Diamond 2x2 each side | Keep your shoulders stable and isolate the side bend between your last rib and the hip bones! Do not allow the shoulder that you are side bending on to collapse towards the front. Look at the spot in between your hands. Do not shift your gaze!Imagine you are in a toaster. You do not want to burn your knees or shoulders. Do not rotate!Start small and work deeper over time. Always put quality first! It is normal that one side will be easier than the other. |
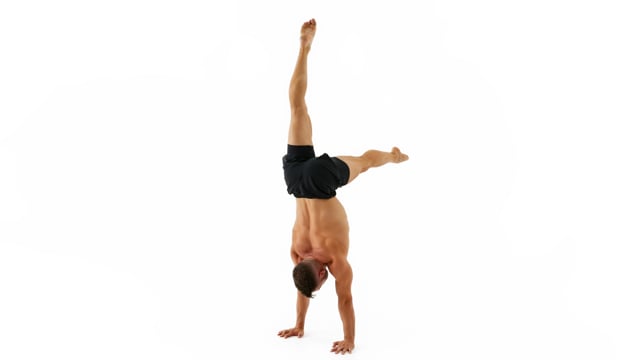
OAHS Training
| Demo | Exercise | Reps/Sets | How to/Cues |
|---|---|---|---|
 | Small Transfer Shrug - Legs Together 2x2 each side | Aim to keep your free hand flat on the floor. Of course this is not possible but it will help you to isolate the work into the supporting shoulder and to keep the free shoulder low by your ear.Freeze at every movement change. This will allow you to check on your positions and forces you to stay up longer and ultimately to get stronger.Lock your elbows, push out tall and work on staying in control at all times! | |
 | Small Transfer Shrug - Full Straddle 2x2 each side | Aim to keep your free hand flat on the floor. Of course this is not possible but it will help you to isolate the work into the supporting shoulder and to keep the free shoulder low by your ear.Freeze at every movement change. This will allow you to check on your positions and forces you to stay up longer and ultimately to get stronger.Lock your elbows, push out tall and work on staying in control at all times! | |
 | Small Transfer - Full Straddle 1x2 each side | Lock your elbows, push out tall and work on staying in control at all times!Freeze at every movement change. This will allow you to check on your positions and forces you to stay up longer and ultimately to get stronger.Engage your legs! They make up a significant part of your handstand. Lock your knees, point your feet and squeeze the water out of them. | |
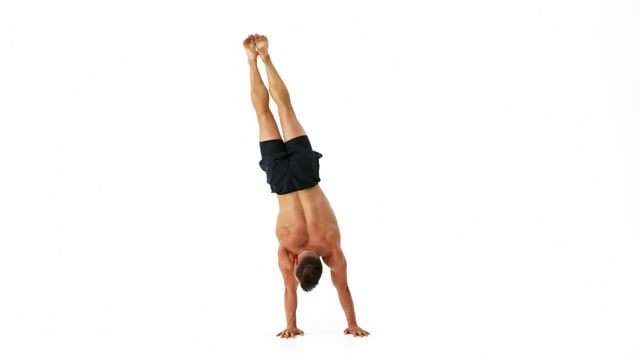 | Small Transfer - Legs Together 1x2 each side | Lock your elbows, push out tall and work on staying in control at all times!Freeze at every movement change. This will allow you to check on your positions and forces you to stay up longer and ultimately to get stronger.Engage your legs! They make up a significant part of your handstand. Lock your knees, point your feet and squeeze the water out of them. | |
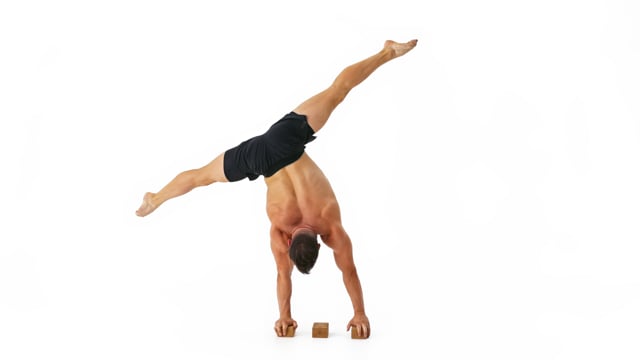 | 3 Blocks Step - Full Straddle 2x each side | Look at the hand that you are standing on and connect the side of your face with the supporting shoulder.Each time transfer onto the same hand. Step there and step back. This will help you find, understand and solidify your alignment.Freeze at every movement change. This will allow you to check on your positions and forces you to stay up longer and ultimately to get stronger. | |
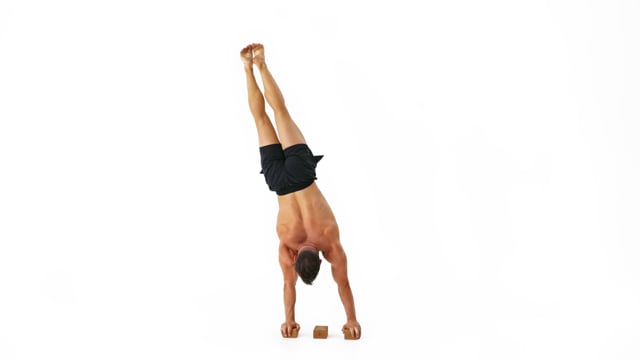 | 3 Blocks Step - Legs Together 2x each side | Look at the hand that you are standing on and connect the side of your face with the supporting shoulder.Each time transfer onto the same hand. Step there and step back. This will help you find, understand and solidify your alignment.Freeze at every movement change. This will allow you to check on your positions and forces you to stay up longer and ultimately to get stronger. |
Conditioning
| Demo | Exercise | Reps/Sets | How to/Cues |
|---|---|---|---|
 | Lateral Wall Walk - Legs Together 2 sets of 6 blocks there and back | Align your supporting shoulder and opposite hip through side bending on top of your supporting hand in each step.Look at the hand that you are standing on and connect the side of your face with the supporting shoulder.Freeze at every movement change. This will allow you to check on your positions and forces you to stay up longer and ultimately to get stronger. | |
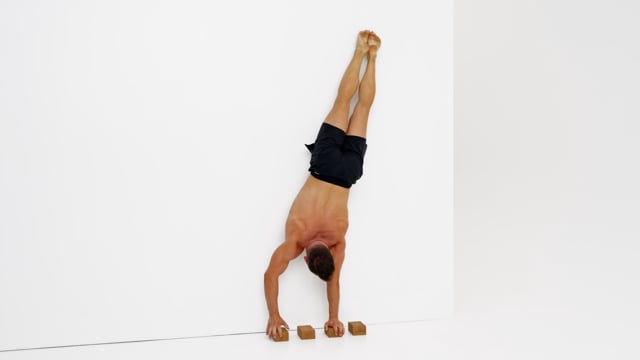
 | Vertical Wall Walk - Legs Together 2 sets of down up down up | Freeze at every movement change. This will allow you to check on your positions and forces you to stay up longer and ultimately to get stronger.Place your floor hand close to the block to make getting on top of it easier.Before pushing up align your block hand, shoulder and opposite hip. For this bend your block elbow and bend towards the side between your hip bones and the last rib. | |
 | Miami Reps - Wall 2x3 each side | The push needs to come exclusively from the block arm and should only be vertically. Your body should not change its general position during the climb.The free hand is for balance only. Only slide up on the fingertips when you can not reach the floor with a flat hand anymore.Focus on the transition between the climbs. Freeze at every change of direction, look at the hand you are standing on and focus on your alignment. |