Shoulder Prehab
Rest between sets: As Needed
Intensity: Light
workout_number sort_number Demo Exercise Reps/Sets How to/Cues
agms 2 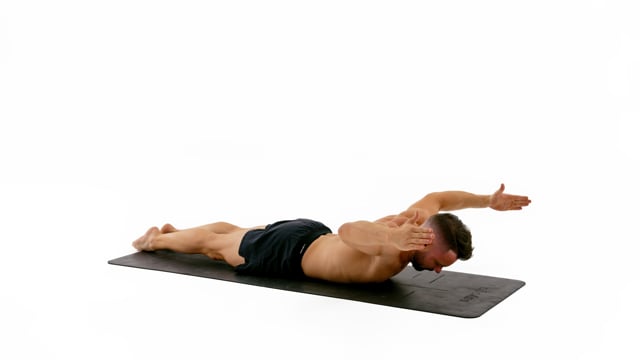
Rotate your hands for the thumbs to point towards the ceiling as your bring your arms to the W. Make sure you have a 90 degrees angle in your shoulders and that your elbows are in line with the shoulders. Pull your hands and elbows up towards the ceiling and not back.Keep your chest on the floor the entire time and rotate your hands for the thumbs to point towards the ceiling.Keep your legs engaged but on the floor. Point your feet and make your ankles touch.
agms 3 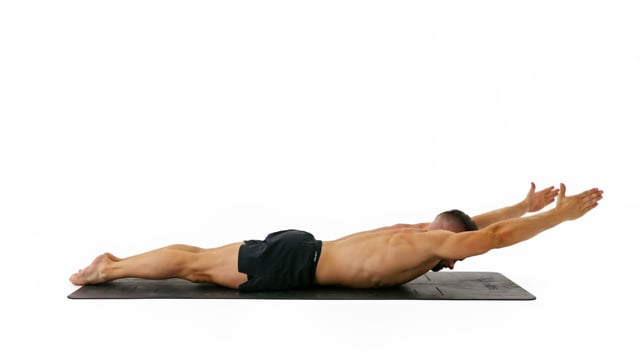
On the way back stop with your elbows in line with your shoulders and a 90 degree angle in your elbows. Lift your forearms towards the ceiling and squeeze on top for a moment.Keep your chest on the floor the entire time and rotate your hands for the thumbs to point towards the ceiling.Keep your legs engaged but on the floor. Point your feet and make your ankles touch.
agms 4 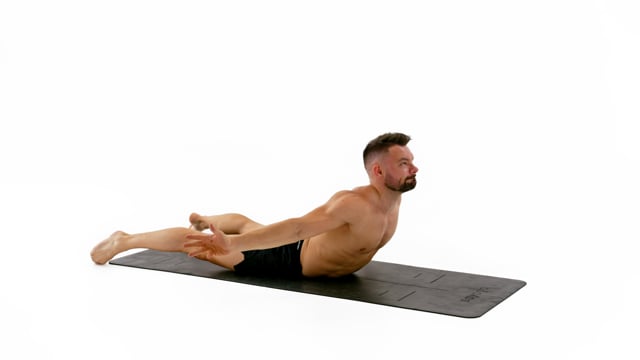
Then externally rotate your arms, squeeze your shoulder blades together in the back, look up towards the ceiling and engage the whole back lifting the upper body of the floor.Keep your feet about shoulder width apart on the floor the entire time.Move slowly! The longer this takes the more control and strength you will develop!
agms 5 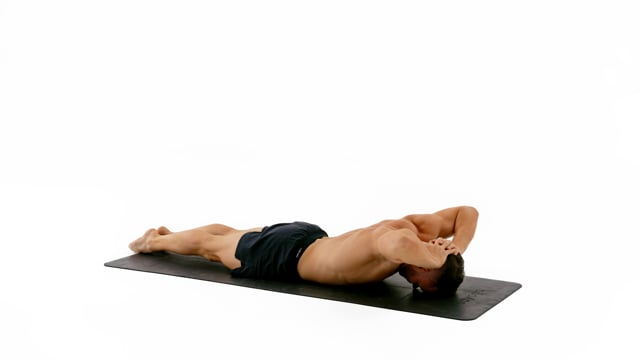
Lift your elbows up as you were trying to make them touch behind your head. Bring them back down slowly. Do not slam them into the floor.Keep your legs engaged but on the floor. Point your feet and make your ankles touch.Move slowly! The longer this takes the more control and strength you will develop!
agms 6 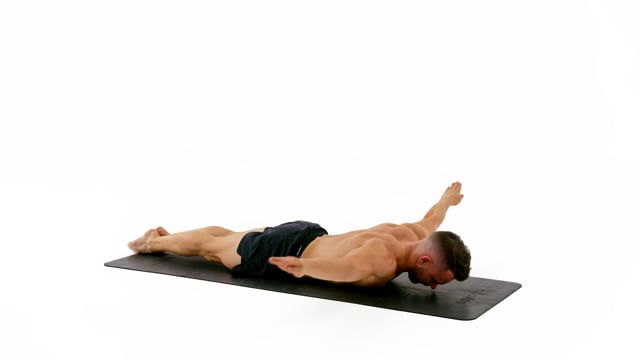
Keep your chest on the floor and lift your head sligthly.Keep your legs engaged but on the floor. Point your feet and make your ankles touch.
7
8 Shoulder Prehab - Long Elastic
bhnt 9 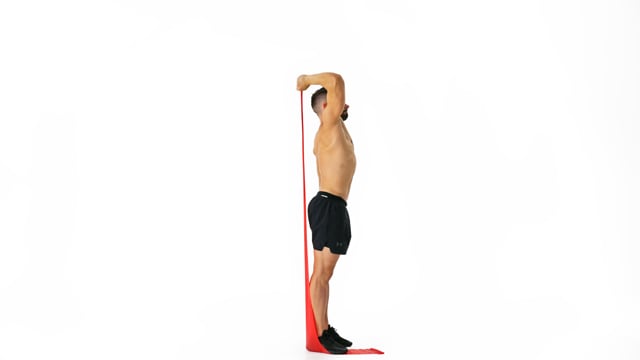
Allow your shoulder to move and elbow to flare naturally as your bend your arm.Engage your core to stabilize your position.Exhale as you extend the arm. Inhale on the way back.
bhnt 10 
Engage your core to stabilize your position. Minimize arching of the lower back.Lock your elbow and look at your hand.This is a core activation drill and not a back stretch. Do not bend too far towards the back!
bhnt 11 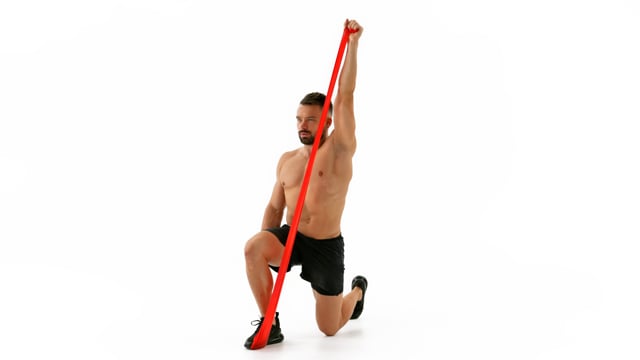
Stop lowering the arm with your elbow next to your shoulder and 90 degrees bent.Engage your core to stabilize your position.Exhale as you extend the arm. Inhale on the way back.
bhnt 12 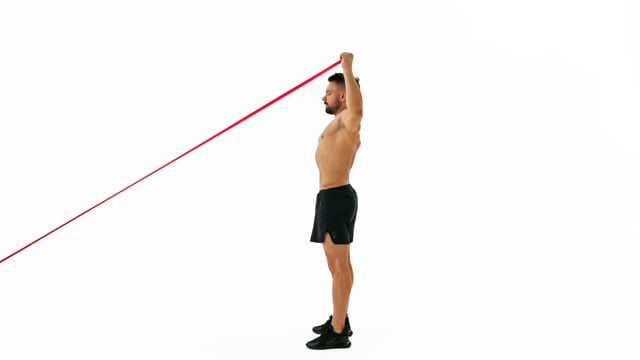
Separate your movements. First pull your hand back and up aligning your elbow with the shoulders, then rotate the arm and finally press the hand overhead. Follow this same path on the way back down.Imagine you had a solid stick going through your shoulders and the working arm all the way to your elbow. Rotate the arm on this axis.Stand far enough from your attachment point so you can apply constant backwards pressure on the elastic as you extend your arm overhead.
bhnt 13 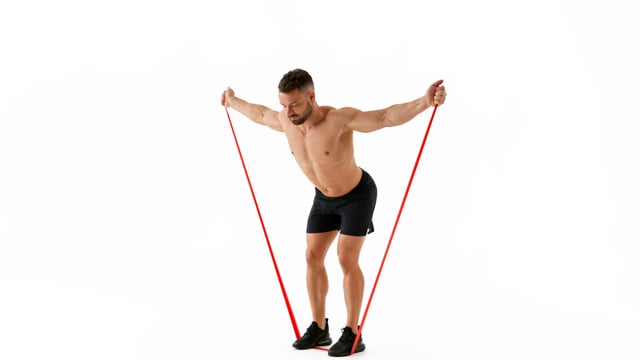
Keep your shoulders low and pull your arms back as if you were trying to touch your elbows behind your back.Rotate your hands so the thumbs are guiding the movement and the elastic is leaving your firsts on the pinky side.Exhale as you pull your arms back.
14
15
16
17
18
19
20
21 Shoulder Prehab - Loop Elastic
ciou 22 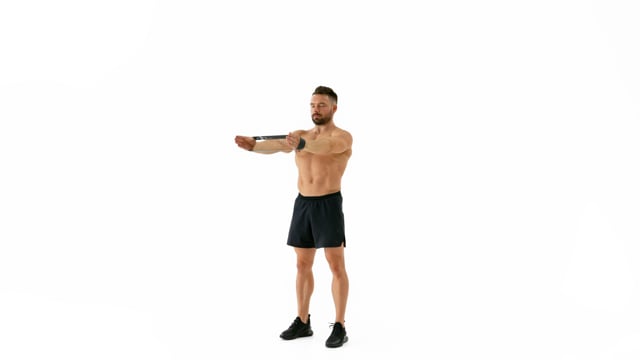
Apply constant outwards pressure on the elastic as you raise your arms overhead and back.Keep your shoulders down and look towards the front.Engage your core to stabilize your position.
ciou 23 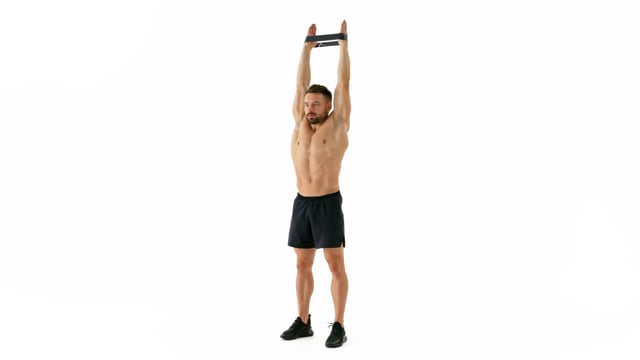
Separate your movements. First rotate your arms inside of your shoulders to bring the elbows in front of your chest. Then push your hands overhead.Keep your shoulders down and look towards the front.Apply outwards pressure on the elastic the entire time but do not externally rotate your arms.
ciou 24 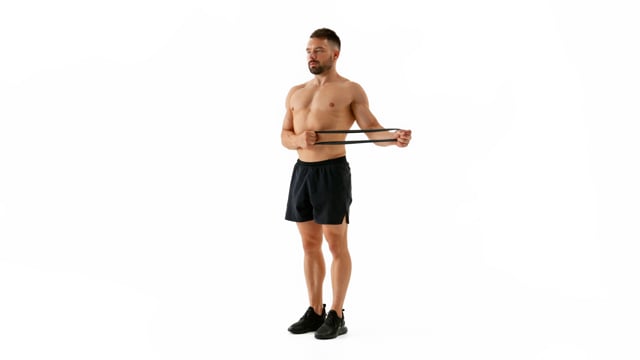
Externally rotate your arms against the pressure of the elastic whilst keeping your elbows connected to your side.Keep your shoulders down and look towards the front.Engage your core to stabilize your position.
ciou 25 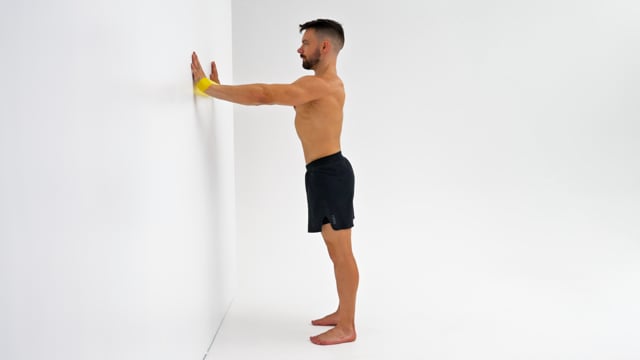
Keep your shoulders down and look towards the front.Slide your hand out on the wall against the pressure of the elastic. Keep your elbows locked.Engage your core to stabilize your position.
ciou 26 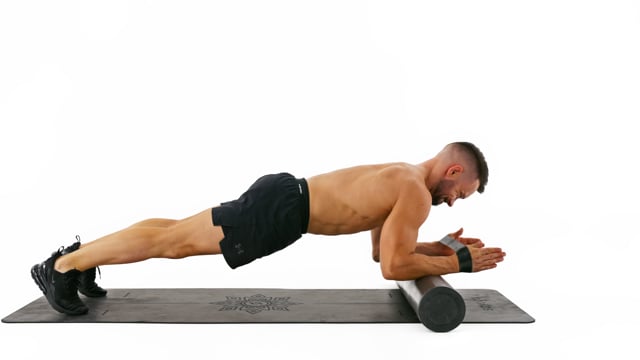
Rock your elbows back and forth carefully whilst keeping your body stable.Engage your core and create 1 straight line from your feet all the way through your neck.Protract and depress your scapula. Do not allow your shoulder blades to stick out behind.
27
28 Japanese Shoulder Warm Up
djpv 29 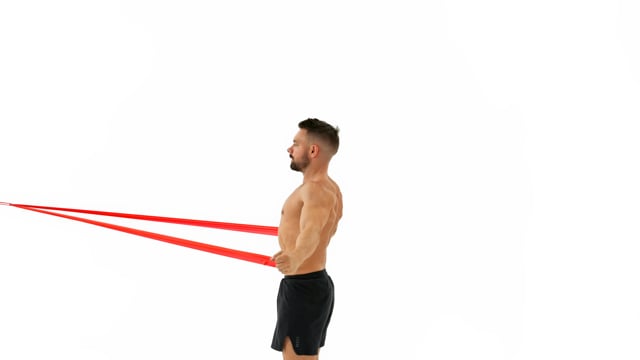
Straighten your arms and work with your palms facing the attachment point.Straighten out your back and keep your shoulders low.Work through all 5 angles: Up overhead, 45 degrees towards the side, perfectly out towards the side, 45 degrees towards the floor and with the hands next to the hips.
djpv 30 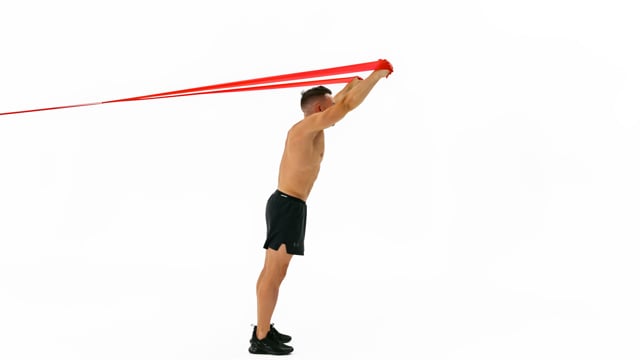
Straighten your arms and work with your palms facing away from the attachment point. Keep your knees sligthly bent.Straighten out your back and keep your shoulders low.Work through all 5 angles: Up overhead, 45 degrees towards the side, perfectly out towards the side, 45 degrees towards the floor and with the hands next to the hips.
djpv 31 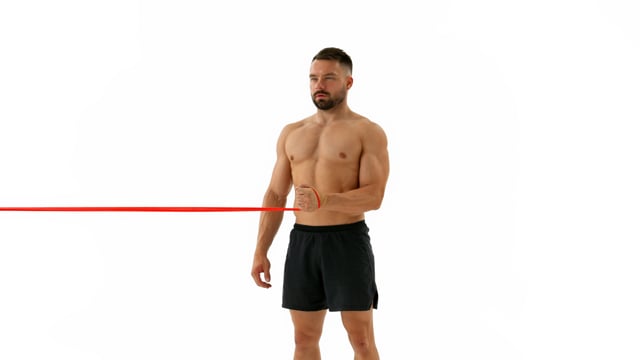
Externally rotate your arm against the pressure of the elastic whilst keeping your elbow connected to your side.Keep your shoulders down and look towards the front.focus on form and keep the band under constant pressure., "Go slow and controlled. We are training very small stabilizing muscles here. If the applied pressure becomes too high the bigger shoulder muscles will take over. For them the elastic will not apply enough force and the exercise becomes useless. Use a weak elastic, focus on form and keep the band under constant pressure."
32 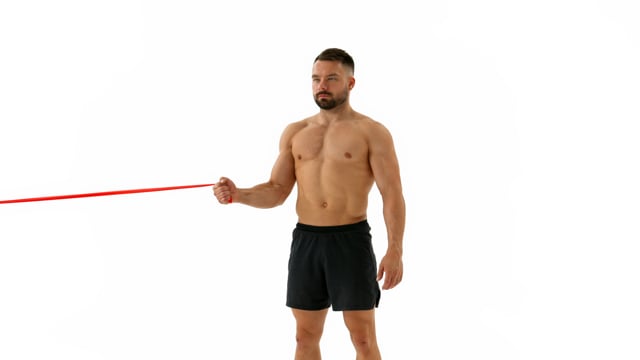
Internally rotate your arm against the pressure of the elastic whilst keeping your elbow connected to your side.Keep your shoulders down and look towards the front.focus on form and keep the band under constant pressure., "Go slow and controlled. We are training very small stabilizing muscles here. If the applied pressure becomes too high the bigger shoulder muscles will take over. For them the elastic will not apply enough force and the exercise becomes useless. Use a weak elastic, focus on form and keep the band under constant pressure."
33
34
35
36
37
38
39
40
41 Shoulder Prehab - Long Elastic 2
ekqw 42 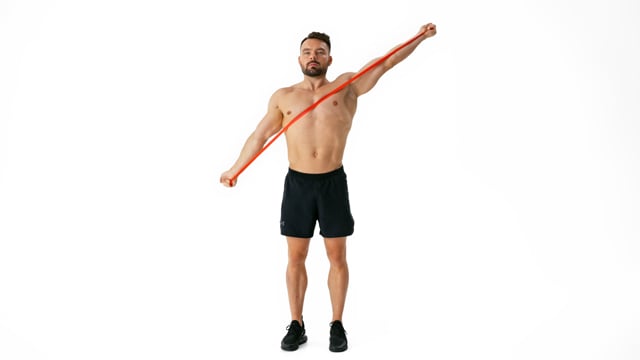
Keep your shoulders low as you diagonally pull the elastic apart.Engage your core to stabilize your position.
ekqw 43 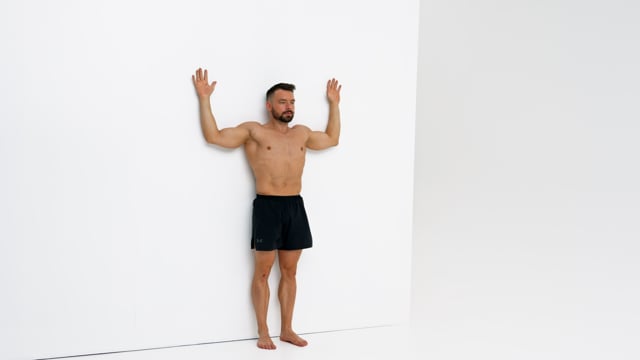
Place your feet hip width apart on the floor with minimal distance to the wall.Only place your hands on the wall if your shoulder mobility allows it. Whilst the goal is for the entire forearms to be on the wall eventually this particular exercise should not be a stretch.Do not arch your back or stick your ribs out. Work on keeping your entire back connected with the wall.
ekqw 44 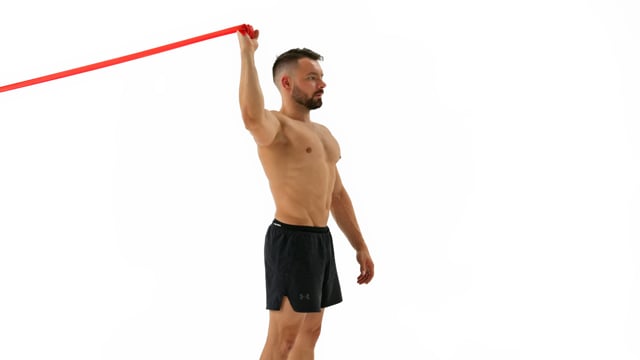
Hold your working elbow at a 90 degree angle perfectly in line with both of your shoulders.Imagine you had a solid stick going through your shoulders and the working arm all the way to your elbow. Rotate the arm on this axis.Make sure to use an elastic that only places minimal pressure on your shoulder. If the elastic is too strong different muscles will take over and the exercise will lose its effect.
ekqw 45 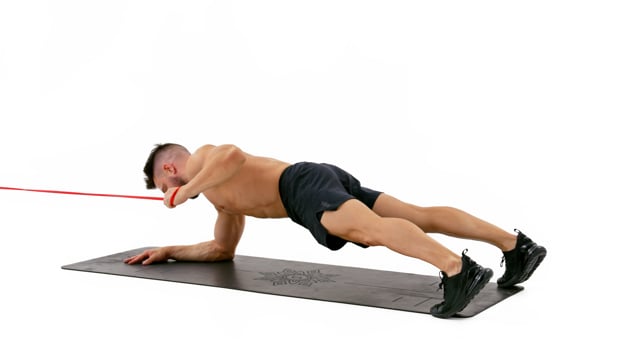
Pull your elbow back next to your shoulder.Engage your core and create 1 straight line from your feet all the way through your neck.Keep your hips and shoulders perfectly squared and parallel to the floor.
ekqw 46 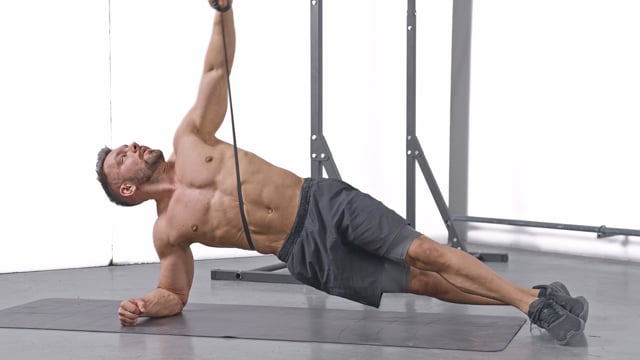
Attach the elastic behind your ribs close to the floor. Grab it firmly with your top hand.Rotate your body towards the floor as your reach with the hand underneath your rib cage towards the attachment point.Look up towards the ceiling as you pull your hand up and over.
47
48 Shoulder Warm Up Floor - Alt
flrx 49 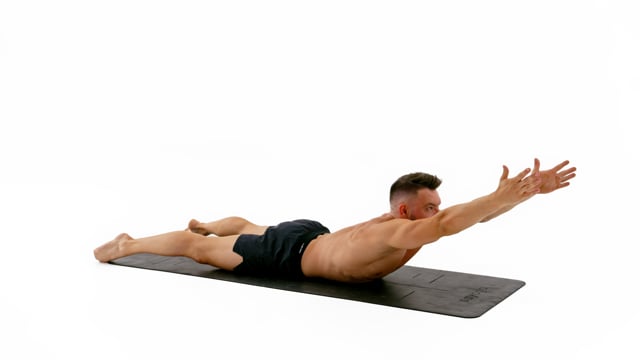
Externally rotate your hands as you move your arms towards the front. As your hands reach the front the thumbs point towards the ceiling. Reverse this as you bring the hands back down.Keep your feet about shoulder width apart on the floor the entire time.Move slowly! The longer this takes the more control and strength you will develop!
flrx 50 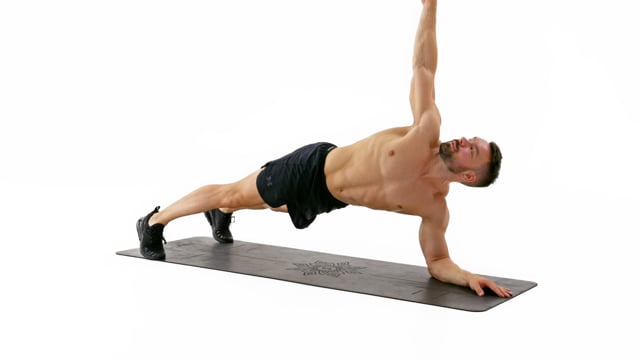
Engage your core and create 1 straight line from your feet all the way through your neck.Look up as you reach towards the ceiling. Both of your arms should end up in 1 straight line.Move slow and stay in control at all times!
flrx 51 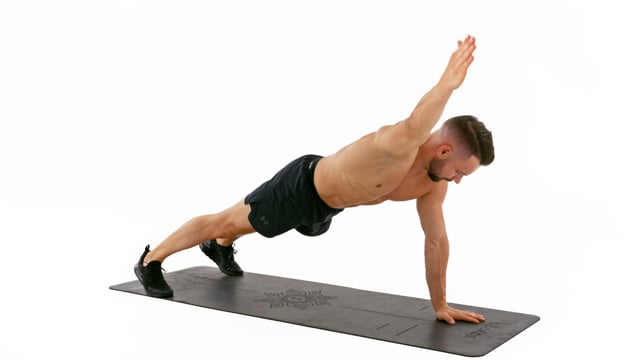
Engage your core and create 1 straight line from your feet all the way through your neck.Lift one arm at the time out diagonally in a 45 degree angle. Your thumb needs to point towards the ceiling.Keep your shoulders and hips immobile.
flrx 52 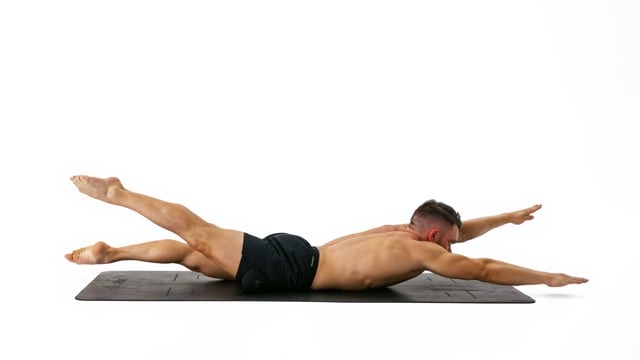
Pull your hands and feet far away from your center to get as long as possible.Keep your core engaged to stabilize your position and isolate the movement into your arms and legs only.Go as fast as possible.
flrx 53 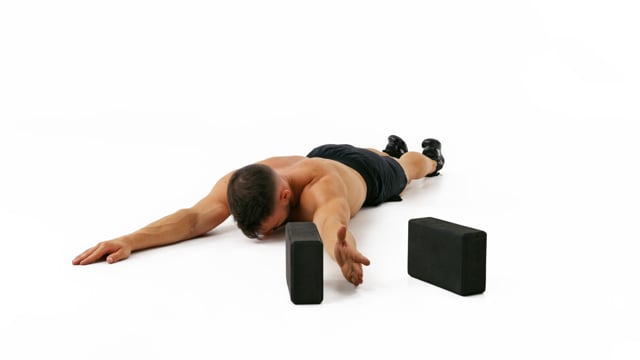
Relax your hands back on the floor between each rep.Keep your chest on the floor the entire time and rotate your hands for the thumbs to point towards the ceiling.Keep your legs engaged but on the floor. Point your feet and make your ankles touch.
Rest between sets: As Needed
Intensity: Light
Handstand Warm Up
Rest between sets: Long enough to recover | Short enough to stay warm
Intensity: Moderate | Focus on form
Skill Work
Rest between sets: 2-3min between sets
Intensity: Elevated
workout_number sort_number Demo Exercise Reps/Sets How to/Cues
a 63 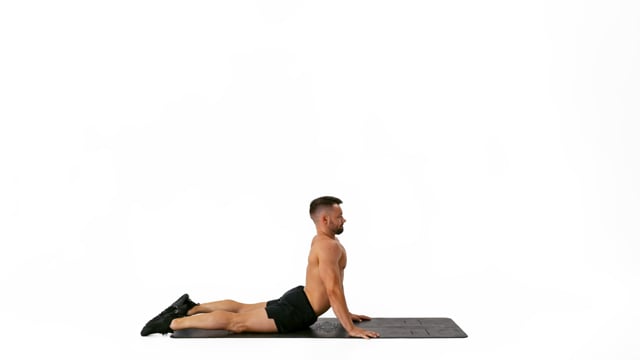
During the Dolphin Arch Rock your back is arched. Engage your core to straighten out your back and even slightly round it before pushing up.Timing is key here. Commit to your movement and do not try to push up too early. Wait for the legs to come all the way up and for your weight to shift before performing the HSPU portion of the movement.This is a great move to learn the timing of the 90 Degree Push Up and to understand how to generate and use momentum to swap from the Bent Arm Planche to the Bent Arm Stand. Benefit from it!
a 64 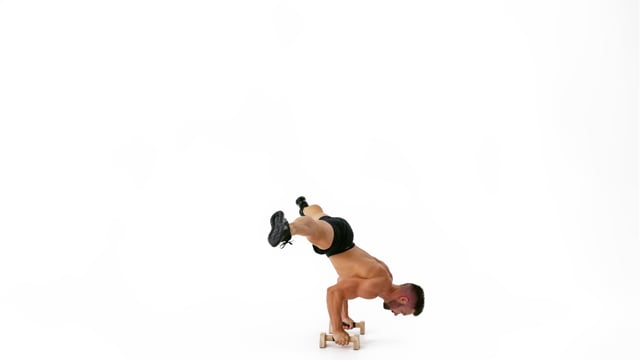
Do not collapse in the Bent Arm Planche. Support yourself and keep tension. Protract your shoulders to fight gravity.Move slowly! The longer this takes the more control and strength you will develop!Engage your shoulders and protract them slightly. Your shoulder blades should not stick out from your back.
a 65 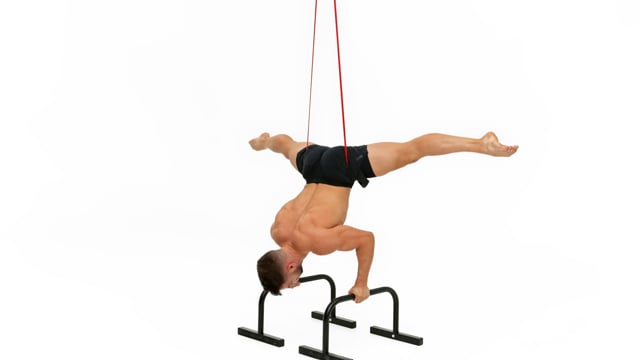
Whilst the goal is to perform the 90 degree push up without the use of momentum it is advisable to use a small tempo when transferring from the Bent Arm Planche to the Bent Arm Stand.Avoid bending your elbows more than about 90 degrees. If the angle becomes too sharp you will get stuck on the way back up.Timing is key here. Commit to your movement and do not try to push up too early. Wait for the legs to come all the way up and for your weight to shift before performing the HSPU portion of the movement.
66
b 67 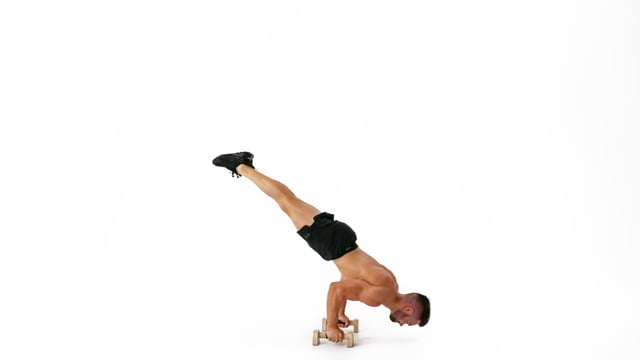
Take the same path on the way back up. Stay clean and do not arch your back.Separate the movements to stay clean and efficient.Focus on your handstand after the push up. Align your shoulders, hips and feet on top of the center of your hands, elevate your scapula and stay fingertip heavy.
b 68 
During the Dolphin Arch Rock your back is arched. Engage your core to straighten out your back and even slightly round it before pushing up.Timing is key here. Commit to your movement and do not try to push up too early. Wait for the legs to come all the way up and for your weight to shift before performing the HSPU portion of the movement.This is a great move to learn the timing of the 90 Degree Push Up and to understand how to generate and use momentum to swap from the Bent Arm Planche to the Bent Arm Stand. Benefit from it!
b 69 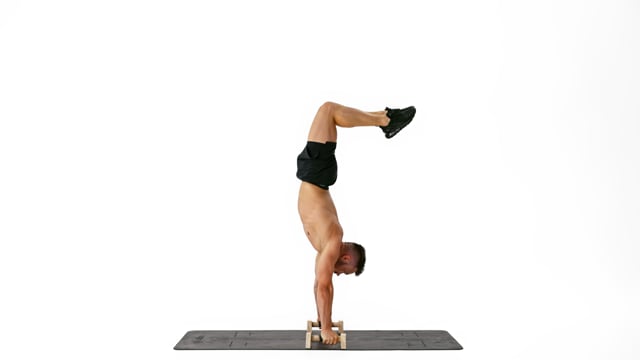
Over time work on building more control and start cleaning the movement up. Start making precise choices with your legs and use less momentum.Avoid bending your arms more than about 90 degrees. If the angle becomes too sharp you will not be able to resist properly.Timing is key here. Commit to your movement and do not try to push up too early. Wait for the legs to come all the way up and for your weight to shift before performing the HSPU portion of the movement.
b 70 
Do not collapse in the Bent Arm Planche. Support yourself and keep tension. Protract your shoulders to fight gravity.Move slowly! The longer this takes the more control and strength you will develop!Engage your shoulders and protract them slightly. Your shoulder blades should not stick out from your back.
71
c 72 
During the Dolphin Arch Rock your back is arched. Engage your core to straighten out your back and even slightly round it before pushing up.Timing is key here. Commit to your movement and do not try to push up too early. Wait for the legs to come all the way up and for your weight to shift before performing the HSPU portion of the movement.This is a great move to learn the timing of the 90 Degree Push Up and to understand how to generate and use momentum to swap from the Bent Arm Planche to the Bent Arm Stand. Benefit from it!
c 73 
Do not collapse in the Bent Arm Planche. Support yourself and keep tension. Protract your shoulders to fight gravity.Move slowly! The longer this takes the more control and strength you will develop!Engage your shoulders and protract them slightly. Your shoulder blades should not stick out from your back.
74
d 75 
Over time work on building more control and start cleaning the movement up. Start making precise choices with your legs and use less momentum.Avoid bending your arms more than about 90 degrees. If the angle becomes too sharp you will not be able to resist properly.Timing is key here. Commit to your movement and do not try to push up too early. Wait for the legs to come all the way up and for your weight to shift before performing the HSPU portion of the movement.
d 76 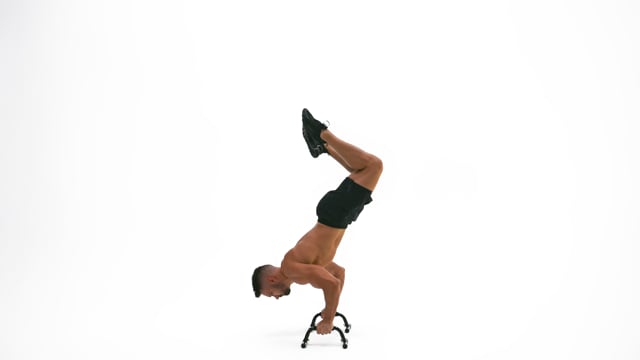
Separate your movements. First come up to the Bent Arm Stand position and only after perform the HSPU portion of the skill. Timing is key!Avoid bending your elbows more than about 90 degrees. If the angle becomes too sharp you will get stuck on the way back up.Do not arch your back. Instead even round your upper back slightly and protract your shoulders.
d 77 
Do not collapse in the Bent Arm Planche. Support yourself and keep tension. Protract your shoulders to fight gravity.Move slowly! The longer this takes the more control and strength you will develop!Engage your shoulders and protract them slightly. Your shoulder blades should not stick out from your back.
78
e 79 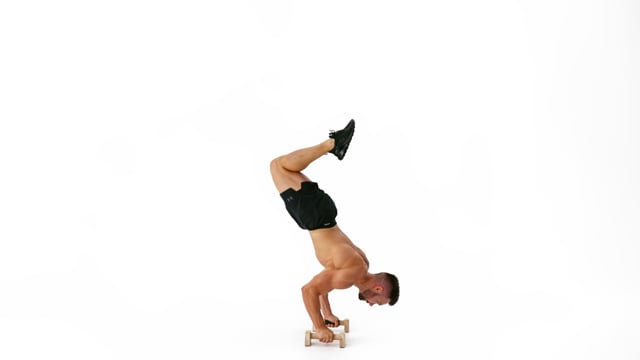
Over time work on building more control and start cleaning the movement up. Start making precise choices with your legs and use less momentum.Avoid bending your arms more than about 90 degrees. If the angle becomes too sharp you will not be able to resist properly.Timing is key here. Commit to your movement and do not try to push up too early. Wait for the legs to come all the way up and for your weight to shift before performing the HSPU portion of the movement.
e 80 
During the Dolphin Arch Rock your back is arched. Engage your core to straighten out your back and even slightly round it before pushing up.Timing is key here. Commit to your movement and do not try to push up too early. Wait for the legs to come all the way up and for your weight to shift before performing the HSPU portion of the movement.This is a great move to learn the timing of the 90 Degree Push Up and to understand how to generate and use momentum to swap from the Bent Arm Planche to the Bent Arm Stand. Benefit from it!
e 81 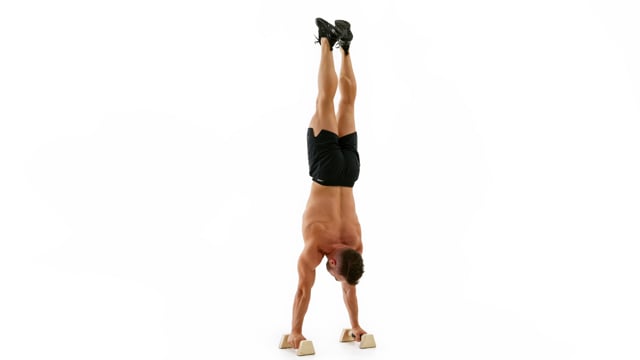
Separate your movements. First come up to the Bent Arm Stand position and only after perform the HSPU portion of the skill. Timing is key!Avoid bending your elbows more than about 90 degrees. If the angle becomes too sharp you will get stuck on the way back up.Do not arch your back. Instead even round your upper back slightly and protract your shoulders.
82
f 83 
Over time work on building more control and start cleaning the movement up. Start making precise choices with your legs and use less momentum.Avoid bending your arms more than about 90 degrees. If the angle becomes too sharp you will not be able to resist properly.Timing is key here. Commit to your movement and do not try to push up too early. Wait for the legs to come all the way up and for your weight to shift before performing the HSPU portion of the movement.
84
g 85 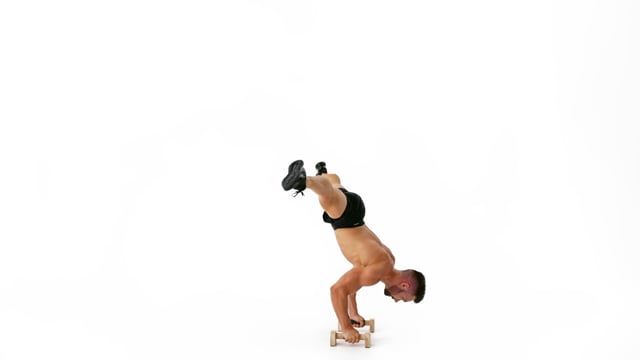
Whilst the goal is to perform the 90 degree push up without the use of momentum it is advisable to use a small tempo when transferring from the Bent Arm Planche to the Bent Arm Stand.Avoid bending your elbows more than about 90 degrees. If the angle becomes too sharp you will get stuck on the way back up.Timing is key here. Commit to your movement and do not try to push up too early. Wait for the legs to come all the way up and for your weight to shift before performing the HSPU portion of the movement.
g 86 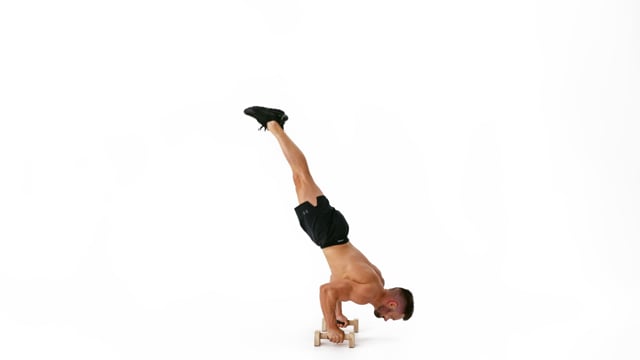
Separate your movements. First come up to the Bent Arm Stand position and only after perform the HSPU portion of the skill. Timing is key!Avoid bending your elbows more than about 90 degrees. If the angle becomes too sharp you will get stuck on the way back up.Do not arch your back. Instead even round your upper back slightly and protract your shoulders.
87
h 88 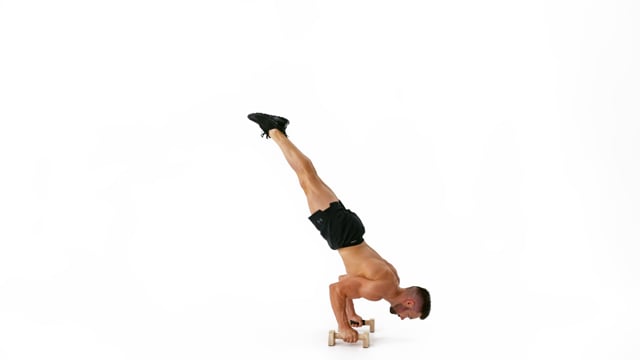
Whilst the goal is to perform the 90 degree push up without the use of momentum it is advisable to use a small tempo when transferring from the Bent Arm Planche to the Bent Arm Stand.Avoid bending your elbows more than about 90 degrees. If the angle becomes too sharp you will get stuck on the way back up.Timing is key here. Commit to your movement and do not try to push up too early. Wait for the legs to come all the way up and for your weight to shift before performing the HSPU portion of the movement.
h 88 
Separate your movements. First come up to the Bent Arm Stand position and only after perform the HSPU portion of the skill. Timing is key!Avoid bending your elbows more than about 90 degrees. If the angle becomes too sharp you will get stuck on the way back up.Do not arch your back. Instead even round your upper back slightly and protract your shoulders.
88
i 88 
Whilst the goal is to perform the 90 degree push up without the use of momentum it is advisable to use a small tempo when transferring from the Bent Arm Planche to the Bent Arm Stand.Avoid bending your elbows more than about 90 degrees. If the angle becomes too sharp you will get stuck on the way back up.Timing is key here. Commit to your movement and do not try to push up too early. Wait for the legs to come all the way up and for your weight to shift before performing the HSPU portion of the movement.
i 88 
Whilst the goal is to perform the 90 degree push up without the use of momentum it is advisable to use a small tempo when transferring from the Bent Arm Planche to the Bent Arm Stand.Avoid bending your elbows more than about 90 degrees. If the angle becomes too sharp you will get stuck on the way back up.Timing is key here. Commit to your movement and do not try to push up too early. Wait for the legs to come all the way up and for your weight to shift before performing the HSPU portion of the movement.
i 88 
Separate your movements. First come up to the Bent Arm Stand position and only after perform the HSPU portion of the skill. Timing is key!Avoid bending your elbows more than about 90 degrees. If the angle becomes too sharp you will get stuck on the way back up.Do not arch your back. Instead even round your upper back slightly and protract your shoulders.
Rest between sets: up to 90 sec between
Intensity: Elevated