Warm Up
| workout_number | sort_number | Demo | Exercise | Reps/Sets | How to/Cues |
|---|---|---|---|---|---|
| a | 1 | 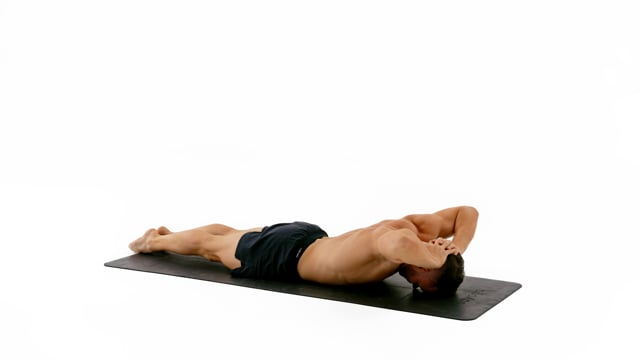 | Elbow Lift 20sec | Lift your elbows up as you were trying to make them touch behind your head. Bring them back down slowly. Do not slam them into the floor.Keep your legs engaged but on the floor. Point your feet and make your ankles touch.Move slowly! The longer this takes the more control and strength you will develop! | |
| a | 2 | 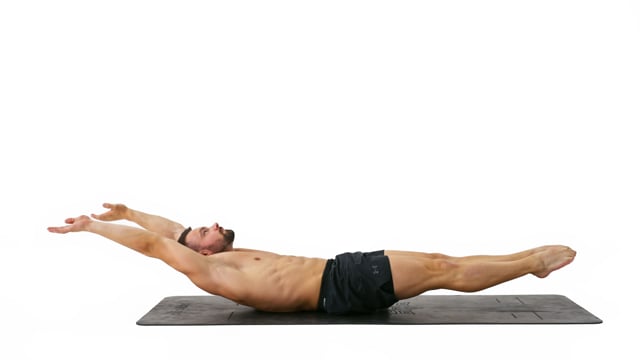 | Hollow Body Hold 20sec | Engage your legs. Squeeze your feet together and lock your knees.Keep your neck in a neutral position.Lock your elbows and keep your arms close to your ears. | |
| a | 3 |  | Kneeling Elbow Rotation 20sec | Place your hands shoulder width apart on the floor with your fingers facing towards the front! Lock your elbows!Rotate the pit of your elbows towards you and away from you as far as you can in each rep.Lean into your hands and keep your wrists under constant pressure. | |
| 4 | |||||
| b | 5 | 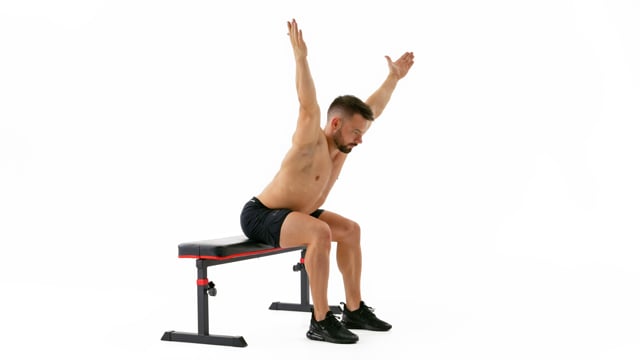 | Hinging YTW 1min | Lock your elbows and rotate your hands so your thumbs point towards the back.For the Y your arms should be approximately in a 45 degree angle. In the T your arms should be out towards the side and parallel to the floor.For the W with your thumbs pointing upwards first row your elbows backwards until in line with your shoulders. Only after rotate your arms up. | |
| b | 6 | 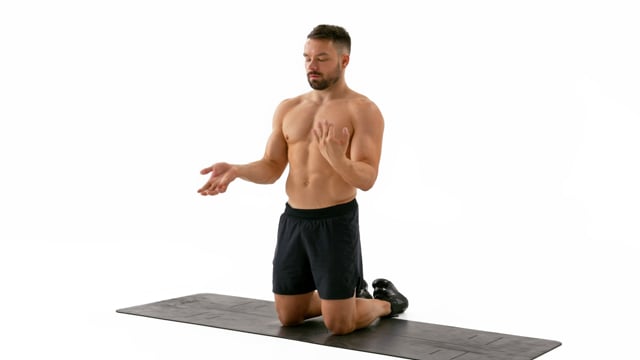 | Reverse Up Down Wrist Waving 1min | Move your wrists from full flexion into full extension and back.Stay in each extreme for a moment for an active stretch.Keep your shoulders depressed and squared with your hips. | |
| b | 7 | 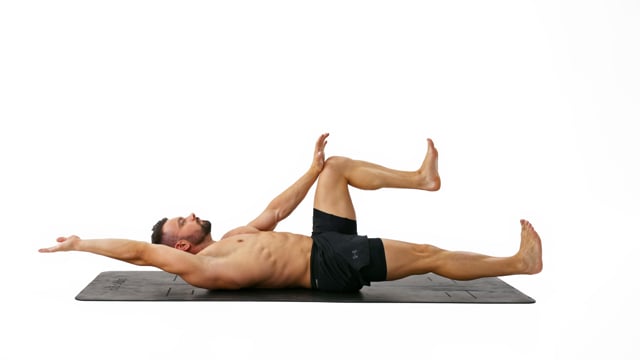 | Constant Pressure Chair on Back 1min | Extend the same side arm and leg simultaneously whilst keeping pressure between the opposite limbs.Keep your shoulders depressed and squared with your hips at all times.Suck your belly button in to collect your lower back with the floor. | |
| 8 | |||||
| c | 9 | 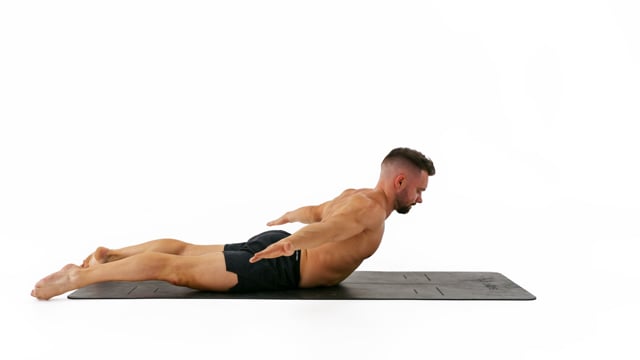 | Back Lift with Hands by Hips 8x | Keep your head in a neutral position as you lift your entire upper body off the floor.Keep your feet about shoulder width apart on the floor the entire time.Move slowly! The longer this takes the more control and strength you will develop! | |
| c | 10 | 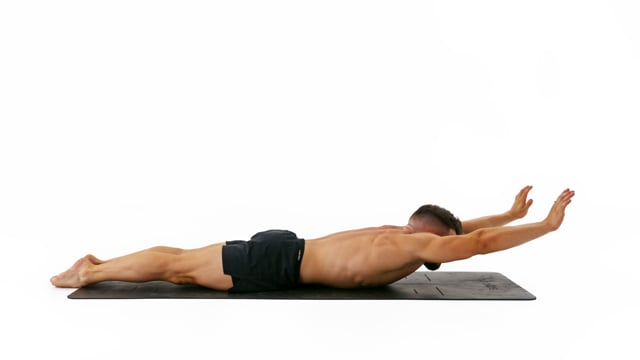 | Shoulder Lift on Floor 6x | Hover your chin close to the floor.Lock your elbows and look at your hands.Do not lift your chest off the floor. Isolate the movement into your shoulders. | |
| c | 11 | 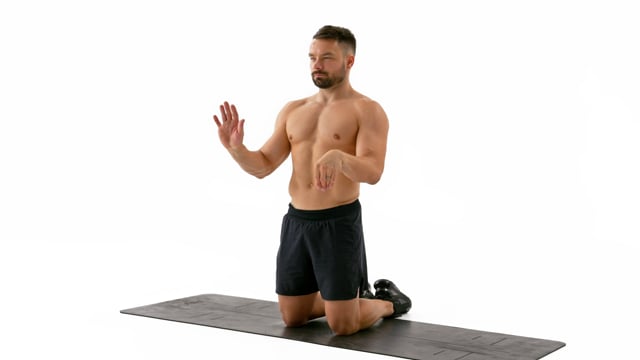 | Up Down Wrist Waving 10x | Move your wrists from full flexion into full extension and back.Stay in each extreme for a moment for an active stretch.Keep your shoulders depressed and squared with your hips. | |
| c | 12 | 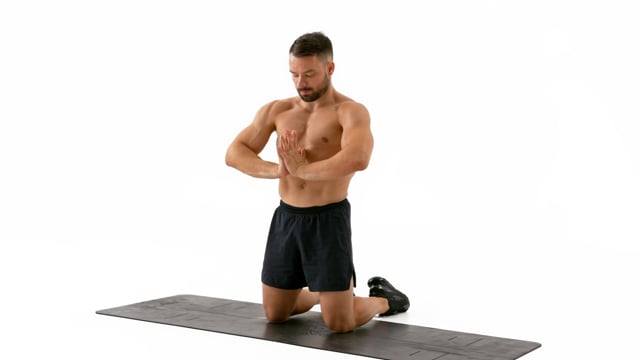 | Prayer Pose Stretch 6x | Keeping your hands in a vertical position push them down in front of your body towards your belly button.Apply pressure on your wrists by pushing your hands together and move sligthly deeper in each repetition.Keep your shoulders depressed and squared with your hips. | |
| c | 13 | 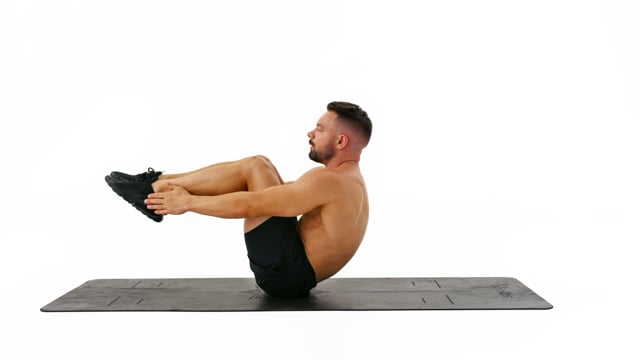 | Cocoon Crunche 6x | ||
| 14 | |||||
| 15 | |||||
| d | 16 | 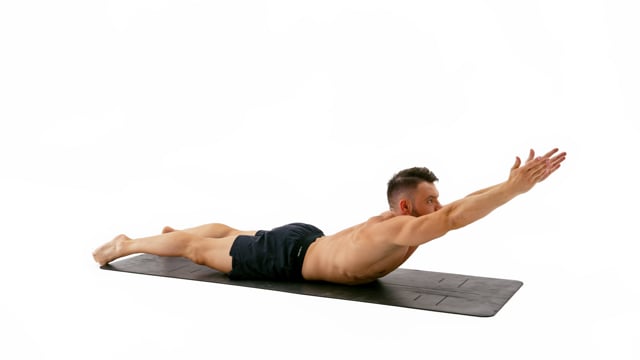 | Active Around the Sun on Stomach 20sec | Lift your upper body as high as possible in each rep whilst rotating the hands so the palms face the floor.Open your legs past hip width and keep our feet pointed on the floor the entire time.Keep your shoulders depressed, work the entire range of motion and fully relax your muscles between reps. | |
| d | 17 | 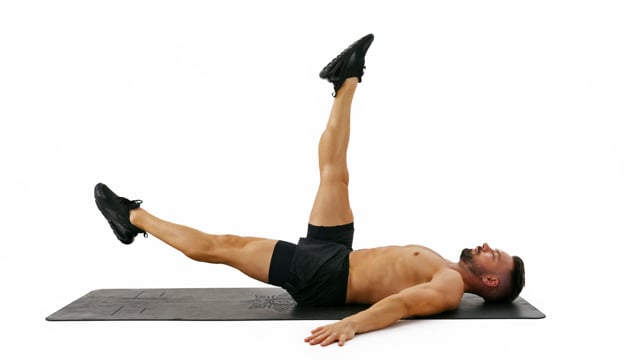 | Alternating Lying Single Leg Lift 20sec | ||
| d | 18 | 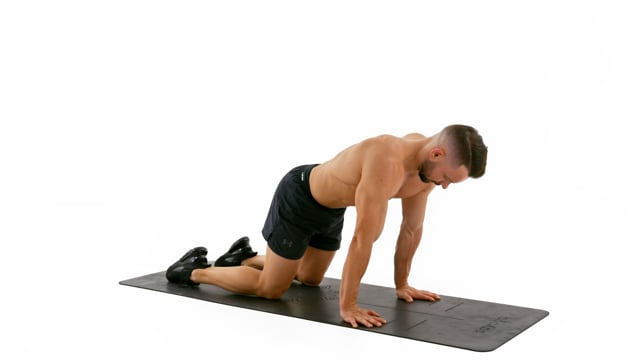 | Forward Facing Wrist Stretch 20sec | Place your hands shoulder width apart on the floor with your fingers facing towards the front! Lock your elbows and rotate their pits about 45 degrees towards the front.Gently move your shoulders towards the front on top of your fingers and beyond to load weight from your knees into your wrists.Go slow and only place as much pressure in your hands as you are comfortable with. | |
| 19 | |||||
| e | 20 | 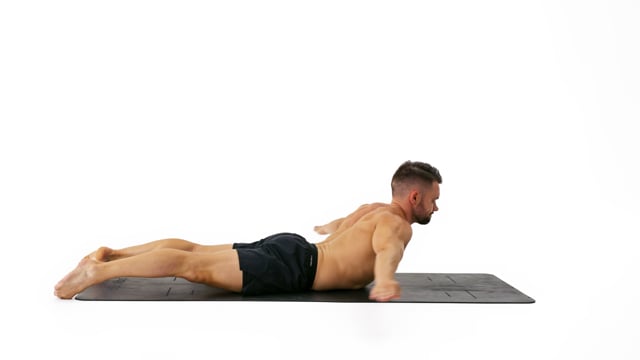 | Active Arm Circle on Stomach 1min | Draw small, quick and dynamic circles with your hands whilst keeping your elbows perfectly locked.Point your feet on the floor and connect your ankles.Lift your head with your upper body and keep your neck in a neutral position. | |
| e | 21 | 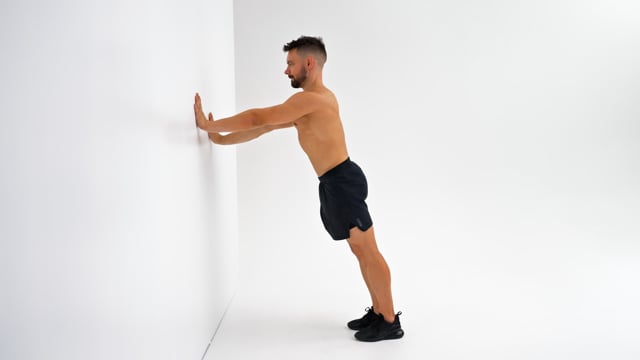 | Wrist Wall Walk 1min | In small alternating steps walk your hands downwards on the wall increase the wrist stretch with each step.As you can not go any lower return with the same small steps to your startign position.Engage your core and create 1 straight line from your feet all the way through your neck. | |
| e | 22 | 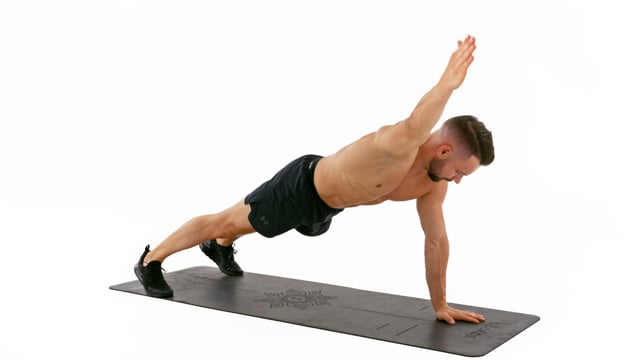 | Push Up Y 1min | Engage your core and create 1 straight line from your feet all the way through your neck.Lift one arm at the time out diagonally in a 45 degree angle. Your thumb needs to point towards the ceiling.Keep your shoulders and hips immobile. |
Specific Mobility
Rest Between Sets: None
Intensity: Moderate | Focus on form
workout_number sort_number Demo Exercise Reps/Sets How to/Cues
a 1 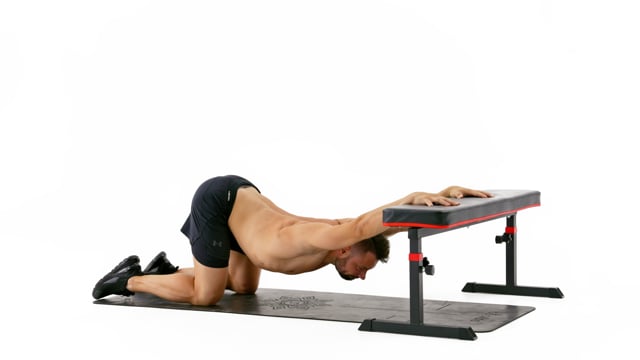
Lock your elbows and slightly depress your shoulders.Place your knees far enough so they are behind the hips and not right underneath them.Once your rib cage is approaching the floor start pushing your hips towards the hands for an additional stretch.
a 2 
Engage your core and avoid arching your back as good as you can!Look at your hands and keep them around shoulder width apart.Lock your elbows.
3
b 4 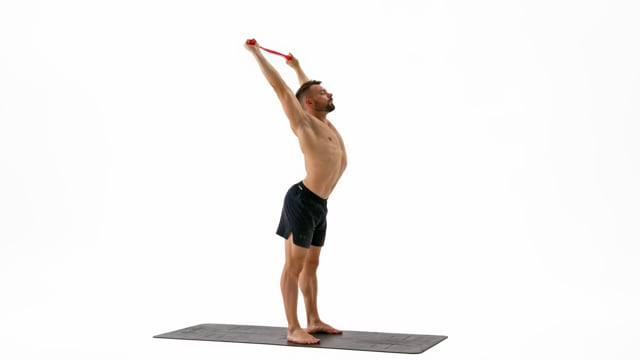
Keep your mid and lower back stable and engaged at all times. Do not arch beyond your chest.Your wrists stay in the same position towards each other. Do not allow your hands to rotate to eliminate the possibility of your shoulders rotating.Exhale as you open your shoulders.
b 5 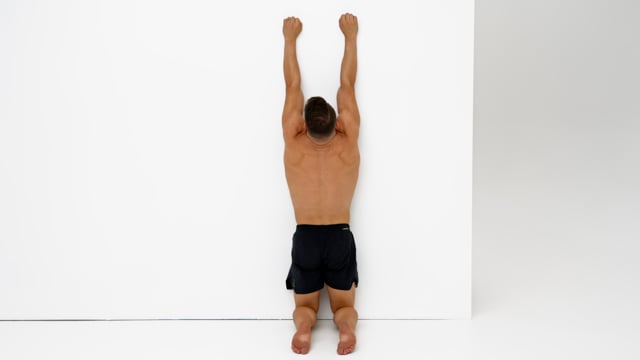
Lock your elbows and look at your hands.Reach towards the ceiling pushing as tall as you can and cover your ears with your shoulders. Make sure the elastic comes out of the back of your hands like an extension of your fingers and not from the thumb or pinky side.Go slow on the way down and keep your elbows locked. Both directions matter!
6
c 7 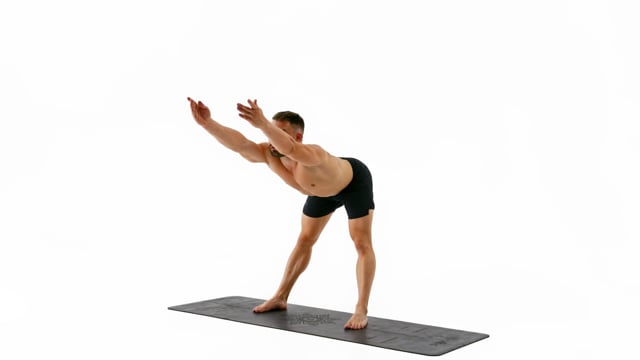
Straighten your back. Ideally even arch your lower back slightly and place your hips in an anterior pelvic tilt.Delay your chest raising up and look at your hands as they guide the upwards movement.Keep your knees fully locked at all times.
c 8 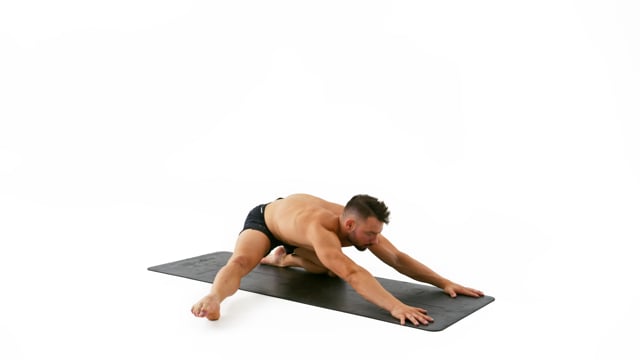
Push both your glutes and chest towards the floor.Keep your hips squared with your shoulders and equal weight on both hands. Straighten your back.Place the hand of the bent knee not in front of the knee but slightly further in.
9
d 10 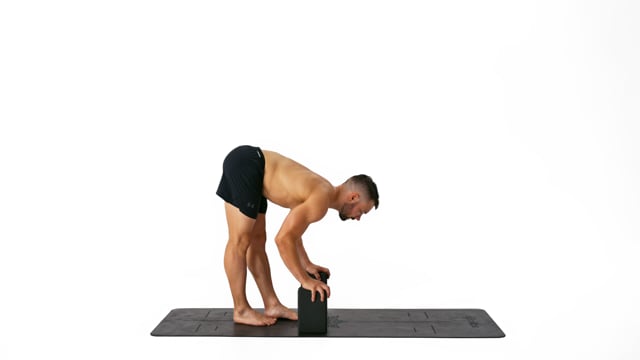
The anterior pelvic tilt is the most important part of this exercise.As you move your foot pull your toes up towards your chin and flex your foot.Keep your knees locked and shoulders squared with the hips at all times.
d 11 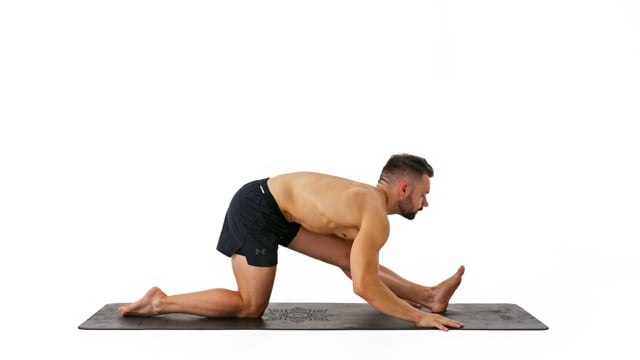
Focus on the anterior pelvic tilt during the runners stretch.Flex your foot and fully lock your front knee during the Runners Stretch.During the Half Split focus on the posterior pelvic tilt and push your hips towards your front heel.
12
e 13 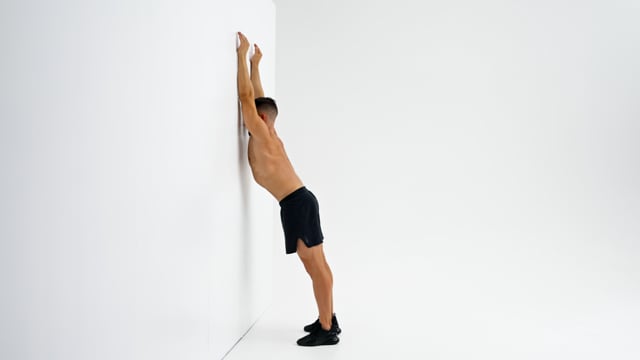
Look at the wall as the hands slide up.Once your arms approach the top and begin to lock out push your chest towards the wall for a gentle back stretch.Keep your shoulders depressed and squared with your hips.
e 14 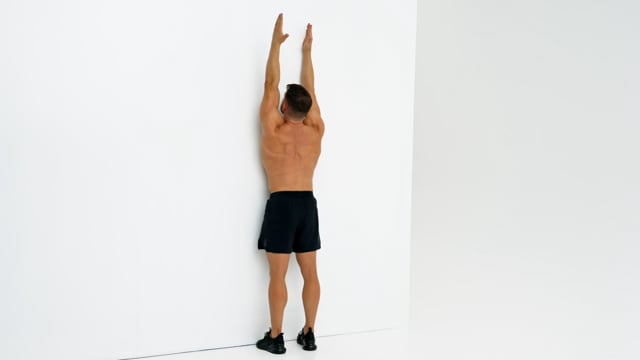
Handstand Training
Rest Between Sets: Minimal | Long enough to recover
Intensity: Moderate | Focus on form
workout_number sort_number Demo Exercise Reps/Sets How to/Cues
a 1 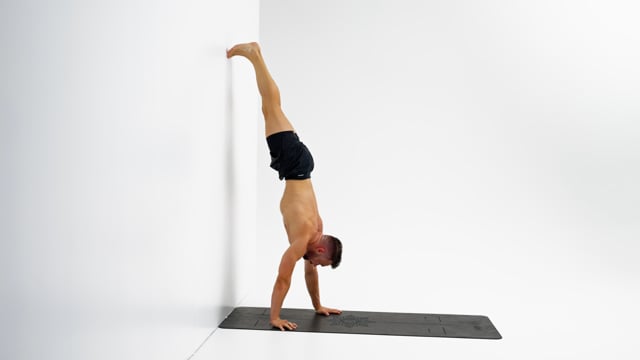
Take small and controlled steps with your hands facing towards the front.Only your feet should touch the wall. Do not place your knees, hips or chest on the wall.Look at the spot in between your hands. Do not look at the wall placing your chin on your chest.
a 2 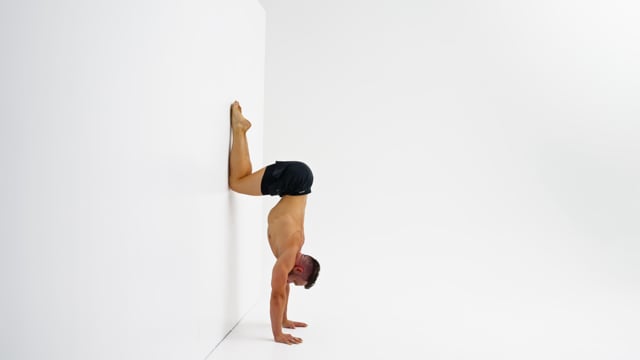
Keep your knees together and make them touch the wall as you pull them down.Pull your knees as low as possible whilst engaging your lower back. In the tuck position your hips need to be in a slight anterior pelvic tilt. As soon as your lower back rounds and your hips flip into a posterior pelvic tilt your knees are too low.Lock your elbows, elevate your scapula and look at the spot in between your hands.
a 3 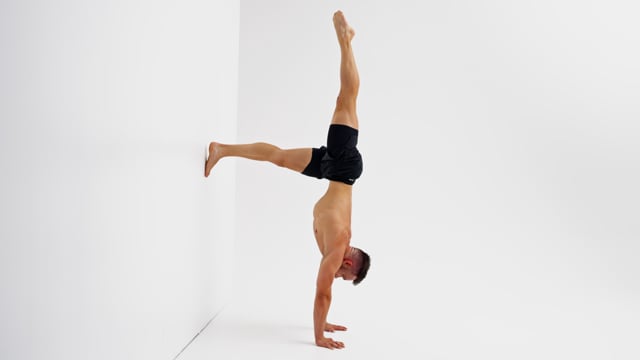
With the leg on top pressure on your shoulders is less horizontal and more vertical. Use this to push out extra tall. Work on holding this newly gained height on the way back down to the starting position.Engage your back and pull your hips into a slight anterior pelvic tilt when you are brining the leg back to the wall to keep your weight in the fingertips. Do not allow your lower back to round when returning to the L.In case of a temporary lack of hamstring flexibility bend your knee slightly to ease the tension.
a 4 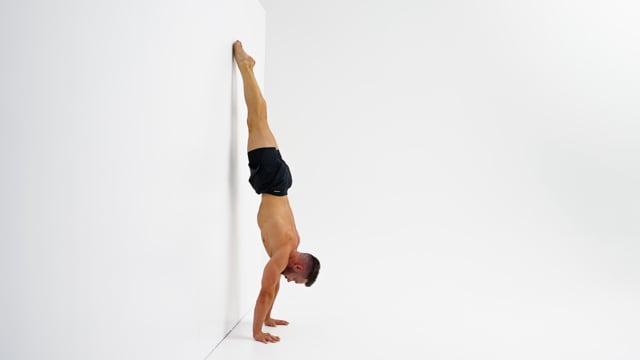
Do not pull your hips or arch your back. Stay in a perfectly straight line from shoulders to toes. The only position change should be in the shoulders and wrists.Do not place your hands too far away from the wall. The main focus of this drill is not conditioning but technical refinement.Keep your elbows locked and elevate your scapula fully at all times.
a 5 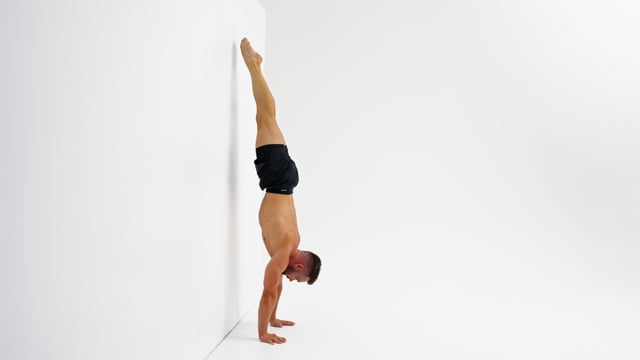
Do not pull your hips or arch your back. Stay in a perfectly straight line from shoulders to toes. The only position change should be in the shoulders and wrists.Move slow and stay in control at all times. Do not use momentum to get off the wall. Do not jump off the wall and do not take 1 foot at the time off the wall.Come back to the wall with your entire body from wrists to toes in 1 straight line.
a 6 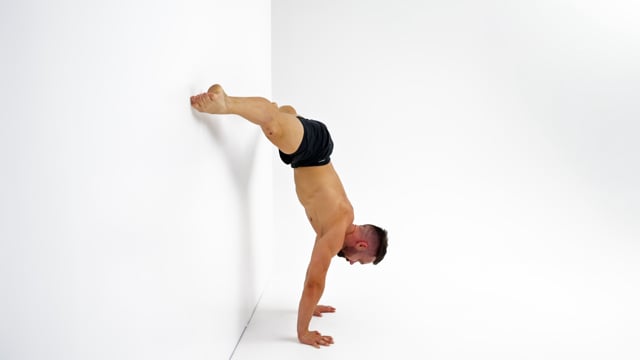
Don't just lock your legs inside of your hips but actively push them open. Do not accidentally close your legs whilst leaning towards the front., Lock your legs inside of your hips. Do not accidentally close your legs whilst leaning towards the front.Do not pull your hips or arch your back. Stay in a perfectly straight line from shoulders to toes. The only position change should be in the shoulders and wrists.Do not place your hands too far away from the wall. The main focus of this drill is not conditioning but technical refinement.
a 7 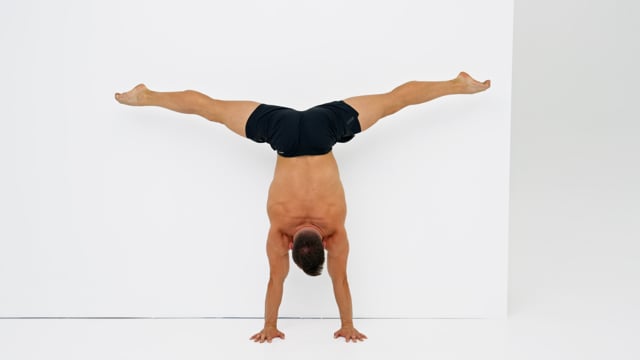
Don't just lock your legs inside of your hips but actively push them open. Do not accidentally close your legs whilst leaning towards the front., Lock your legs inside of your hips. Do not accidentally close your legs whilst leaning towards the front.Do not pull your hips or arch your back. Stay in a perfectly straight line from shoulders to toes. The only position change should be in the shoulders and wrists.Keep your elbows locked and elevate your scapula fully at all times.
8
9
10
b 11 
Take small and controlled steps with your hands facing towards the front.Only your feet should touch the wall. Do not place your knees, hips or chest on the wall.Look at the spot in between your hands. Do not look at the wall placing your chin on your chest.
b 12 
With the leg on top pressure on your shoulders is less horizontal and more vertical. Use this to push out extra tall. Work on holding this newly gained height on the way back down to the starting position.Engage your back and pull your hips into a slight anterior pelvic tilt when you are brining the leg back to the wall to keep your weight in the fingertips. Do not allow your lower back to round when returning to the L.In case of a temporary lack of hamstring flexibility bend your knee slightly to ease the tension.
b 13 
Do not pull your hips or arch your back. Stay in a perfectly straight line from shoulders to toes. The only position change should be in the shoulders and wrists.Do not place your hands too far away from the wall. The main focus of this drill is not conditioning but technical refinement.Keep your elbows locked and elevate your scapula fully at all times.
b 14 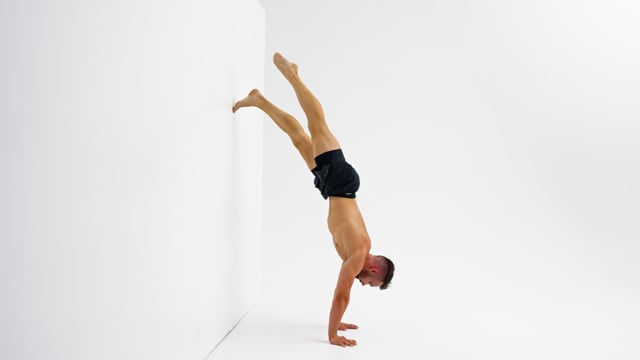
When you can not go any further with your shoulders stop moving. Keep your feet immobile on the wall and push your shoulders back to align your hips and shoulders on top of the center of your hands. Create a 45 degree angle at the hips.Lock your elbows fully, turn the pit of your elbows about 45 degrees towards the front and look at the spot between your hands.
b 15 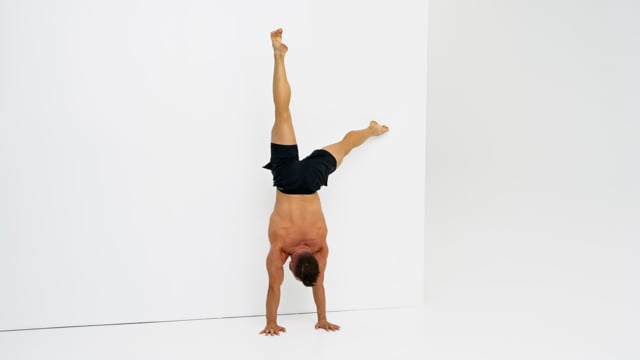
Focus on the rotation of your leg inside of your hip. In the straddle position the leg needs to be externally rotated. When the leg is on top it needs to be in parallel.Focus on the immobile leg. Keeping it perfectly still is much harder than moving the other one to straddle and back.Due to the nature of this exercise you will be slightly piked in your single leg straddle position. This is ok as you gain lots of shoulder strength and coordination but moving the wall leg not just against gravity but also against the friction of the wall. Find a flat and even wall and wear slippery socks!
b 16 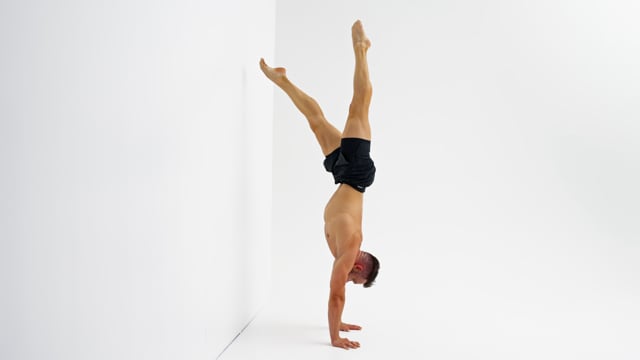
Move slowly and calculated. Do not push, swing or jump off the wall.Keep your hips immobile. Do not let your hips slide back towards the wall between reps.Keep your elbows locked and elevate your scapula fully at all times.
b 17 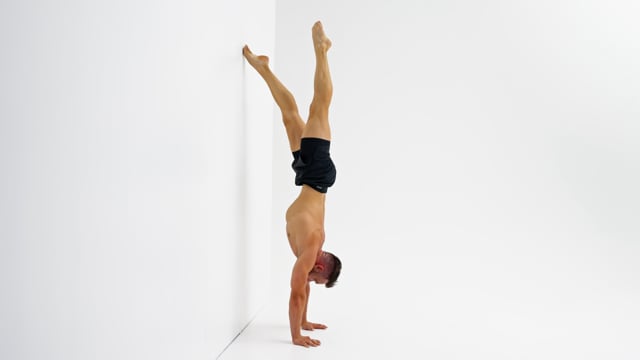
Focus on the way back and isolate the movement in 1 leg at the time. Do not use your top leg as a counter weight.Keep your hips immobile. Do not let your hips slide back towards the wall between reps.Keep your elbows locked and elevate your scapula fully at all times.
18
19
20
c 21 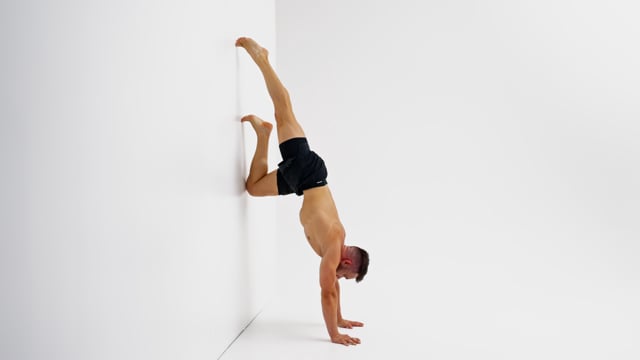
Keep your hands shoulder wide apart facing towards the front and look at the spot on the floor in between them.Lock your elbows fully and turn the pit of your elbows about 45 degrees towards the front.Push your shoulders tall. In other words: Elevate your scapula. They should cover your ears so you can not hear anything.
c 22 
Take small and controlled steps with your hands facing towards the front.Only your feet should touch the wall. Do not place your knees, hips or chest on the wall.Look at the spot in between your hands. Do not look at the wall placing your chin on your chest.
c 23 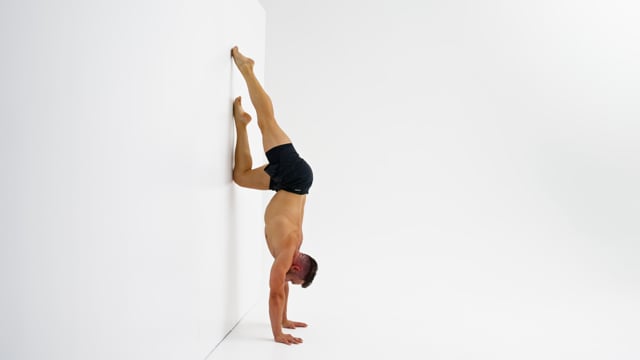
Pull 1 knee down to the tuck at the time whilst keeping your shoulders and hips perfectly squared. Pull the knee down in a vertical line and avoid it sticking out to the side.Do not push your feet up the wall too far between reps. Your hand-shoulder-hips line needs to stay intact at all times.Touch the wall with your feet and the working knee and shin only.
c 24 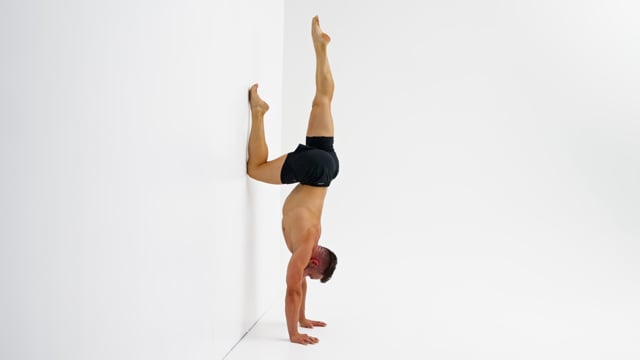
Isolate the movement into the working leg only. Place the knee on the wall and pull it as low as possible without un-squaring the hips or flipping them into a posterior pelvic tilt.Focus on the immobile leg. Keeping it perfectly stable is much harder than moving the other knee down to the tuck and back up.Make sure your shoulders stay right on top of the center of your hands. Do not push them open in the direction of your armpits or allow them to close and slide in the direction of your back.
c 25 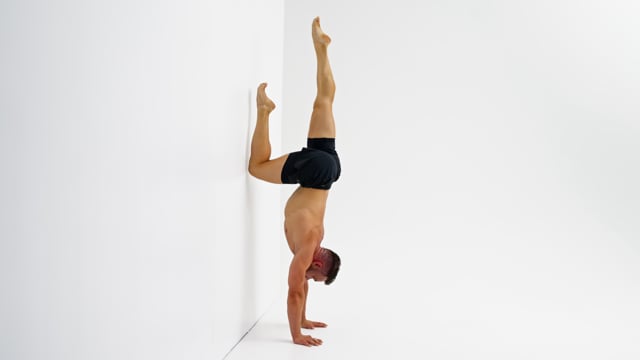
Align the foot on top of your hips, shoulders and center of the hands. Before you take the second foot of you should already be in full control of your handstand.If you feel like you have to arch your back to use the top leg as counter weight your alignment is off. Push out tall from your shoulders and move them on top of the center of your hands instead of trying to force this to work by opening into a banana position.Bend your tuck knee fully as you take it off the wall and bring your heel close to your glutes. This will help bring the weight on top of the center of your hands.
c 26 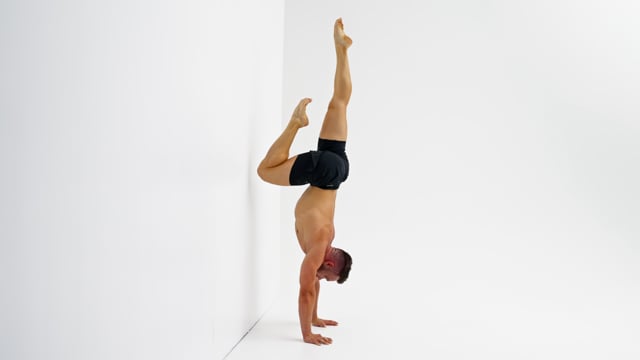
Align the foot on top of your hips, shoulders and center of the hands. Before you take the second foot of you should already be in full control of your handstand.If you feel like you have to arch your back to use the top leg as counter weight your alignment is off. Push out tall from your shoulders and move them on top of the center of your hands instead of trying to force this to work by opening into a banana position.Bend your tuck knee fully as you take it off the wall and bring your heel close to your glutes. This will help bring the weight on top of the center of your hands.
c 27 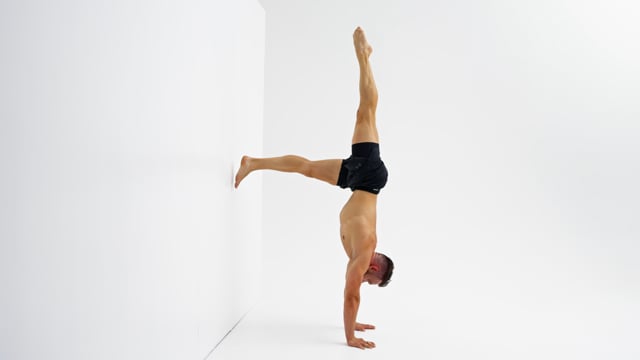
Stab the foot up straight towards the ceiling to align your top leg with the already aligned hands, shoulders and hips. Do not arch the leg over towards the back.Use the momentum created to momentarily release the second foot off the wall without closing the leg up.In case of a temporary lack of hamstring flexibility bend your wall knee slightly to ease the tension.
28
29
30
d 31 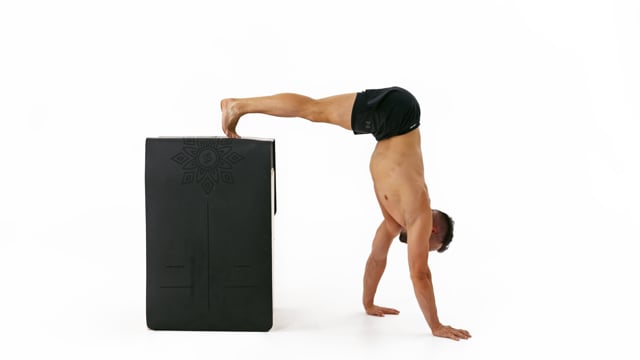
Take small and controlled steps with your hands facing towards the front.Do not look at the box. Instead focus on a spot on the floor in between your hands.Place your feet on a box, table or kitchen counter for the legs to be about parallel to the floor. Do not place your feet against the wall!
d 32 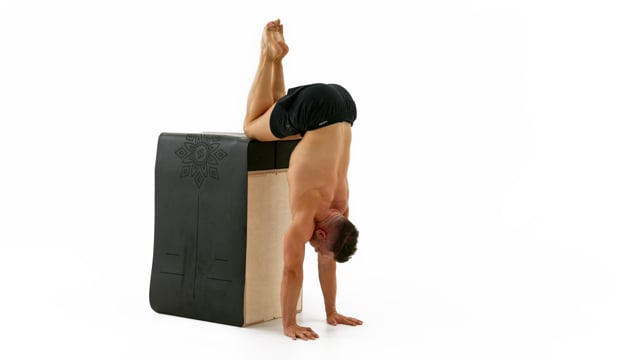
Take small and controlled steps with your hands facing towards the front.Do not look at the box. Instead focus on a spot on the floor in between your hands.Make sure the box for your tuck is high enough so that your hips are in a slight anterior pelvic tilt when you get to your final position. Only place the knees on the box.
d 33 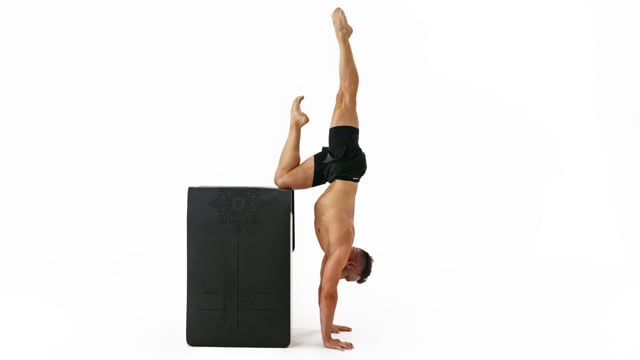
Time your hips and knee. If you were watching this drill from the side the foot should travel up and back down on one vertical line.Keep your immobile leg fully bent and the heel close to your glutes. Place your shoulders on top of the center of your hands and push out tall.Make sure the box for your tuck is high enough. Your hips have to be in a slight anterior pelvic tilt and never in a posterior one. Only place the knees on the box.
d 34 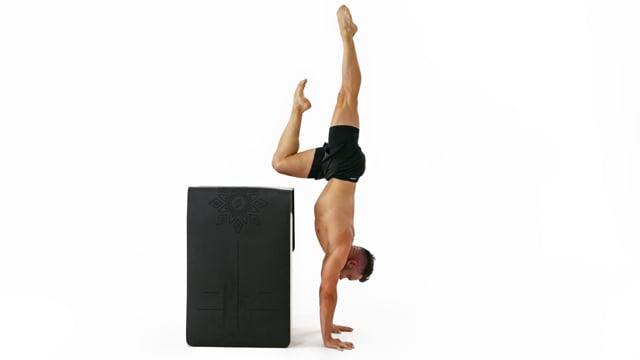
If you feel like you have to arch your back to use the top leg as counter weight your alignment is off. Push out tall from your shoulders and move them on top of the center of your hands instead of trying to force this to work by opening into a banana position.Make sure the box for your tuck is high enough. Your hips have to be in a slight anterior pelvic tilt and never in a posterior one. Only place the knees on the box.Keep your hover knee fully bent and keep the foot close to your glutes. This will help bring the weight on top of the center of your hands.
d 35 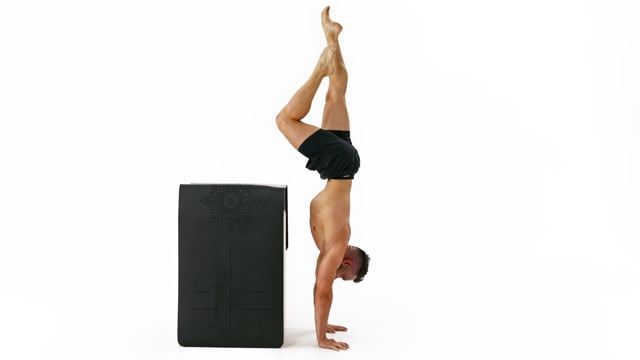
If you feel like you have to arch your back to use the top leg as counter weight your alignment is off. Push out tall from your shoulders and move them on top of the center of your hands instead of trying to force this to work by opening into a banana position.Make sure the box for your tuck is high enough. Your hips have to be in a slight anterior pelvic tilt and never in a posterior one. Consider placing a mat or something soft on the box to soften the blow in case you lose control and come down a bit faster.Focus on the way back and isolate the movement in 1 leg at the time. Do not use your top leg as a counter weight. Stabilize your hips with your back and use your hip flexors to actively pull the first knee down until it touches the box.
d 36 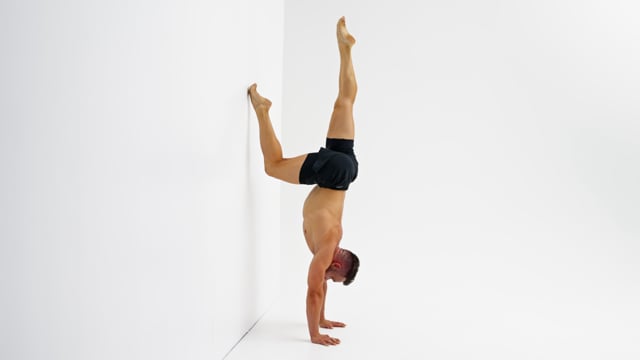
37
38
39
40
e 41 
Take small and controlled steps with your hands facing towards the front.Only your feet should touch the wall. Do not place your knees, hips or chest on the wall.Look at the spot in between your hands. Do not look at the wall placing your chin on your chest.
e 42 
Do not pull your hips or arch your back. Stay in a perfectly straight line from shoulders to toes. The only position change should be in the shoulders and wrists.Do not place your hands too far away from the wall. The main focus of this drill is not conditioning but technical refinement.Keep your elbows locked and elevate your scapula fully at all times.
e 43 
Do not pull your hips or arch your back. Stay in a perfectly straight line from shoulders to toes. The only position change should be in the shoulders and wrists.Move slow and stay in control at all times. Do not use momentum to get off the wall. Do not jump off the wall and do not take 1 foot at the time off the wall.Come back to the wall with your entire body from wrists to toes in 1 straight line.
e 44 
Isolate the movement into the working leg only. Place the knee on the wall and pull it as low as possible without un-squaring the hips or flipping them into a posterior pelvic tilt.Focus on the immobile leg. Keeping it perfectly stable is much harder than moving the other knee down to the tuck and back up.Make sure your shoulders stay right on top of the center of your hands. Do not push them open in the direction of your armpits or allow them to close and slide in the direction of your back.
e 45 
Align the foot on top of your hips, shoulders and center of the hands. Before you take the second foot of you should already be in full control of your handstand.If you feel like you have to arch your back to use the top leg as counter weight your alignment is off. Push out tall from your shoulders and move them on top of the center of your hands instead of trying to force this to work by opening into a banana position.Bend your tuck knee fully as you take it off the wall and bring your heel close to your glutes. This will help bring the weight on top of the center of your hands.
e 46 
With the leg on top pressure on your shoulders is less horizontal and more vertical. Use this to push out extra tall. Work on holding this newly gained height on the way back down to the starting position.Engage your back and pull your hips into a slight anterior pelvic tilt when you are brining the leg back to the wall to keep your weight in the fingertips. Do not allow your lower back to round when returning to the L.In case of a temporary lack of hamstring flexibility bend your knee slightly to ease the tension.
e 47 
Focus on the way back and isolate the movement in 1 leg at the time. Do not use your top leg as a counter weight.Keep your hips immobile. Do not let your hips slide back towards the wall between reps.Keep your elbows locked and elevate your scapula fully at all times.