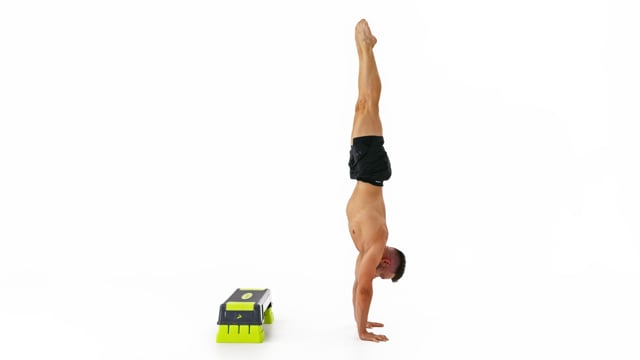
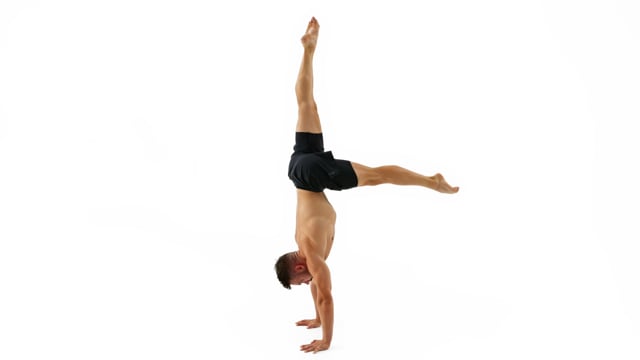
Let's get to work!

Handstand Workout A

Here is your full workout for today. This overview includes name, reps, and most important cues. IMPORTANT!!  To see the video click the (“+”) symbol next to the exercise name, and it will expand.

Look after yourself and only do what feels safe enough.
Make sure to warm up well. 

Dashboard |  Workout

Specific Warm Up

DemoExerciseReps/SetsHow to/Cues
Forehead to W1x8Start with your head just off the floor and your hands underneath your forehead.
Rotate your hands for the thumbs to point towards the ceiling as your bring your arms to the W. Make sure you have a 90 degrees angle in your shoulders and that your elbows are in line with the shoulders. Pull your hands and elbows up towards the ceiling and not back.
Keep your chest on the floor the entire time and rotate your hands for the thumbs to point towards the ceiling.
Keep your legs engaged but on the floor. Point your feet and make your ankles touch.
Straight to W1x8Reach your hands out towards the front to elevate your scapula, then lift the hands up towards the ceiling keeping your chest on the floor.
On the way back stop with your elbows in line with your shoulders and a 90 degree angle in your elbows. Lift your forearms towards the ceiling and squeeze on top for a moment.
Keep your chest on the floor the entire time and rotate your hands for the thumbs to point towards the ceiling.
Keep your legs engaged but on the floor. Point your feet and make your ankles touch.
Back Extension1x8Lock your elbows and place your hands next to your hips. Start by internally rotating your arms so the back rounds and the pinky fingers touch the floor.
Then externally rotate your arms, squeeze your shoulder blades together in the back, look up towards the ceiling and engage the whole back lifting the upper body of the floor.
Keep your feet about shoulder width apart on the floor the entire time.
Move slowly! The longer this takes the more control and strength you will develop!
Elbow Lift1x8Interlock your hands behind your head and keep your forehead on the floor.
Lift your elbows up as you were trying to make them touch behind your head. Bring them back down slowly. Do not slam them into the floor.
Keep your legs engaged but on the floor. Point your feet and make your ankles touch.
Move slowly! The longer this takes the more control and strength you will develop!
Arm Circle1x12 each directionWith your arms locked and out by the side like an airplane perform small and dynamic circles.
Keep your chest on the floor and lift your head sligthly.
Keep your legs engaged but on the floor. Point your feet and make your ankles touch.
Salt Bae Wrist Curl1x8Start with the palm of your hand facing downwards in front of you.
Using your internal muscles stretch your hands open. Bring your wrist into full extension and spread your fingers wide.
Engage your forearm and hand muscles to make the tips of your fingers touch and curl your wrist into flexion.
Keep your hips and shoulders perfectly squared and parallel to the floor.
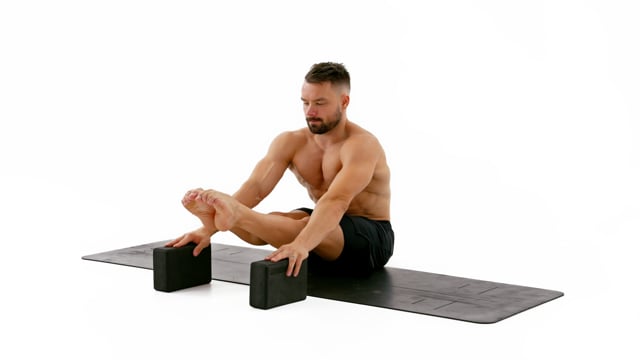
Wrist Warm Up1x20secGently stretch your wrists on the floor.
Rotate, twist and move them to stretch them in each direction.
Spend more time in positions where you feel less mobile or even stiff.
Keep your elbows locked and hands shoulder wide apart.
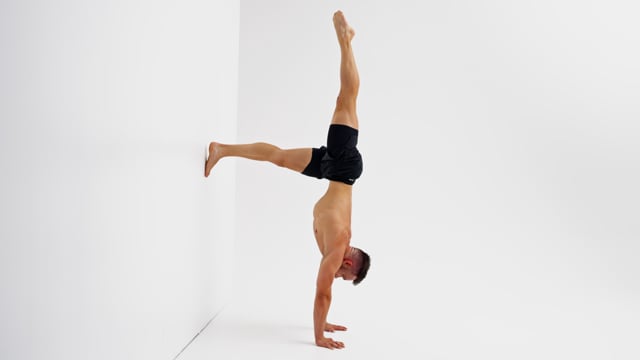
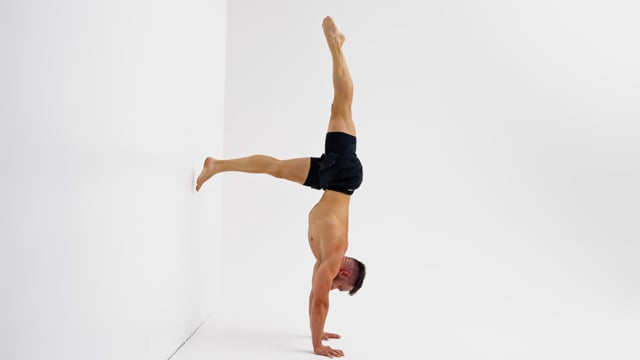
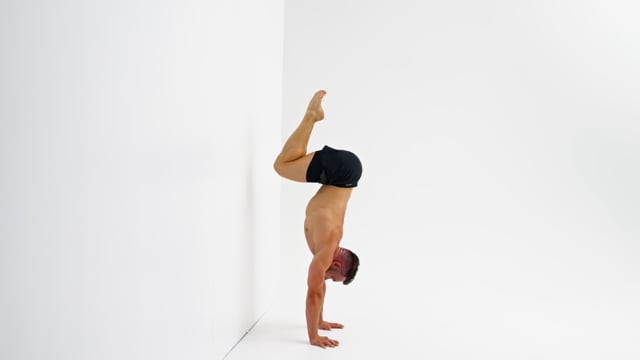
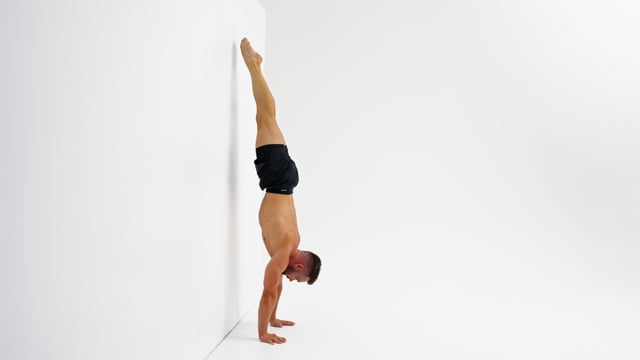
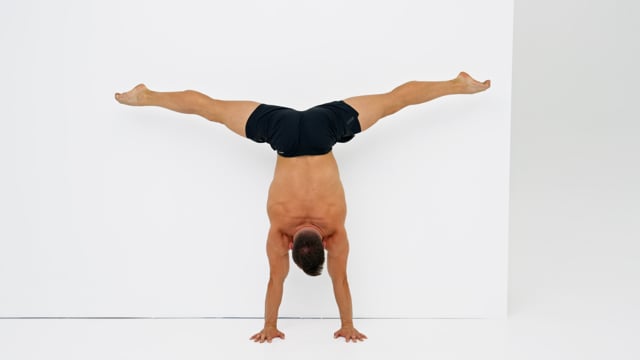
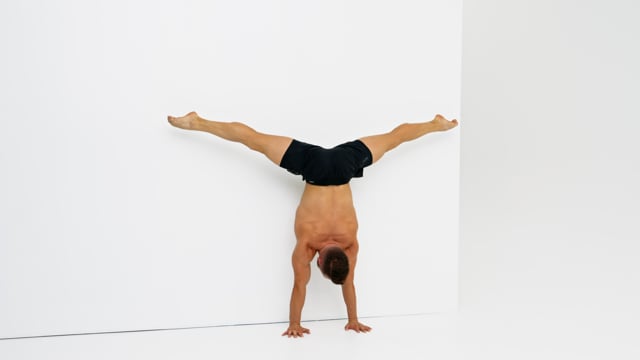
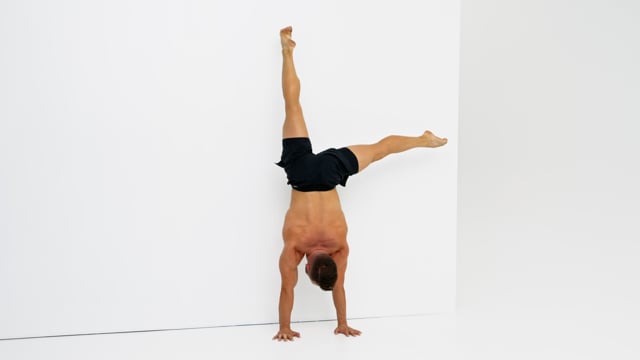
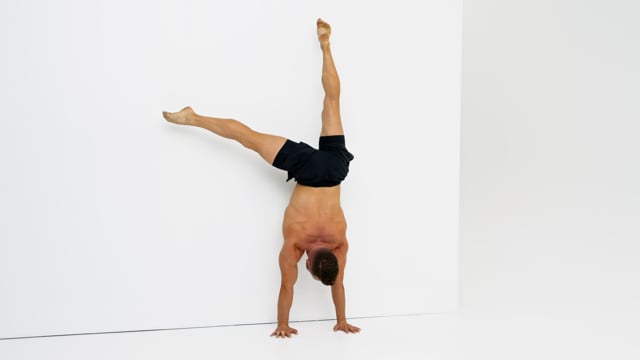
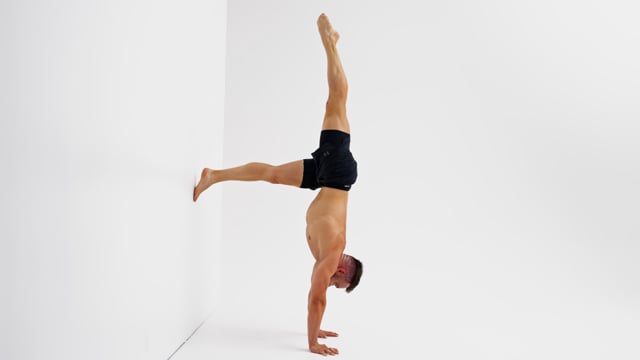
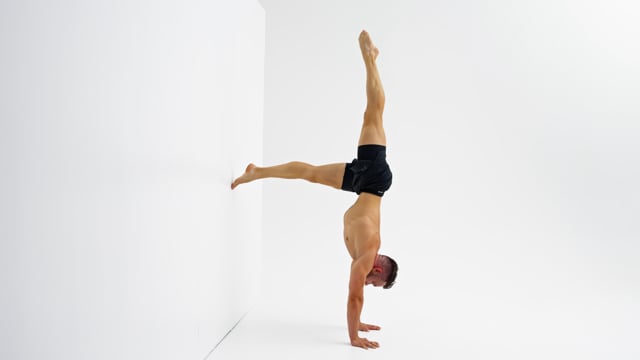
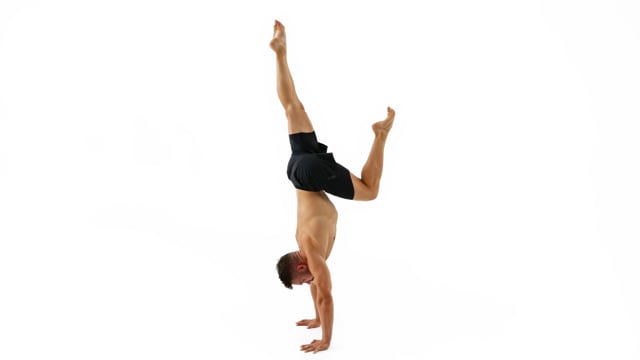
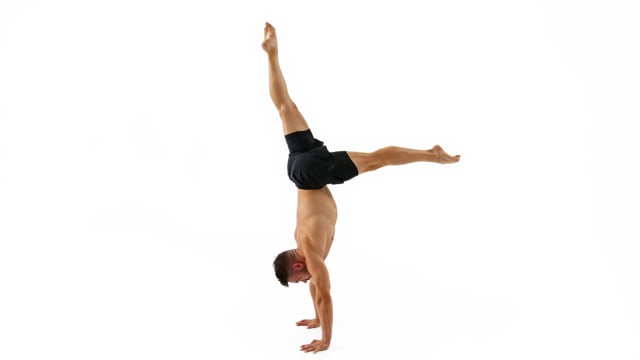
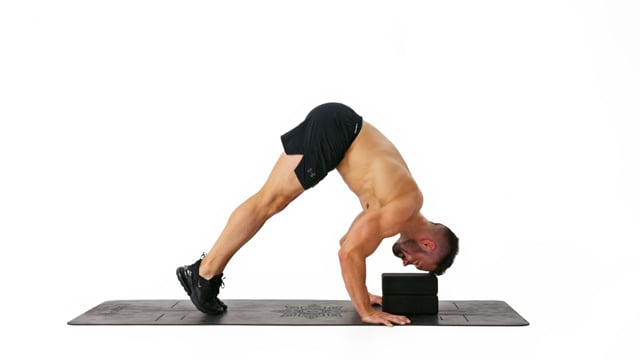
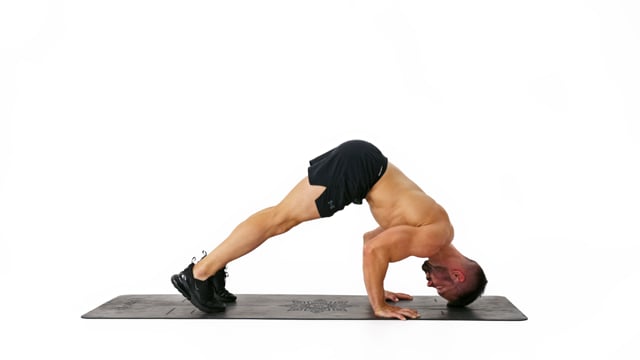
Wall Walk1x2Engage your whole body! Do not allow your back to arch or your shoulder blades to stick out behind your back.
Take small and controlled steps with your hands facing towards the front.
Only your feet should touch the wall. Do not place your knees, hips or chest on the wall.
Do not look at the wall. Instead look at the spot in between your hands.

Handstand Training

DemoExerciseReps/SetsHow to/Cues
L Handstand Single Leg Isolation
1x2 each side alternating
With the leg on top pressure on your shoulders is less horizontal and more vertical. Use this to push out extra tall. Work on holding this newly gained height on the way back down to the starting position.
Engage your back and pull your hips into a slight anterior pelvic tilt when you are brining the leg back to the wall to keep your weight in the fingertips. Do not allow your lower back to round when returning to the L.
In case of a temporary lack of hamstring flexibility bend your knee slightly to ease the tension.
L Handstand Leg Isolation
1x1 each side alternating
If you feel like you have to arch your back to use the top leg as counter weight your alignment is off. Push out tall from your shoulders and move them on top of the center of your hands instead of trying to force this to work by opening into a banana position.
Focus on the way back and isolate the movement in 1 leg at the time. Do not use your top leg as a counter weight.
In case of a temporary lack of hamstring flexibility bend your knee slightly to ease the tension.
Wall Take Off to Tuck to Straight
1x2
Move slow and work on staying in control at all times. The goal is not just to jump from one position to the next but even to control the journey between the positions.
Time your hips and knees. If you were watching this drill from the side the feet should travel down and back up on 1 vertical line.
Pull your knees as low as possible in the tuck but stop before your lower back rounds, shoulders close or elbows bend.
Slide Away
1x3
Do not pull your hips or arch your back. Stay in a perfectly straight line from shoulders to toes. The only position change should be in the shoulders and wrists.
Move slow and stay in control at all times. Do not use momentum to get off the wall. Do not jump off the wall and do not take 1 foot at the time off the wall.
Come back to the wall with your entire body from wrists to toes in 1 straight line.
Slide Away to Straddle to Straight
2x2
When your legs are together your feet should be in a parallel position. As soon as your legs open they have to rotate externally.
Move slow and work on staying in control at all times. The goal is not just to jump from one position to the next but even to control the journey between the positions.
Keep your scapula elevated, elbows locked and and the weight in the fingertips at all times. Look at the space in between your hands and engage your legs!
Straddle Slide Away
1x3
Don't just lock your legs inside of your hips but actively push them open. Do not accidentally close your legs whilst leaning towards the front., Lock your legs inside of your hips. Do not accidentally close your legs whilst leaning towards the front.
Do not pull your hips or arch your back. Stay in a perfectly straight line from shoulders to toes. The only position change should be in the shoulders and wrists.
Keep your elbows locked and elevate your scapula fully at all times.
Straddle Slide Away to Straight to Straddle
1x2
When your legs are together your feet should be in a parallel position. As soon as your legs open they have to rotate externally.
Move slow and work on staying in control at all times. The goal is not just to jump from one position to the next but even to control the journey between the positions.
Keep your scapula elevated, elbows locked and and the weight in the fingertips at all times. Look at the space in between your hands and engage your legs!
Slide Away to Lateral Leg Isolation
2x1 each side
Focus on the rotation of your leg inside of your hip. In the straddle position the leg needs to be externally rotated. When the leg is on top it needs to be in parallel.
Keep both elbows locked and shoulders elevated. Due to the nature of the movement you will have more weight on one side of your body. It is up to you to create the visual illusion of the weight staying perfectly even between your hands.
You are very close to the wall which forces you to engage properly and follow correct form. If not your foot will touch the wall!
Straddle Slide Away to Lateral Leg Isolation
2x1 each side
Focus on the rotation of your leg inside of your hip. In the straddle position the leg needs to be externally rotated. When the leg is on top it needs to be in parallel.
Keep both elbows locked and shoulders elevated. Due to the nature of the movement you will have more weight on one side of your body. It is up to you to create the visual illusion of the weight staying perfectly even between your hands.
You are very close to the wall which forces you to engage properly and follow correct form. If not your foot will touch the wall!

Freestanding Handstands

DemoExerciseReps/SetsHow to/Cues
L Wall Jump
4x each side
Stab the foot up straight towards the ceiling to align your top leg with the already aligned hands and shoulders. Do not arch the leg over towards the back.
Keep your scapula elevated, elbows locked and and the weight in the fingertips at all times. Look at the space in between your hands and engage your legs!
In case of a temporary lack of hamstring flexibility bend your wall knee slightly to ease the tension.
L Handstand Kick to Handstand
2x1 each side
Stab the foot up straight towards the ceiling to align your top leg with the already aligned hands, shoulders and hips. Do not arch the leg over towards the back.
Use the light momentum created from the kick to lift the second leg off the wall. Finish in a straight handstand.
Slightly bend the L-leg in case of a temporary lack of hamstring flexibility.
Kick Up to Single Leg Tuck
4x each side
Stab the foot up straight towards the ceiling to align your top leg with the already aligned hands and shoulders. Do not arch the leg over towards the back.
Keep your scapula elevated, elbows locked and and the weight in the fingertips at all times. Look at the space in between your hands and engage your legs!
Fully bend the second leg and use your hip flexors to pull it into a tight tuck.
Kick Up to L
4x each side
Stab the foot up straight towards the ceiling to align your top leg with the already aligned hands and shoulders. Do not arch the leg over towards the back.
Keep your scapula elevated, elbows locked and and the weight in the fingertips at all times. Look at the space in between your hands and engage your legs!
Slightly bend the L-leg in case of a temporary lack of hamstring flexibility.
Partial Kick Up to Elevated Kick Up to Handstand
4x each side
Stab the foot up straight towards the ceiling to align your top leg with the already aligned hands and shoulders. Do not arch the leg over towards the back.
First jump into the single leg L. Then, once in control, close the second leg up.
Slightly bend the L-leg in case of a temporary lack of hamstring flexibility.
Kick Up to Handstand
4x each side
Stab the foot up straight towards the ceiling to align your top leg with the already aligned hands and shoulders. Do not arch the leg over towards the back.
First jump into the single leg L. Then, once in control, close the second leg up.
Slightly bend the L-leg in case of a temporary lack of hamstring flexibility.

Conditioning

DemoExerciseReps/SetsHow to/Cues
Partial Pike Push Up
6x total
Look at your hands and elevate your scapula in the starting position. Allow your scapula to depress naturally as you bend your arms.
Allow your elbows to flare out naturally but aim to keep them approximately at a 45 degree angle. Keep your forearms vertical at all times and do not allow your elbows to point towards the back.
Your upper body should travel down and back up on 1 diagonal line. Do not arch your back and do not push your shoulders towards your feet on top. Do not aim your nose towards the floor but your forehead.
Pike Push Up Negative
6x total
From your starting position draw an imaginary line starting at your hips through your shoulders and head. Extend this line until it hits the floor. Use this spot as a target for your head when lowering.
Consider placing a pillow on the floor underneath your head for added safety and comfort.
Allow your elbows to flare out naturally but aim to keep them approximately at a 45 degree angle. Keep your forearms vertical at all times and do not allow your elbows to point towards the back.
Superset - cycle the following 2 exercises
3 rounds


Plank Superman Walk Up Combi
2x each side alternating
Separate the movements to stay clean and efficient.
Do not allow your body to swing from side to side.
Engage your shoulders and protract them slightly. Your shoulder blades should not stick out from your back.
Sitting L Sit Leg Lift - Block Assisted
8x
Work with strength only. Do not slam your feet into the floor on the way back down.
Lock your knees and point your feet!
Exhale as you lift your legs.
WordPress Video Lightbox